Document 1
1
Last Modified: 2 Oct 2018
Search Assistant - User's Manual
Introduction ...................................................................................................................................................................... 2
Startup .............................................................................................................................................................................. 2
Graphical Interface Components ...................................................................................................................................... 4
(Cth)
Templates Panel ............................................................................................................................................................ 4
Search Panel .................................................................................................................................................................. 5
1982
Results Panel ................................................................................................................................................................. 6
Preview Panel ................................................................................................................................................................ 7
Act
Change History .................................................................................................................................................................. 7
Information
of
Freedom
the
under
Released
2
Last Modified: 2 Oct 2018
Introduction
Search Assistant is an extension of the Palantir client (Workspace) that enables users to search data in Fusion Data
Holdings (FDH), NPRS and TRIM. Search results containing data from the FDH can then be displayed in Workspace
Graph as entities and links, assuming a mapping has been created using Semantic Mapper.
Startup
(Cth)
s 37(2)(b), s 47E(d)
1982
Act
Information
of
Figure1: Workspace Launcher window
Freedom
s 37(2)(b), s 47E(d)
the
under
Figure 2: Security Warning window
Released
Then provide your network credentials:
3
s 37(2)(b), s 47E(d)
Last Modified: 2 Oct 2018
Figure 3: Workspace Login window
(Cth)
s 37(2)(b), s 47E(d)
1982
Act
Figure 4: Workspace Toolbar
s 37(2)(b), s 47E(d)
Information
of
Freedom
the
Figure 5: The Search Assistant option in the menu
under
Finally, the Search Assistant panel is displayed within Palantir Workspace:
Released
4
Last Modified: 2 Oct 2018
s 37(2)(b), s 47(1)(b), s 47E(d)
(Cth)
1982
Act
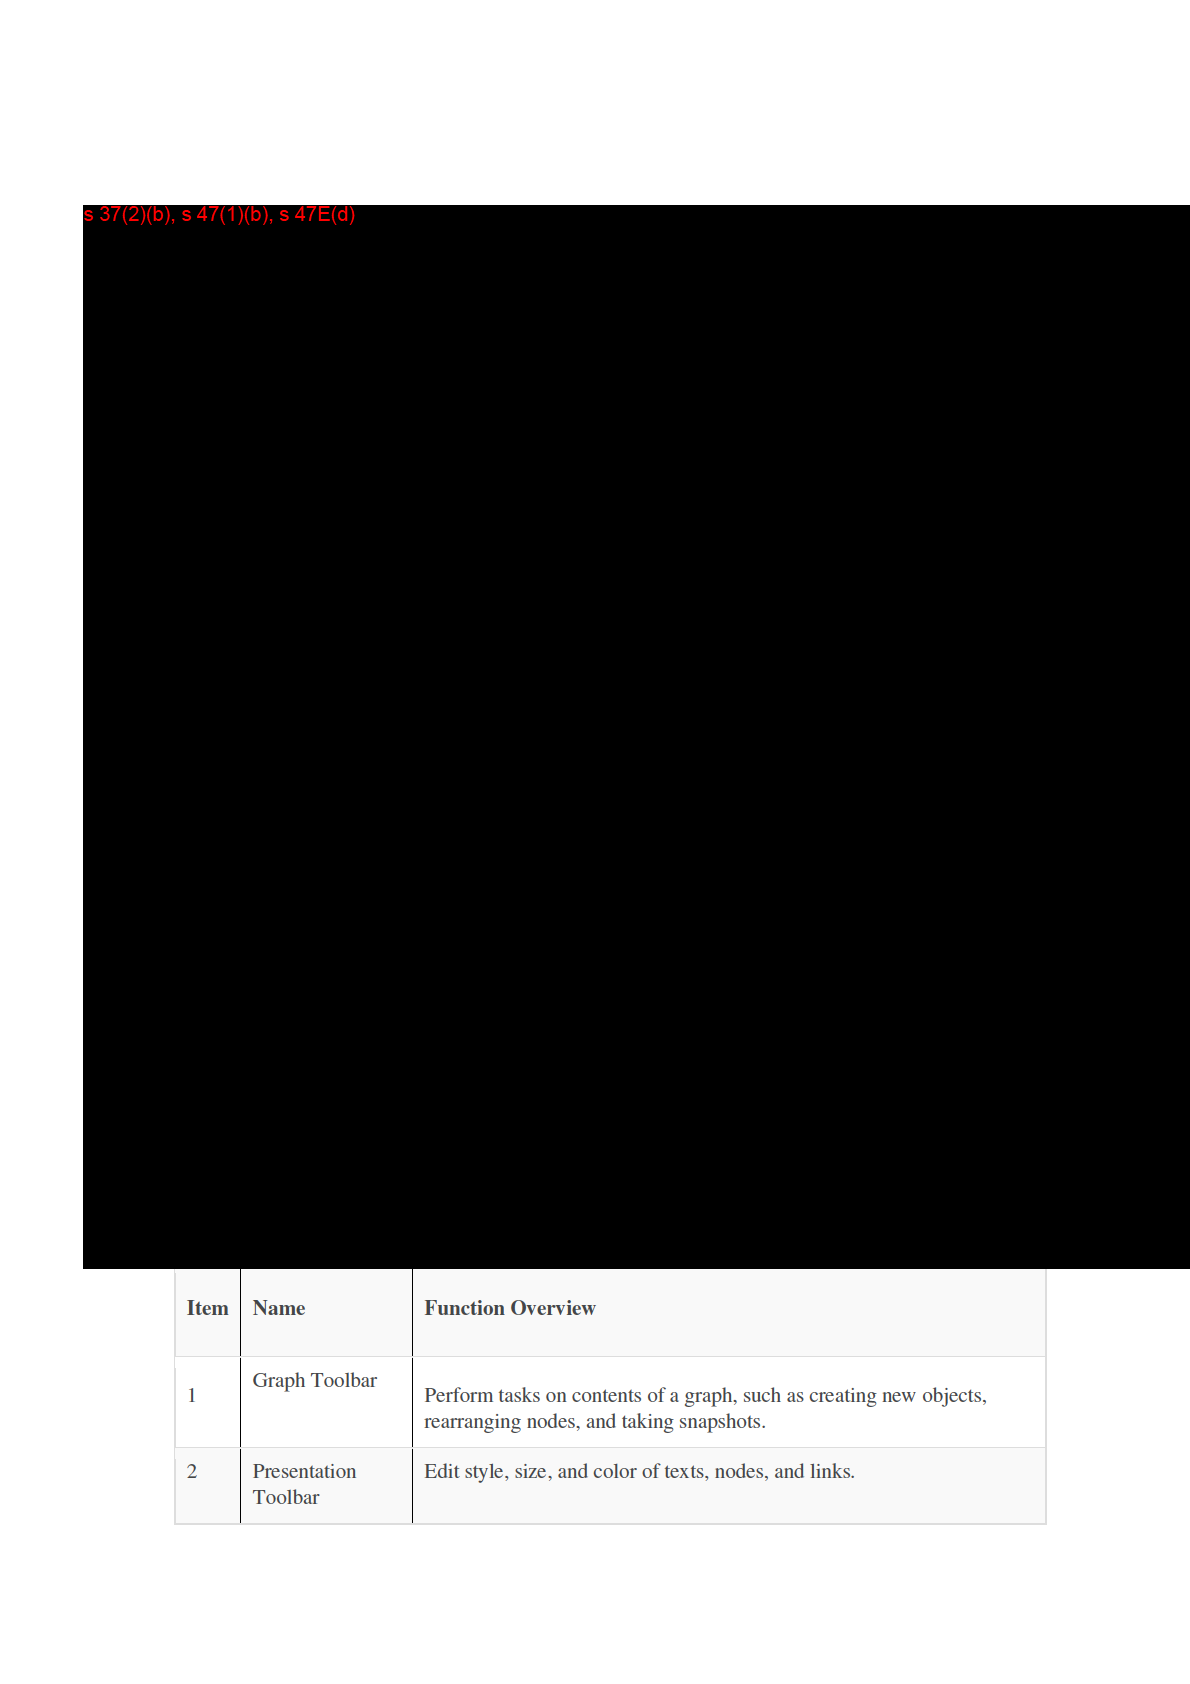
Graphical Interface Components
Information
of
The Search Assistant GUI consists of the Templates panel on the left, the Search panel in centre-north, the Results
panel in centre-south below the Search panel, and the Preview panel on the right (Fig. 6).
Templates Panel
Freedom
The Templates panel contains user-selectable search types: document search (General, Person, Address,
Organisation, ABN-CAN, Phone Number, Email) NPRS search and TRIM search.
the
Document Search is based on the index created by a SOLR search engine. The user specifies keywords and Search
Assistant finds SOLR index documents containing those keywords. The SOLR search engine creates one index
document for every row in each document uploaded to the FDH (speaking precisely, SOLR creates as many index
under
documents as there are entities defined for a given row of the uploaded file). Each SOLR index document contains
fields with names and values. SOLR finds the keywords specified by the user in the field values, and displays the
whole index document for every match found. The latest version of Search Assistant has a search result pagination
implemented for all Document Search type searches and for the TRIM search. Such pagination executes searches 2
to 10 times faster compared to the previous version without pagination. In addition, the user can specify a date
Released
range of when data was added to the index. Users can define the search results page size, which persists across
Search Assistant sessions.
TRIM Search connects directly to TRIM and can search by a title or content. Users can apply the AND, OR and NOT
Boolean operators, but they need to use parentheses for complex queries and not to rely on operator precendence.
For instance, the query: X and Y or T and Z, will be intepreted by TRIM as ((X and Y) or T) and Z. In order to
enforce correct operator precedence the user has to specify parentheses explicitly: (X and Y) or (T and Z).
5
Last Modified: 2 Oct 2018
TRIM search results are retrieved from TRIM in real-time. Search results are sorted by the document creation date in
the reverse order (newest documents first).
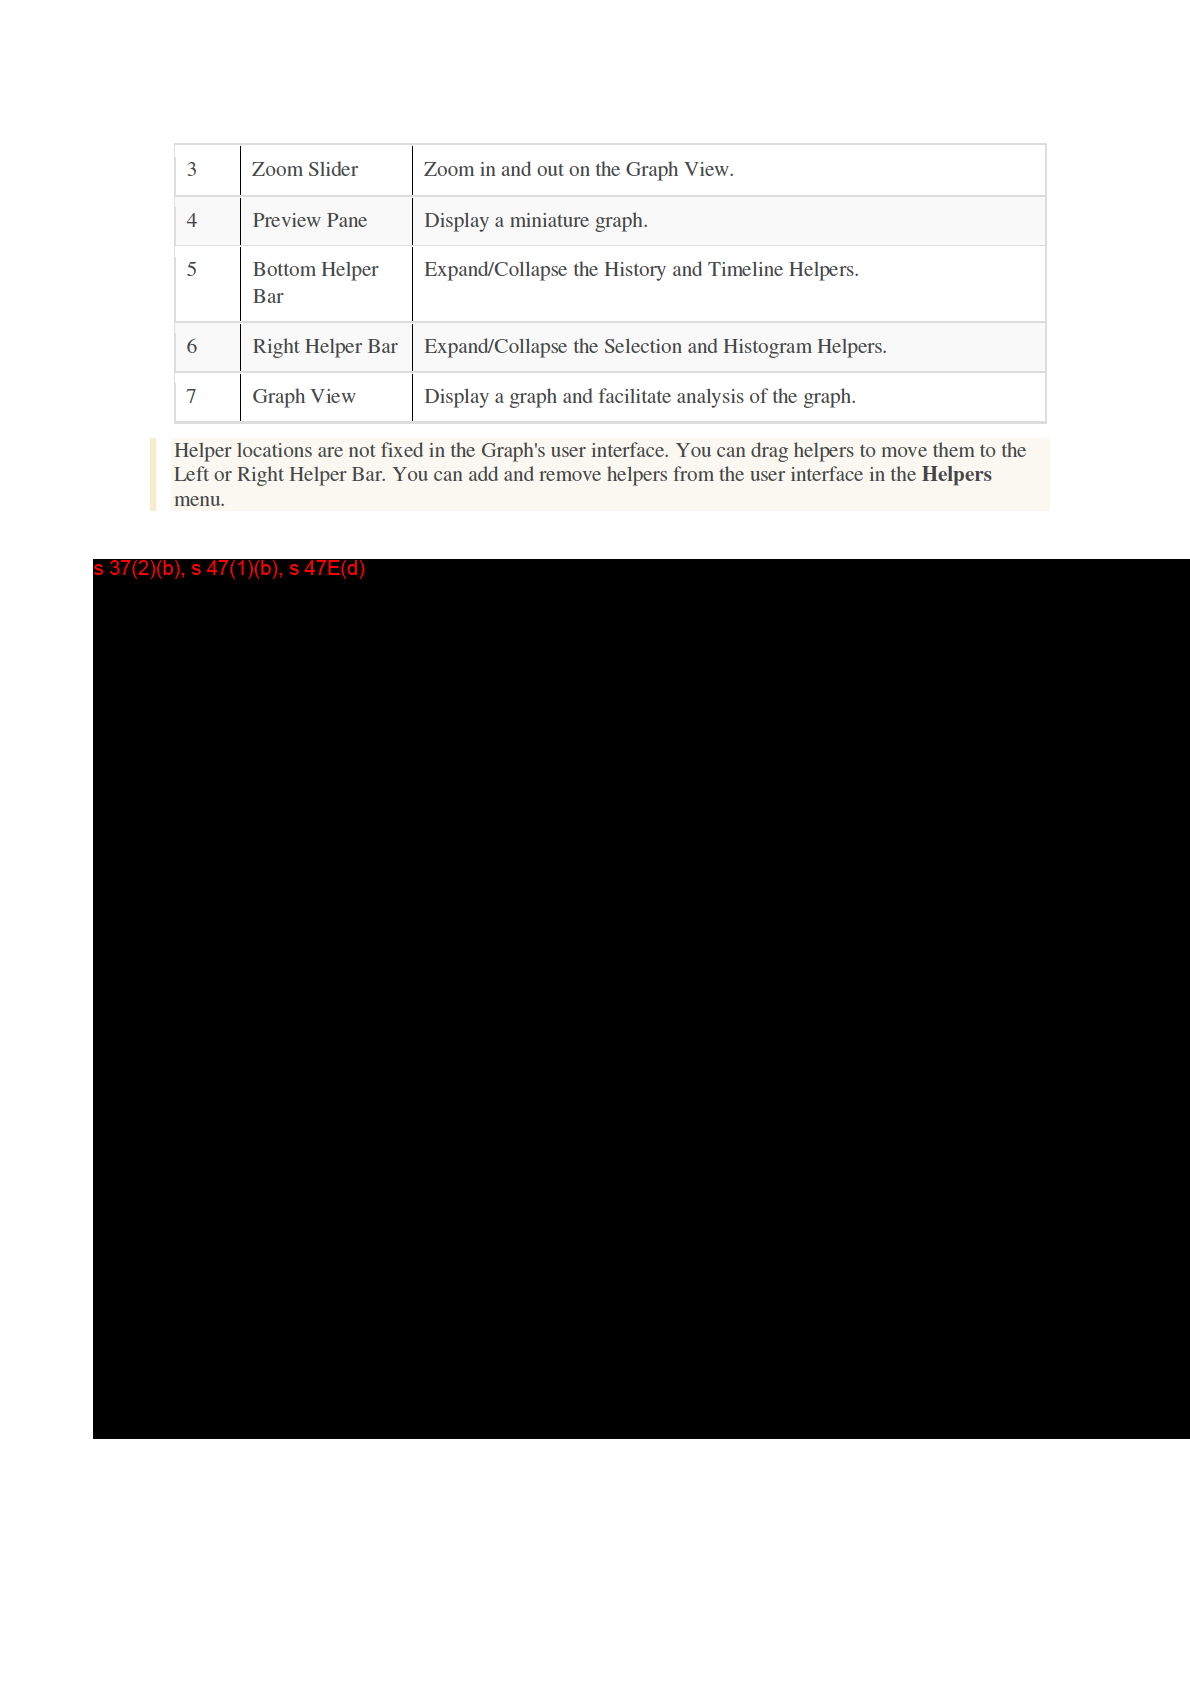
Search Panel
The Search panel contains graphical components for the user to specify search criteria and run a search.
s 37(2)(b), s 47(1)(b), s 47E(d)
(Cth)
1982
Act
Those components depend on a search type. For instance, the FDH General search (Fig. 7) contains the Search field
where the user types in one or more search keywords, the Upload Date group of radio buttons to specify an index-
uploaded date range for search results, and the Data source pull-down list for specifying where the searched data
Information
comes from.
of
The Upload Date component is common for all Document searches. It allows the user to specify a date when each
result was added to the index. The index upload date has been chosen because it is readily available in the current
system, but it can be changed if required.
The Data source field is also common for all search types.
Freedom
The Search panel contains the Status panel at the bottom, where the total count of search results will be displayed
for all search types, including the search time:
the
s 37(2)(b), s 47(1)(b), s 47E(d)
under
Released
In addition, the Status panel contains result pagination components for Document searches:
6
Last Modified: 2 Oct 2018
s 37(2)(b), s 47(1)(b), s 47E(d)
(Cth)
The result page size is user-defined and it defaults to 35 rows initially. The result page size persists across search
1982
Assistant sessions and it is written to the searchAssistantProps.txt file in user’s H: drive.
Act
Results Panel
The Results panel displays search results sorted by their score in the descending order:
s 37(2)(b), s 47(1)(b), s 47E(d)
Information
of
Freedom
the
under
Released
Notice a new Upload Date column on the right.
7
Last Modified: 2 Oct 2018
Search result rows are colour-coded. The results with the score equal to the maximum score (for this current search),
are in green. The results with the score in the range (75%, 100%) (left inclusive, right exclusive) are in yellow. The
results with the score in the range (67%, 75%) are in light gray. The rest of the results are in dark gray colour (not
displayed on Fig. 10).
Double click a particular result row in order to display a preview of the selected document. Right click it and then
select the Add to Graph option to add the selected document to Workspace's Graph.
Preview Panel
(Cth)
The Preview panel (Fig. 11) displays user-defined tags for the selected document (source-agency is the last tag) and
document's row of data with column names.
1982
Act
Information
of
Freedom
the
s 37(2)(b), s 47E(d)
under
Released
s 22(1)(a)(ii)
8
Last Modified: 2 Oct 2018
s 22(1)(a)(ii)
(Cth)
1982
Act
Information
of
Freedom
the
under
Released
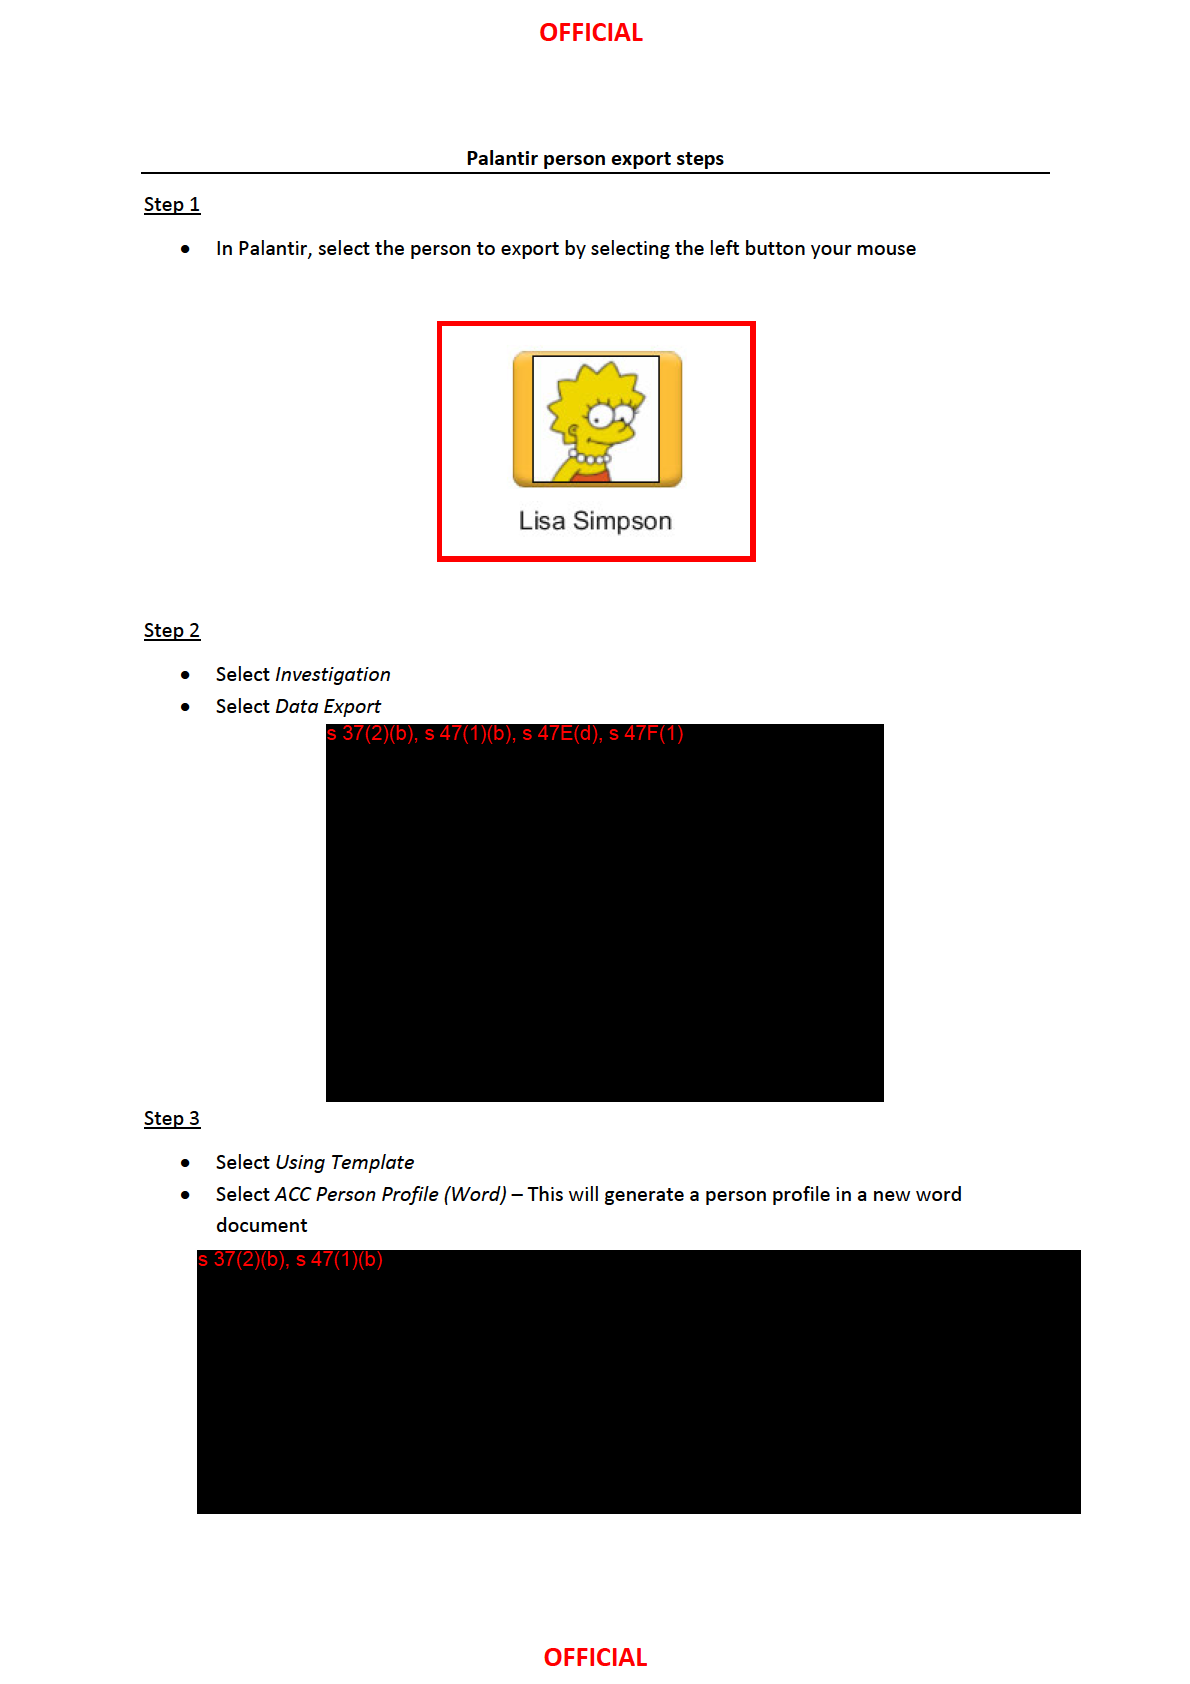
Document 2
About the Workspace & Palantir
The Palantir Workspace is an integrated suite of tools that analysts can use to:
•
Import and view data from their organizations
•
Discover existing and related data
•
Analyze data to discover useful information
(Cth)
•
Share their data and the results of their analyses with others
s 37(2)(b), s 47(1)(b), s 47E(d)
1982
Act
Information
of
Freedom
the
under
Released
Data in the Palantir Workspace
The Workspace application can access any data available to the user. This includes both the main Palantir
database, called the Data Repository, and the individual subsets of data contained in each of the user’s
investigations, called investigative realms.
s 37(2)(b), s 47E(d)
(Cth)
To learn more about investigations, see Data in Investigations.
Data in the Palantir Workspace 1982
The Workspace application can access any data available to the user. This includes both the main Palantir
database, called the Data Repository, and the individual subsets of data contained in each of the user’s
Act
investigations, called investigative realms.
s 37(2)(b), s 47E(d)
To learn more about investigations, see Data in Investigations.
Information
of
Freedom
the
under
Released

Document 3
OFFICIAL
(Cth)
1982
Act
Palantir data export
session
Information
s 22(1)(a)(ii)
of
Freedom
the
under
Released
OFFICIAL
OFFICIAL
Palantir data export
20/99819
What is data export?
• Palantir has multiple ways of extracting data that are useful for various
reasons
•
(Cth)
Some of the export options are:
o Person Entity - This allows you to place your entity into a word
1982
template with the details of the entity and links
o PowerPoint – This allows you to place your chart on a PowerPoint
Act
document
o HTLM export – This allows you to generate an HTML file. The file
can be opened on a web browser without having to logon into
Palantir
o Excel export – This allows you to export your chart data into and
XLS or CSV file
Information
of
When and why would you export data from Palantir?
• You can export data from Palantir at anytime
• To collaborate. Example:
o When attending meeting
Freedom
o When briefing
the
o To inform a group of people of the outcome
under
o When writing an intelligence product
Other consideration?
•
Released
Prior to exporting any dataset, consider if it is appropriate
• Seek approval if sharing externally
• Engage with the Dissemination team and seek their advise
OFFICIAL
(Cth)
1982
Act
Information
of
Freedom
the
under
Released
OFFICIAL
Palantir HTML export steps
Step 1:
• Do your charting/analysis in Palantir
s 37(2)(b), s 47(1)(b), s 47E(d)
(Cth)
1982
Act
Information
of
Step 2:
• Select the entities you'd like to export, select Export to HTML.
s 37(2)(b), s 47(1)(b), s 47E(d)
Freedom
the
under
Released
OFFICIAL
OFFICIAL
Step 3:
Accept the warning that you're exporting data from Palantir and you are responsible for access
control from this point
s 47(1)(b)
(Cth)
1982
Act
Step 4:
Choose a location for the HTML page, and select options (such as title, description, whether to
Information
export media, etc)
s 37(2)(b), s 47E(d)
of
Freedom
the
under
Released
OFFICIAL
OFFICIAL
Step 5:
Open file in a web browser - note you can zoom, pan and click on entities. s 37(2)(b), s 47E(d)
s 37(2)(b), s 47(1)(b), s 47E(d)
(Cth)
1982
Act
Information
of
Freedom
the
under
Released
OFFICIAL
OFFICIAL
Palantir PowerPoint export steps
Step 1:
• Do your charting/analysis in Palantir
s 37(2)(b), s 47(1)(b), s 47E(d)
(Cth)
1982
Act
Information
of
Freedom
the
under
Step 2:
• Select the Camera icon on the Graph application and select Export to PowerPoint
s 47(1)(b)
Released
OFFICIAL
OFFICIAL
Palantir excel export steps
Step 1:
• Do your charting/analysis in Palantir
s 37(2)(b), s 47(1)(b), s 47E(d)
(Cth)
1982
Act
Information
of
Freedom
the
under
Step 2:
• Select the Helper tab and enable by ticking the Table option
Released
OFFICIAL
OFFICIAL
s 37(2)(b), s 47(1)(b), s 47E(d)
(Cth)
1982
Act
Information
of
Step 3:
• Select all the object you would like to place on the excel document. If you would like to
select all the objects hit the Ctrl+A
•
Freedom
Select Save and place in on your file folder
s 37(2)(b), s 47(1)(b), s 47E(d)
the
under
Released
End of Document
OFFICIAL
Document 4
Palantir Learning Outcomes
Morning session
1. Introduction to Palantir via PowerPoint
2. Palantir Homepage - Palantir Web (using Firefox)
3. Palantir Workspace – Overview of the applications (how to activate)
(Cth)
4. Palantir Workspace searches (Palantir realm and Search Assistant)
1982
Act
5. The Browser application (Object Profile and Feeds)
6. The Graph application (search around + Property searches)
Information
7. The Helpers (plug ins)
of
8. Export options (Person, table and Html)
Afternoon session
Freedom
the
1. Draw a specific search around
under
2. Filter search and Object explorer
3. Collaboration
Released
4. Document upload and entity tagging (word document)
5. Excel document upload and mapping
Evaluations
(Cth)
1982
Act
Information
of
Freedom
the
under
Released
PROTECTED
Importing LII data into Palantir guide
TRIM17/220310
What is LII?
• ‘
(Cth)
Lawfully Intercepted Information’ is defined in s 6E of the
Telecommunications (Interception and Access) Act 1979 (Cth) (‘the TIA Act’)
s 37(2)(b), s 47E(d)
1982
Act
How do I get a LII Data into an investigation?
Information
s 37(2)(b), s 47E(d)
of
Freedom
the
When would I import a LII into Palantir?
s 37(2)(b), s 47E(d)
under
Reporting requirements for LII Product
s 37(2)(b), s 47E(d)
Released
PROTECTED
PROTECTED
s 37(2)(b), s 47E(d)
If information is used in Palantir the OCT will add a statement in the relevant ceased
warrant report that the information was uploaded to, and used in, an internal
analytical tool.
Extracting LII s 37(2)(b), s 47E(d)
(Cth)
s 37(2)(b), s 47E(d)
1982
Act
TRIM saving requirement
Information
of
1. Create a TRIM folder to store your CAD TI with the format as below:
2. Save the CAD TI file to a TRIM folder for upload.
s 37(2)(b), s 47E(d)
Freedom
the
under
Released
Uploading the CAD TI Data
PROTECTED
(Cth)
1982
Act
Information
of
Freedom
the
under
Released
PROTECTED
a) Add files to the import queue
b) Review the list of files to import
c) Select
Next to continue (see Figure 3)
s 47(1)(b)
(Cth)
1982
Act
Step 2 - Review Your Documents Information
of
Use the
Review Your Import screen to review the:
a. Import statistics
b. To Edit Permissions for the data sources
c. Select
Import to continue (see Figure 4)
Freedom
s 47(1)(b)
the
under
Released
PROTECTED
PROTECTED
Step 3 – Adding Objects to the Graph
The following message will pop up and asks to Add the Objects into the Graph.
Select
Yes at this point (see Figure 5).
s 47(1)(b)
(Cth)
1982
Act
Information
of
Step 4 - Display the objects on the Graph
Freedom
The Objects that are created from within the LII can be viewed in the Graph (see
the
Figure 6).
under
Released
PROTECTED
PROTECTED
s 47(1)(b)
(Cth)
1982
Act
Information
Restricting the data
of
Note – you need to make sure you have
Permissions/Preferences to
ALL ACIC Ops before uploading
Freedom
LII/TI Data files into Palantir
the
under
Released
Step 1 – Need to get permission.
PROTECTED
PROTECTED
s 37(2)(b), s 47(1)(b), s 47E(d)
(Cth)
1982
Act
• Select ‘INVESTIGATIONS’
• Select ‘VIEW/EDIT PREMISSIONS’
Information
s 37(2)(b), s 47(1)(b), s 47E(d)
of
Freedom
the
under
Released
PROTECTED
PROTECTED
• In the ‘Investigative Authorisation’ field, select ‘Edit Authorisation’
(Cth)
1982
Act
Information
of
Freedom
the
under
Released
PROTECTED
PROTECTED
s 37(2)(b), s 47(1)(b), s 47E(d)
(Cth)
1982
Act
Information
of
• From ‘All Groups’, select
ALL ACIC Ops and add to
‘Investigative
Authorization Groups’Freedom
• Select ‘SAVE’ the
under
Released
PROTECTED

(Cth)
1982
Act
Information
of
Freedom
the
under
Released
PROTECTED
Accessing the restricted data
Step 1 – Selecting ALL ACIC Ops under ‘Preferences’
s 37(2)(b), s 47(1)(b), s 47E(d), s 47F(1)
(Cth)
1982
Act
Information
• Select ‘Preferences’, ‘Edit Default Investigation Security’
of
Freedom
the
under
Released
PROTECTED
PROTECTED
s 37(2)(b), s 47(1)(b), s 47E(d)
(Cth)
1982
Act
Information
of
• From ‘ALL GROUPS’, select
ALL ACIC Ops and add to
‘INVESTIGATIVE AUTHORIZAT
Freedom ION GROUPS’
• Select ‘SAVE’
the
under
Released
PROTECTED


Document 6
EXERCISE 1: ANALYSIS OF OMCGS
OBJECTIVES: This exercise should act as a ‘warm up’ to Palantir. It utilises skills that most attendees
of this course should be familiar with already. During the exercise the instructors will come around
the room and get to know you all a bit better.
(Cth)
INSTRUCTIONS:
1982
• Login to the training server instance of Palantir.
• Within this instance there is some data relating to OMCGs, use your previous knowledge of
Act
Palantir to answer the following questions. Feel free to discuss the exercise with other
members of the class as you progress.
s 37(2)(b), s 47E(d)
Information
of
Freedom
the
under
Released

(Cth)
1982
Act
Information
of
Freedom
the
under
Released
(Cth)
1982
Act
Information
of
Freedom
the
under
Released
s 47(1)(b)
(Cth)
1982
Act
Information
of
Freedom
the
under
Released
s 37(2)(b), s 47(1)(b), s 47E(d), s 47F(1)
(Cth)
1982
Act
Information
of
Freedom
the
under
Legend
1.
Review the visual indicator that you are working in the Browser application.
Released
2.
Click Browser tabs to switch between objects, documents, and folders.
3.
Click icons on the Browser toolbar to navigate the Browser and perform common tasks.
4.
Check which objects are in your current folder in the Folders & Feeds panel.
5.
Select subtabs to view and modify the selected object.
s 47(1)(b)
(Cth)
1982
Act
Information
of
Freedom
the
under
Released
(Cth)
1982
Act
Information
of
Freedom
the
under
Released
(Cth)
1982
Act
Information
of
Freedom
the
under
Released
Legend
1.
Edit search specifications for the radius, polygon, or route search and click
Search.
2.
Review the visual indicator that you are working the Map application.
3.
Click icons on the Map toolbar to specify search types, annotate the map, and perform other
common tasks.
4.
Move the zoom slider to zoom in or out on the Map view.
(Cth)
5.
Verify the geographic location of the currently selected point on the Map view.
6.
Create the radius, polygon, or route geosearch by selecting a search type and drawing a shape
or route on the Map view.
1982
s 47(1)(b)
Act
Information
of
Freedom
the
under
Released
s 37(2)(b), s 47(1)(b), s 47E(d), s 47F(1)
(Cth)
1982
Act
Information
of
Freedom
the
Legend
1.
Click
Join Team to search for teams on topics of interest.
2.
Click
Create a Team to start a new team and invite Palantir users to join it.
under
3.
Click a team to view its message feed or right-click a team for options to refresh the feed,
manage the team, or leave the team.
4.
View personal messages between you and one or more users and respond to invitations to join
teams.
Released
5.
Read messages for the selected feed in the main display panel.
6.
Send a message to the selected team, optionally with one or more Palantir objects or with
your graph.
7.
Review the unread message count for all your teams and personal inbox.
8.
Filter a feed by message text, users, dates and times of message posts, and type of message
(text, object, graph).
s 47(1)(b)
(Cth)
1982
Act
Information
of
Freedom
the
under
Released
s 37(2)(b), s 47(1)(b), s 47E(d)
(Cth)
1982
Act
Information
of
Freedom
the
under
Legend
1.
Create and work with formulas and object sets in the formula panel.
2.
Review the visual indicator that you are working the Object Explorer application.
3.
Click action buttons to manipulate formulas.
Released
4.
Derive new object sets and produce histograms from selected data in the preview panel.
5.
Specify display options for the visualization panel.
6.
Review selections in the visualization panel, which can include a histogram or charts.
7.
Specify group-by and sort-by values for the current display in the visualization panel.
s 47(1)(b)
(Cth)
1982
Act
s 37(2)(b), s 47(1)(b), s 47E(d)
Information
of
Freedom
the
under
Released
Legend
1.
Change the investigation name (title) and optionally its description in the Information
Summary panel.
2.
Select slides to export in the History Slides panel.
3.
Click the
Check and
Uncheck buttons to select categories of history slides at once.
4.
Review the selected slide in the Preview panel.
(Cth)
5.
Review or change a slide title and description in the Slide Info panel.
6.
Export the selected slides to a PowerPoint presentation or an HTML web page.
1982
s 47(1)(b)
Act
Information
of
Freedom
the
under
Released
s 37(2)(b), s 47(1)(b), s 47E(d)
(Cth)
1982
Act
Information
of
Freedom
the
under
Released
s 37(2)(b), s 47(1)(b), s 47E(d)
(Cth)
1982
Act
Information
of
Freedom
the
under
Released
Document 8
s 37(2)(b), s 47E(d)
(Cth)
1982
Act
Information
of
Freedom
the
under
Released
s 37(2)(b), s 47E(d)
(Cth)
1982
Act
Information
of
Freedom
the
under
Released
s 37(2)(b), s 47E(d)
(Cth)
1982
Act
Information
of
Freedom
the
under
Released
Document 9
s 37(2)(b), s 47(1)(b), s 47E(d)
(Cth)
1982
Act
Information
of
Freedom
the
under
Released
s 37(2)(b), s 47(1)(b), s 47E(d)
(Cth)
1982
Act
Information
of
Freedom
the
under
Released
(Cth)
1982
Act
Information
of
Freedom
the
under
Released
OFFICIAL
Frequently Asked Questions (FAQs)
(Cth)
(insert here)
1982
Act
Information
of
Freedom
the
under
OFFICIAL
Palantir User Guide – Creating and Linking Entities (20/136212)
Page
2 of
25
Released
OFFICIAL
Step 1: Creating Entities in the Graph Application
(Cth)
s 37(2)(b), s 47(1)(b), s 47E(d)
1982
Act
Information
of
Freedom
the
under
OFFICIAL
Palantir User Guide – Creating and Linking Entities (20/136212)
Page
3 of
25
Released
OFFICIAL
s 37(2)(b), s 47(1)(b), s 47E(d)
(Cth)
1982
Act
Information
of
Freedom
the
under
OFFICIAL
Palantir User Guide – Creating and Linking Entities (20/136212)
Page
4 of
25
Released
OFFICIAL
3. Once you have selected the entity types ‘
Person’ you will be required to name the entity. In this instance
name the entity ‘Joe Bloggs’
(Cth)
4. After entering the entity name you can either select
Create new “Joe Bloggs” or select from existing entities with the same name. In this instance
select
‘Create new’
s 37(2)(b), s 47(1)(b), s 47E(d)
1982
Act
Information
of
Freedom
the
under
OFFICIAL
Palantir User Guide – Creating and Linking Entities (20/136212)
Page
5 of
25
Released
OFFICIAL
5. Repeat the above steps to create the entity type ‘Telecommunication Service’. You can name the entity
0400 123 456
(Cth)
s 37(2)(b), s 47(1)(b), s 47E(d)
1982
Act
Information
of
Freedom
the
under
OFFICIAL
Palantir User Guide – Creating and Linking Entities (20/136212)
Page
6 of
25
Released
OFFICIAL
6. Repeat steps 1-5 to create the following two entities on your graph:
(Cth)
a. Entity type ‘Person’ named “
Wilma Bloggs”
b. Entity type ‘Telecommunication Service’ named “
0400 987 654”
Once completed, you can move the entities around on the graph using you left-click to drag and drop. You should now have something similar to the below
1982
image:
Act
s 37(2)(b), s 47(1)(b)
Information
of
Freedom
the
Naming (Labelling) your Entity
It’s important to ensure there’s consistency in Palantir when naming common entities. The Intelligence Training team and Strategic Intelligence are
collaborating to develop some resources to assist with naming conventions and the general Palantir Ontology. In the interim, new users should always
under
search Palantir for similar entity types before creating and naming their entity, and/or ask their colleagues or the Local Champions for assistance.
OFFICIAL
Palantir User Guide – Creating and Linking Entities (20/136212)
Page
7 of
25
Released
OFFICIAL
Adding properties to entities
(Cth)
It is important to add properties to an entity to build the profile with important information that can help with an investigation. You can do this through the
browser application.
1982
1. You can double-click on Joe Bloggs to open that entity in the browser, or left-click and drag and drop Joe Bloggs in to the browser. Once viewing the
entity in the browser click on the ‘
Properties’ tab.
s 37(2)(b), s 47(1)(b), s 47E(d)
Act
Information
of
Freedom
the
under
OFFICIAL
Palantir User Guide – Creating and Linking Entities (20/136212)
Page
8 of
25
Released
OFFICIAL
2. To add properties, click on the ‘
Search for properties’ bar. You can either start typing the property (if known), or click on the down arrow to select a
(Cth)
property from the Ontology. In this instance, search for the
date of birth property by typing “DOB” or locating it via
properties > other > time > date of
birth using the down arrow
a) Input the date value in the right-hand side text field then click on ‘
Add’ to complete the process
s 37(2)(b), s 47(1)(b), s 47E(d)
1982
Act
Information
of
Freedom
the
under
OFFICIAL
Palantir User Guide – Creating and Linking Entities (20/136212)
Page
9 of
25
Released
OFFICIAL
3. Repeat step 2 above and add the property ‘
Gender’ and select the gender type as ‘
M’ (represents “male”). The profile for Joe Bloggs should now look
(Cth)
similar to the below image:
s 37(2)(b), s 47(1)(b), s 47E(d)
1982
Act
Information
of
Freedom
the
under
OFFICIAL
Palantir User Guide – Creating and Linking Entities (20/136212)
Page
10 of
25
Released
OFFICIAL
Updating entity labels
(Cth)
Object ‘
Labels’ are the first thing Palantir users will see when viewing an object in the search results or graph
e.g. a person’s name. Including useful
information in an entities label can assist with refining a search, allowing you to work more efficiently. In the instance of a
person, when creating unique
properties such as the
date of birth and
gender it’s best practice to update the label of that person to reflect these unique details.
1982
1. To update a label, navigate to the properties tab in an entities profile and click on the
Label field located under ‘Type’.
2. You can now type in the additional details. Best practice is to capitalise the surname, followed by the person’s gender (in brackets), followed by the
Act
date of birth. It should follow this structure “
Joe BLOGGS (m) 01/Jan/1990’
s 37(2)(b), s 47(1)(b), s 47E(d)
Information
of
Freedom
the
under
Please note: If you change a label and have that entity on your graph, the label will automatically update. Just remember to publish your updates.
OFFICIAL
Palantir User Guide – Creating and Linking Entities (20/136212)
Page
11 of
25
Released
OFFICIAL
Step 2: Creating Relationship Links between Entities
(Cth)
s 37(2)(b), s 47(1)(b), s 47E(d)
1982
Act
Information
of
Freedom
the
Please note: You can also select an entity on your graph and hold down ‘
Shift + Ctrl’ and left-click on another entity to create a link. This method can be
under
used for creating several links simultaneously, which is especially useful if you have a large chart on your graph and cannot zoom in to locate the drag and
drop link option.
OFFICIAL
Palantir User Guide – Creating and Linking Entities (20/136212)
Page
12 of
25
Released
OFFICIAL
2. The ‘
Add a Link’ pop-up will appear once you draw the line between two entities. If you know what relationship link you want to create, you can start
(Cth)
typing in the text field. In this instance we want to create a relationship link from Joe Bloggs to Wilma Bloggs called ‘
Married/Defacto/Partner of’.
a. If you’re unsure what the link type is called, you can use the drop down arrow to the right of text field and drill down into the ontology. In this
case
Relationships > Person based > Married/Defacto/Partner of
s 37(2)(b), s 47(1)(b), s 47E(d)
1982
Act
Information
of
Freedom
the
Please note: You have the option to add additional text for this relationship link. To do this, type the information into the second text field before saving.
This information will now show on the graph rather than the default link type.
under
OFFICIAL
Palantir User Guide – Creating and Linking Entities (20/136212)
Page
13 of
25
Released
OFFICIAL
3. Repeat steps 1 and 2 to create relationship links between the following entities so your graph reflects something similar to the below image
(Cth)
s 37(2)(b), s 47(1)(b), s 47E(d)
1982
Act
Information
of
Freedom
the
under
OFFICIAL
Palantir User Guide – Creating and Linking Entities (20/136212)
Page
14 of
25
Released
OFFICIAL
Step 3: Creating Event Links between Entities
(Cth)
s 37(2)(b), s 47(1)(b), s 47E(d)
1982
Act
Information
of
Freedom
the
under
OFFICIAL
Palantir User Guide – Creating and Linking Entities (20/136212)
Page
15 of
25
Released
OFFICIAL
(Cth)
2. Once the ‘Add a Link’ pop-up window opens, start typing “Phone call” in the first text field. Alternatively, you can use the drop-down arrow and select
phone call via
Events > Communication > Phone Call
s 37(2)(b), s 47(1)(b), s 47E(d)
1982
Act
Information
of
Freedom
the
under
OFFICIAL
Palantir User Guide – Creating and Linking Entities (20/136212)
Page
16 of
25
Released
OFFICIAL
3. You can update the title (optional) in the second text field, along with the direction of the event. In this instance we will leave both the title and
(Cth)
direction as the default selection (0400123456 calls 0400987654)
s 37(2)(b), s 47(1)(b), s 47E(d)
1982
Act
Information
of
Freedom
the
under
OFFICIAL
Palantir User Guide – Creating and Linking Entities (20/136212)
Page
17 of
25
Released
OFFICIAL
Creating a meeting event
(Cth)
s 37(2)(b), s 47(1)(b), s 47E(d)
1982
Act
Information
of
Freedom
the
under
OFFICIAL
Palantir User Guide – Creating and Linking Entities (20/136212)
Page
18 of
25
Released
OFFICIAL
2. Your graph should now look similar to the below image
(Cth)
s 37(2)(b), s 47(1)(b), s 47E(d)
1982
Act
Information
of
Freedom
the
under
OFFICIAL
Palantir User Guide – Creating and Linking Entities (20/136212)
Page
19 of
25
Released
OFFICIAL
3. By default, when you have multiple links between two objects on the graph, they will be merged (reduces clutter and information overload). If you wish
(Cth)
to view each link individually you can do this very easily.
a. L
eft-click on the link (will be highlighted in yellow once selected), followed by
right-clicking to bring up the search around tool.
b. On the search around tool select the ‘
Unmerge’ option to separate the links.
s 37(2)(b), s 47(1)(b), s 47E(d)
1982
Act
Information
of
Freedom
the
under
OFFICIAL
Palantir User Guide – Creating and Linking Entities (20/136212)
Page
20 of
25
Released
OFFICIAL
(Cth)
4. Once you have completed the instructions in step 3, the links will be unmerged/separated and appear as new objects on your graph. You can move
around the objects and edit the information in the browser application as you see fit.
s 37(2)(b), s 47(1)(b), s 47E(d)
1982
Act
Information
of
Freedom
the
under
OFFICIAL
Palantir User Guide – Creating and Linking Entities (20/136212)
Page
21 of
25
Released
OFFICIAL
Step 4: Using Basic Helpers to Analyse Entity Relationships
(Cth)
You can use various helpers to conduct basic analysis and sort information, such as the
histogram,
flows and
timeline helpers. All helpers can be enabled
via the ‘Helpers’ toolbar to the top-left of the Palantir screen.
1982
s 37(2)(b), s 47(1)(b), s 47E(d)
Act
Information
of
Freedom
the
under
OFFICIAL
Palantir User Guide – Creating and Linking Entities (20/136212)
Page
22 of
25
Released
OFFICIAL
s 37(2)(b), s 47(1)(b), s 47E(d)
(Cth)
1982
Act
Information
of
Freedom
the
under
OFFICIAL
Palantir User Guide – Creating and Linking Entities (20/136212)
Page
23 of
25
Released
OFFICIAL
s 37(2)(b), s 47(1)(b), s 47E(d)
(Cth)
1982
Act
Information
of
Freedom
the
under
OFFICIAL
Palantir User Guide – Creating and Linking Entities (20/136212)
Page
24 of
25
Released
OFFICIAL
(Cth)
1982
Act
Information
End of Document
of
Freedom
the
under
OFFICIAL
Palantir User Guide – Creating and Linking Entities (20/136212)
Page
25 of
25
Released
(Cth)
1982
Act
Information
of
Freedom
the
under
Released
OFFICIAL
Frequently Asked Questions (FAQs)
(Cth)
What is data exporting in Palantir?
• Palantir has multiple ways of extracting data to be opened in various other applications
e.g. Microsoft programs or web browsers. Some of the
1982
useful export options are:
o
Person (entity) export – this allows you to place your entity into a word template with the details of the entity and links
Act
o
PowerPoint export – This allows you to export your chart (from the graph application) into a PowerPoint document
o
HTML export – This allows you to generate a HTML file that can be opened with a web browser without having to login to Palantir (this can
be useful for exporting geo-coordinates from the map application and displaying in a web browser)
o
Excel export – This allows you to export your chart data into a .xlsm or .csv file
When and why would you export data from Palantir?
• Exporting data is primarily used to collaborate with colleagues and partners. For example:
o
When attending a meeting you can present clear spreadsheets or charts
Information
o
When you require information for a briefing
o
To inform a group of people of the outcome of an investigation of
o
When writing an intelligence product
Other considerations:
• Prior to exporting any dataset, consider if it is appropriate to share
• Seek approval if sharing exported content externally with partners
• If unsure, always engage with the Dissemination team and seek their advise
Freedom
s 37(2)(b), s 47E(d)
the
under
OFFICIAL
Palantir User Guide – Exporting from Palantir (20/153150)
Page
2 of
13
Released
OFFICIAL
Export a Person Profile
(Cth)
You have the ability to export a person (entity) profile to a Word document using a Palantir template. This template may not suit your exact requirements,
but can be a useful tool to cut and paste information into a format that best suits your business needs.
1982
1.
Select the entity in the graph application using your left-click, OR
open the entity in the browser application (both of these options produce the same
result)
2. Navigate to the ‘
Investigation’ toolbar to the top-left of the screen. Click ‘
Data Export’ > select ‘
Using Template’ > select ‘
ACIC Person Profile (Word)’
Act
s 37(2)(b), s 47(1)(b), s 47E(d)
Information
of
Freedom
the
under
OFFICIAL
Palantir User Guide – Exporting from Palantir (20/153150)
Page
3 of
13
Released
OFFICIAL
3. This will open a new Word document template automatically and you will need to save this to your H:drive. This template may not be directly
(Cth)
transferrable to be used as a final ACIC intelligence product, but can be used to extract the metadata of a person’s Palantir profile and copied to a
suitable document
(see below for a snapshot of the information extracted to Word using this export template)
s 37(2)(c), s 47(1)(b), s 47E(d)
1982
Act
Information
of
Freedom
the
under
OFFICIAL
Palantir User Guide – Exporting from Palantir (20/153150)
Page
4 of
13
Released
OFFICIAL
Exporting a Chart to HTML
(Cth)
You can export your chart from the graph application to a HTML file. This HTML file can be opened in a compatible web browser so you can share chats
without logging into Palantir.
1982
1. Select the entities on your graph that you would like to export. You can use ‘
Ctrl + A’ to select all objects, or
left-click and drag the mouse over a group
of objects
2. Navigate to the ‘
Investigation’ toolbar to the top-left of the screen. Click ‘
Data Export’ > then ‘
Export to HTML’
Act
s 37(2)(b), s 47(1)(b), s 47E(d)
Information
of
Freedom
the
under
OFFICIAL
Palantir User Guide – Exporting from Palantir (20/153150)
Page
5 of
13
Released
OFFICIAL
3. A popup window will appear in the centre of the screen.
It’s vital that you read this warning message before exporting your chart to HTML. You
(Cth)
should always consider the classification and caveats around the information you’re exporting as once you
accept (click OK), you are now responsible
for access control of this information from this point onwards
s 37(2)(b), s 47(1)(b), s 47E(d)
1982
Act
Information
of
Freedom
the
under
OFFICIAL
Palantir User Guide – Exporting from Palantir (20/153150)
Page
6 of
13
Released
OFFICIAL
4. After accepting the warning message, the HTML exporter window will open. Here you are required to fill in details of your HTML file (as seen below):
(Cth)
a. Select a save location on your H:drive
b. Give a title to your chart
e.g. Project name > Entity name > Date. You can also provide a description of your HTML file
s 37(2)(b), s 47(1)(b), s 47E(d)
1982
Act
Information
of
Freedom
the
under
OFFICIAL
Palantir User Guide – Exporting from Palantir (20/153150)
Page
7 of
13
Released
OFFICIAL
5. The HTML file can now be open in a compatible web browser (in this instance Firefox). This is a self-contained file and can be share with partner
(Cth)
agencies
a. The details of your export are located to the top-left of the screen
b. You can left-click on an entity to open those details in a panel to the right of the browser. What you see in this preview will differ depending on
your selections in step 4 above
e.g. export media, data sources etc.
1982
s 37(2)(b), s 47(1)(b), s 47E(d)
Act
Information
of
Freedom
the
Please note: You can also export different historical versions of your investigation to HTML using the
Summary application
under
OFFICIAL
Palantir User Guide – Exporting from Palantir (20/153150)
Page
8 of
13
Released
OFFICIAL
Exporting a Chart to PowerPoint
(Cth)
You can export a chart from the graph application to a PowerPoint. This can be achieved directly on the graph application without the need of opening the
‘Data Export’ toolbar.
1982
1. Import/create your chart in the graph application first
2. Click on the
camera icon to the top of the screen (see below for exact location), followed by selecting the ‘
Export to PowerPoint’ option
s 37(2)(b), s 47(1)(b), s 47E(d)
Act
Information
of
Freedom
the
under
OFFICIAL
Palantir User Guide – Exporting from Palantir (20/153150)
Page
9 of
13
Released
OFFICIAL
3. You can continue to export charts to your current PowerPoint as a new slide or create a new presentation. Follow the same process above (in steps 1 &
(Cth)
2), but when clicking on ‘
Export to PowerPoint’ you will now have a choice as to where to export the new chart e.g. current presentation (first option)
or a new presentation (second option)
s 37(2)(b), s 47(1)(b), s 47E(d)
1982
Act
Information
of
Freedom
the
under
Please note: You can also export different historical versions of your investigation to HTML using the
Summary application
OFFICIAL
Palantir User Guide – Exporting from Palantir (20/153150)
Page
10 of
13
Released
OFFICIAL
Exporting Data to Excel
(Cth)
You can export objects and related details into an Excel document (either .xlsm or .csv).
1. Click on the ‘
Helpers’ toolbar located at the top of Palantir Workspace, then click on the ‘
Table’ helper to enable the Excel export
1982
s 37(2)(b), s 47(1)(b), s 47E(d)
Act
Information
of
Freedom
the
under
OFFICIAL
Palantir User Guide – Exporting from Palantir (20/153150)
Page
11 of
13
Released
OFFICIAL
2. The table helper will open to the bottom of graph. If you wish to export all objects and related details, you can simply press ‘
Ctrl + A’ to highlight all
(Cth)
objects on the graph.
3. To export the previewed table into an Excel document, simply click on ‘
Save’ to save the file to your H:drive or click ‘
Open’ to view the file in Excel (you
can then save this manually after cleaning the data)
s 37(2)(b), s 47(1)(b), s 47E(d)
1982
Act
Information
of
Freedom
the
under
Please note: You can select various table options to adjust what is exported to Excel. These include the options to
export header columns,
export selected
rows in the table only, and also provides a feature to
edit the previewed columns manually prior to exporting e.g. choose what columns are exported
OFFICIAL
Palantir User Guide – Exporting from Palantir (20/153150)
Page
12 of
13
Released
OFFICIAL
(Cth)
1982
Act
Information
End of Document
of
Freedom
the
under
OFFICIAL
Palantir User Guide – Exporting from Palantir (20/153150)
Page
13 of
13
Released
(Cth)
1982
Act
Information
of
Freedom
the
under
Released
OFFICIAL
Frequently Asked Questions (FAQs)
(Cth)
What is CAD?
• Call Associated Data (CAD) is telecommunication interception metadata collected under the direction of a warrant. This data is guided by the
1982
Telecommunication (Interception and Access) Act 1979. s 37(2)(b), s 47E(d)
s 37(2)(b), s 47E(d)
Act
Where do I find CAD?
s 37(2)(b), s 47E(d)
Information
What information is contained in CAD?
of
s 37(2)(b), s 47E(d)
Freedom
the
When would you import CAD into Palantir?
s 37(2)(b), s 47E(d)
under
OFFICIAL
Palantir User Guide – Importing Call Associated Data (CAD) (20/162721)
Page
2 of
26
Released
OFFICIAL
Other considerations:
(Cth)
• Palantir allows users to simply drag and drop the CAD document into the Palantir graph application and it will automatically create objects and their
associations based on the CAD data during the import process s 47(1)(b)
1982
Act
Information
of
Freedom
the
under
OFFICIAL
Palantir User Guide – Importing Call Associated Data (CAD) (20/162721)
Page
3 of
26
Released
OFFICIAL
Step 1: Saving the CAD in CM9 (TRIM)
(Cth)
s 37(2)(b), s 47E(d)
1982
Act
s 37(2)(b), s 47(1)(b), s 47E(d)
Information
of
Freedom
the
under
OFFICIAL
Palantir User Guide – Importing Call Associated Data (CAD) (20/162721)
Page
4 of
26
Released
OFFICIAL
(Cth)
Step 2: Importing CAD into Palantir
1. To start the CCR upload simply drag and drop your CCR file from TRIM or your H:drive into the graph application in Palantir
1982
2.
OR, you can open the ‘
Data Import’ wizard from the
Investigation toolbar.
Please note: Both options listed above produce the same outcome. However the drag and drop option (1) is the faster method
Act
s 37(2)(b), s 47(1)(b), s 47E(d)
Information
of
Freedom
the
under
OFFICIAL
Palantir User Guide – Importing Call Associated Data (CAD) (20/162721)
Page
5 of
26
Released
OFFICIAL
3. The CAD will be selected (ticked) by default and you simply need to click ‘
Next’ to proceed to the final step of the import process
(Cth)
4. You can continue to add multiple files by clicking ‘
Add File’ to the left of the data import wizard, or drag and drop files into the grey space of the
importer wizard. In this instance we will upload the one CAD file
s 37(2)(b), s 47(1)(b), s 47E(d)
1982
Act
Information
of
Freedom
Please note: The CAD file (if imported correctly) will appear as seen above. Once you click on ‘Next’ you will skip the manual mapping process usually seen
the
in step 2 of the data import wizard. This is due to CAD being automated in the back-end of Palantir so all the heavy lifting is done for you!
under
OFFICIAL
Palantir User Guide – Importing Call Associated Data (CAD) (20/162721)
Page
6 of
26
Released
OFFICIAL
5. The final import process is
Step 3 (Review Your Import). Here you simply need to click ‘
Import’ to load the CAD into the graph
(Cth)
6. You can view the
import statistics of the file, identifies the source count and the file size (in kilobytes)
7. You can adjust the
permissions of the import data. By default, leave this as default (‘everyone’) unless it’s vital to lock down the information
8. You can select an
object resolution setting. By default, leave this as ‘None (Recommended)’ as this will be completed in
Step 4: Using the Manual
Object Resolution Wizard
1982
s 37(2)(b), s 47(1)(b), s 47E(d)
Act
Information
of
Freedom
the
under
OFFICIAL
Palantir User Guide – Importing Call Associated Data (CAD) (20/162721)
Page
7 of
26
Released
OFFICIAL
Step 3: Link Merging Events
(Cth)
1. Once the objects have been loaded to the graph application, open the
‘Histogram’ helper from the ‘Helpers toolbar’
(keyboard shortcut is
‘Ctrl + Shift +
H’)
to proceed to selecting specific entities/events and link merging
2. Firstly, select all the objects on your graph by using ‘
Ctrl + A’. Secondly, select the ‘
All Events’ bar in the Histogram helper
1982
s 37(2)(b), s 47(1)(b), s 47E(d)
Act
Information
of
Freedom
the
under
OFFICIAL
Palantir User Guide – Importing Call Associated Data (CAD) (20/162721)
Page
8 of
26
Released
OFFICIAL
3. After selecting ‘
All Events’, right-click anywhere on the graph to bring up the options tool and click ‘
Link Merge’ (located at the top of the wheel)
(Cth)
s 37(2)(b), s 47(1)(b), s 47E(d)
1982
Act
Information
of
Freedom
the
under
OFFICIAL
Palantir User Guide – Importing Call Associated Data (CAD) (20/162721)
Page
9 of
26
Released
OFFICIAL
Step 4: Removing Unwanted Data
(Cth)
Data Communications
s 37(2)(b), s 47E(d)
1982
Act
1. Select all objects using ‘
Ctrl + A’, then select ‘
Data Communications’ using the Histogram helper
2. Arrange these event types and review before deleting using the grid layout option (F6), then left-click to drag them to a new position on the graph.
3. When you’re ready to delete press the ‘
delete’ button on your keyboard or right-click on the graph and select ‘
Remove’ from the options wheel
s 37(2)(b), s 47(1)(b), s 47E(d)
Information
of
Freedom
the
under
OFFICIAL
Palantir User Guide – Importing Call Associated Data (CAD) (20/162721)
Page
10 of
26
Released
OFFICIAL
Phone Locations
(Cth)
s 37(2)(b), s 47E(d)
1982
1. Select all objects using ‘
Ctrl + A’, then select ‘
Data Communications’ using the Histogram helper
Act
2. Arrange these using the grid layout option (F6), then left-click to drag them to a new position on the graph
3. Ensure you have all Phone Location events selecting, then hold ‘
Ctrl + Shift’ then ‘
left-click’ on the primary telecommunication service to create the link
s 37(2)(b), s 47(1)(b), s 47E(d)
Information
of
Freedom
the
under
OFFICIAL
Palantir User Guide – Importing Call Associated Data (CAD) (20/162721)
Page
11 of
26
Released
OFFICIAL
4. Select the link type ‘
Linked To’ by typing in the search bar or selecting from the drop down arrow (you can leave the optional text field blank)
(Cth)
5. Click ‘
Save’ to proceed
s 37(2)(b), s 47(1)(b), s 47E(d)
1982
Act
Information
of
Freedom
the
under
OFFICIAL
Palantir User Guide – Importing Call Associated Data (CAD) (20/162721)
Page
12 of
26
Released
OFFICIAL
You should now see the new link types between the Phone Location events and the primary telecommunication service entity (
as seen below)
(Cth)
6. You can drag and drop these
Phone Locations on to the
Map application to view the geo-coordinates of the communications (go to
Step 6: Basic
Analysis)
Please note: You can remove/delete the phone locations from the graph if they’re not relevant to your analysis. You can use the search around tool in the
1982
options wheel to bring them back to your graph as they have been linked to the telecommunication service
s 37(2)(b), s 47(1)(b), s 47E(d)
Act
Information
of
Freedom
the
under
OFFICIAL
Palantir User Guide – Importing Call Associated Data (CAD) (20/162721)
Page
13 of
26
Released
OFFICIAL
Final Graph Results
(Cth)
Once you have merged and deleted the event data on the graph, you will only have entities remaining and can continue your analysis
1. Use
F5 (or click on the
‘Auto’ layout button) to rearrange the objects on your graph (the
hierarchical layout is also useful)
1982
2. Using the
Histogram helper ensure the remaining objects are the entity types ‘
Telecommunication Service’ and ‘
Phone Handset’
You can now move onto the next step to resolve duplicate objects (see
Step 5: Using the Manual Object Resolution Wizard)
s 37(2)(b), s 47(1)(b), s 47E(d)
Act
Information
of
Freedom
the
under
OFFICIAL
Palantir User Guide – Importing Call Associated Data (CAD) (20/162721)
Page
14 of
26
Released
OFFICIAL
Step 5: Using the Manual Object Resolution Wizard
(Cth)
s 37(2)(b), s 47E(d)
1982
1. Open the ‘
Investigation’ toolbar to the top-left of Palantir
Act
2
Navigate to the ‘
Object Resolution’ option and select the ‘
Manual Object Resolution’ option to load the wizard
s 37(2)(b), s 47(1)(b), s 47E(d)
Information
of
Freedom
the
under
OFFICIAL
Palantir User Guide – Importing Call Associated Data (CAD) (20/162721)
Page
15 of
26
Released
OFFICIAL
(Cth)
Select your objects
1. You can now select which objects you would like to resolve by
checking/unchecking the boxes next to each. By default, all objects on your graph will be
1982
selected, which is why in previous steps other objects were removed.
a. You can use the buttons to the bottom of the window to
select all/deselect all
s 37(2)(b), s 47(1)(b), s 47E(d)
Act
Information
of
Freedom
the
under
OFFICIAL
Palantir User Guide – Importing Call Associated Data (CAD) (20/162721)
Page
16 of
26
Released
OFFICIAL
Choose your matching criteria (properties)
(Cth)
1. Next you will need to select matching criteria types (properties) by searching for a property in the ‘
Add New Linking Term’ search box. BY default,
property types that already exist in the in the object
e.g. phone numbers, IMEIs etc. will automatically generate
2. For CRR data, it’s recommended to select an
exact match for IMEI and
Phone Number property types. Additionally, it’s recommended to include a
1982
second Phone Number property but filter to ‘
Last 8 digit match’ to ensure matches are resolved that may be differentiated by an area code
e.g. +61
3. Click ‘
Next’ to continue
Act
s 37(2)(b), s 47(1)(b), s 47E(d)
Information
of
Freedom
the
under
OFFICIAL
Palantir User Guide – Importing Call Associated Data (CAD) (20/162721)
Page
17 of
26
Released
OFFICIAL
Find and select your successful matches and resolve
(Cth)
1. You can now
check/uncheck property matches generated from the previous step
a. Use ‘
select unique’ to select all objects that have only
one criteria match. Use ‘
select all’ to quickly navigate through this process
2. Click ‘
resolve’ once you’re happy with your selection
1982
3. Click ‘
Next’ to proceed to the following criteria match (property search term applied). ‘
Next’ will be greyed out if you have not yet resolved the matches
s 37(2)(b), s 47(1)(b), s 47E(d)
Act
Information
of
Freedom
the
under
OFFICIAL
Palantir User Guide – Importing Call Associated Data (CAD) (20/162721)
Page
18 of
26
Released
OFFICIAL
Check and finalise the process
(Cth)
1. You now have the option to
review all resolutions you processed during the previous step and
undo these changes where necessary. Use the check
boxes to undo these changes
2. Click ‘
finish’ to apply all changes and finish the Manual Object Resolution process
1982
s 37(2)(b), s 47(1)(b), s 47E(d)
Act
Information
of
Freedom
the
under
OFFICIAL
Palantir User Guide – Importing Call Associated Data (CAD) (20/162721)
Page
19 of
26
Released
OFFICIAL
Step 6: Basic Analysis
(Cth)
Timeline Helper
1. You can use the ‘
Timeline’ helper to analyse time-based properties via the graph application. With CAD data you can identify the dates and times of
1982
each call and
Data Communications and
Phone Calls
s 37(2)(b), s 47(1)(b), s 47E(d)
Act
Information
of
Freedom
the
under
OFFICIAL
Palantir User Guide – Importing Call Associated Data (CAD) (20/162721)
Page
20 of
26
Released
OFFICIAL
s 37(2)(b), s 47E(d)
(Cth)
1982
s 37(2)(b), s 47(1)(b), s 47E(d)
Act
Information
of
Freedom
the
under
OFFICIAL
Palantir User Guide – Importing Call Associated Data (CAD) (20/162721)
Page
21 of
26
Released
OFFICIAL
Heat Map Helper
(Cth)
1. Firstly,
select the Phone Location events on your graph that you wish to view on the map application (using the Histogram helper is the quickest
method)
2. ‘
Left-click’ and drag and drop the Phone Locations on to the
Map application to the top of the screen
1982
s 37(2)(b), s 47(1)(b), s 47E(d)
Act
Information
of
Freedom
the
under
OFFICIAL
Palantir User Guide – Importing Call Associated Data (CAD) (20/162721)
Page
22 of
26
Released
OFFICIAL
You can use the
‘Options’ helper on the map application to change how you view the details
(Cth)
3. Use the ‘
Imagery’ filter to select the different map types. In this instance select the ‘Open Street Map’ to change to a Google-type view (the default
setting is ‘NearMap’ which is similar to Google Earth view)
4. You can select the
objects and
property types you wish to view on the map by checking/unchecking these under the
‘Filters’ setting
1982
5. You can
enable/disable icons and labels under the
‘Labels’ setting (in this instance I have only enabled the object icons, as labels can cause a lot of
screen clutter
s 37(2)(b), s 47(1)(b), s 47E(d)
Act
Information
of
Freedom
the
under
OFFICIAL
Palantir User Guide – Importing Call Associated Data (CAD) (20/162721)
Page
23 of
26
Released
OFFICIAL
You can use the
Heatmap helper for geo-spatial analysis by visualising the density and distribution of objects or properties on the Map
(Cth)
6. Firstly you must click on ‘
Show Heatmap’ to enable the helper (use ‘Hide Heatmap’ to turn off), followed by selecting your
data points to view on the
map
7. Use the
Legend setting to set the ‘
Density Radius’ using the slider (in this instance I have set this to approximately 4/5km, which is appropriate for this
1982
example)
s 37(2)(b), s 47(1)(b), s 47E(d)
Act
Information
of
Freedom
the
under
OFFICIAL
Palantir User Guide – Importing Call Associated Data (CAD) (20/162721)
Page
24 of
26
Released
OFFICIAL
8. Enable the ‘
Advanced Settings’ drop down to change the
‘Heatmap Type’ options (in most cases density mode is the best) (Cth)
9. You can update the
‘Presentation’ options to change the ‘Smoothing’, ‘Spectrum’ and ‘Opacity’ also.
s 37(2)(b), s 47(1)(b), s 47E(d)
1982
Act
Information
of
Freedom
the
under
OFFICIAL
Palantir User Guide – Importing Call Associated Data (CAD) (20/162721)
Page
25 of
26
Released
OFFICIAL
(Cth)
1982
Act
Information
of
End of Document
Freedom
the
under
OFFICIAL
Palantir User Guide – Importing Call Associated Data (CAD) (20/162721)
Page
26 of
26
Released
(Cth)
1982
Act
Information
of
Freedom
the
under
Released
OFFICIAL
(Cth)
Frequently Asked Questions (FAQs)
What is CCR information?
1982
s 37(2)(b), s 47E(d)
Act
What information is contained in a CCR?
• CCR holds the following entity information:
s 37(2)(b), s 47E(d)
Information
of
Where do I find CCR information?
• CCR data can be supplied by the telecommunication carrier e.g. Telstra, Vodafone
s 37(2)(b), s 47E(d)
Freedom
When would you import CCR information into Palantir?
s 37(2)(b), s 47E(d)
the
Other Consideration:
under
• Palantir allows users to simply drag and drop the CCR document into the Palantir graph application and it will automatically create objects and their
associations based on the CCR data
OFFICIAL
Palantir User Guide – Importing Call Charge Record (CCR) information (20/162702)
Page
2 of
21
Released
OFFICIAL
Step 1: Saving the CCR in CM9 (TRIM)
(Cth)
1. Once you have received the CCR data from the telecommunication carrier, you must upload this directly into TRIM with its original formatting
For example: [Eligo] Telstra 0417999999 Forward CCR 14JUL2014 to 14AUG2014 Task 123456
1982
2. Once you have uploaded the CCR to TRIM, you can rename the title to include the TRIM reference number. Doing so will allow the user to easily locate
the source file in TRIM from looking at the history or source metadata
Act
For example:
20/12345 [Eligo] Telstra 0417999999 Forward CCR 14JUL2014 to 14AUG2014 Task 123456
Please note: It is the responsibility of the uploader to ensure the filename format is followed so the metadata is created, the source of the data is recorded,
and to support compliance and auditing requirements. Also ensure that you’re using a dedicated electronic folder for the CCR downloads with the required
security classification (PROTECTED), if unsure please seek advice from your colleagues.
s 37(2)(b), s 47(1)(b), s 47E(d)
Information
of
Freedom
the
under
OFFICIAL
Palantir User Guide – Importing Call Charge Record (CCR) information (20/162702)
Page
3 of
21
Released
OFFICIAL
Step 2: Uploading CCR Information to Palantir
(Cth)
1. To start the CCR upload simply drag and drop your CCR file from TRIM or your H:drive into the graph application in Palantir
2.
OR, you can open the ‘
Data Import’ wizard from the
Investigation toolbar.
1982
Please note: Both options listed above produce the same outcome. However the drag and drop option (1) is the faster method
s 37(2)(b), s 47(1)(b), s 47E(d)
Act
Information
of
Freedom
the
under
OFFICIAL
Palantir User Guide – Importing Call Charge Record (CCR) information (20/162702)
Page
4 of
21
Released
OFFICIAL
3. The CCR will be selected (ticked) by default and you simply need to click ‘
Next’ to proceed to the final step of the import process
(Cth)
4. You can continue to add multiple files by clicking ‘
Add File’ to the left of the data import wizard. In this instance we will upload the one CCR file
s 37(2)(b), s 47(1)(b), s 47E(d)
1982
Act
Information
of
Freedom
Please note: The CCR file will appear as an
‘unknown’ file type which is represented by a
“?” symbol next to the file during the importing process. This is no
cause for alarm as Palantir has been configured in the back-end to recognise CCR file types and automates the import, requiring no manual mapping
the
(normally seen in step 2 of the data import process).
under
OFFICIAL
Palantir User Guide – Importing Call Charge Record (CCR) information (20/162702)
Page
5 of
21
Released
OFFICIAL
5. The final import process is
Step 3 (Review Your Import). Here you simply need to click ‘
Import’ to load the CCR data into the graph
(Cth)
6. You can view the
import statistics of the file, identifies the source count and the file size (in kilobytes)
7. You can adjust the
permissions of the import data. By default, leave this as default (‘everyone’) unless it’s vital to lock down the information
8. You can select an
object resolution setting. By default, leave this as ‘None (Recommended)’ as this will be completed in
Step 5: Using the Manual
Object Resolution Wizard
1982
s 37(2)(b), s 47(1)(b), s 47E(d)
Act
Information
of
Freedom
the
under
OFFICIAL
Palantir User Guide – Importing Call Charge Record (CCR) information (20/162702)
Page
6 of
21
Released
OFFICIAL
Step 3: Link Merging Events
(Cth)
1. Once the objects have been loaded to the graph application, open the
‘Histogram’ helper from the ‘Helpers toolbar’
(keyboard shortcut is
‘Ctrl + Shift +
H’)
to proceed to selecting specific entities/events and link merging
2.
1982
Firstly, select all the objects on your graph by using ‘
Ctrl + A’
3 Secondly select the ‘
All Events’ in the Histogram helper
s 37(2)(b), s 47(1)(b), s 47E(d)
Act
Information
of
Freedom
the
under
OFFICIAL
Palantir User Guide – Importing Call Charge Record (CCR) information (20/162702)
Page
7 of
21
Released
OFFICIAL
4. After selecting ‘All Events’, right-click anywhere on the graph to bring up the options tool and click ‘
Link Merge’
(Cth)
s 37(2)(b), s 47(1)(b), s 47E(d)
1982
Act
Information
of
Freedom
the
s 37(2)(b), s 47E(d)
under
OFFICIAL
Palantir User Guide – Importing Call Charge Record (CCR) information (20/162702)
Page
8 of
21
Released
OFFICIAL
Step 4: Removing Unwanted Data
(Cth)
Data Communications
s 37(2)(b), s 47E(d)
1982
Act
1. Select all objects using ‘
Ctrl + A’, then select ‘
Data Communications’ using the Histogram helper
2. Arrange these event types and review before deleting using the grid layout option (F6), then left-click to drag them to a new position on the graph.
3. When you’re ready to delete press the ‘
delete’ button on your keyboard or right-click on the graph and select ‘
Remove’ from the options wheel
s 37(2)(b), s 47(1)(b), s 47E(d)
Information
of
Freedom
the
under
OFFICIAL
Palantir User Guide – Importing Call Charge Record (CCR) information (20/162702)
Page
9 of
21
Released
OFFICIAL
Phone Locations
(Cth)
s 37(2)(b), s 47E(d)
1982
1. Select all objects using ‘
Ctrl + A’, then select ‘
Data Communications’ using the Histogram helper
2. Arrange these using the grid layout option (F6), then left-click to drag them to a new position on the graph
Act
3. Ensure you have desired Phone Location events selected, then hold ‘
Ctrl + Shift’ then ‘
left-click’ on the corresponding telecommunication service to
create the link (
PLEASE NOTE – in CCRs you have multiple phone parties, so
always check you’re linking to the correct telecommunication service!)
s 37(2)(b), s 47(1)(b), s 47E(d)
Information
of
Freedom
the
under
OFFICIAL
Palantir User Guide – Importing Call Charge Record (CCR) information (20/162702)
Page
10 of
21
Released
OFFICIAL
(Cth)
4. Select the link type ‘
Linked To’ by typing in the search bar or selecting from the drop down arrow (you can leave the optional text field blank)
5. Click ‘
Save’ to proceed
s 37(2)(b), s 47(1)(b), s 47E(d)
1982
Act
Information
of
Freedom
the
under
OFFICIAL
Palantir User Guide – Importing Call Charge Record (CCR) information (20/162702)
Page
11 of
21
Released
OFFICIAL
(Cth)
You should now see the new link types between the Phone Location events and the primary telecommunication service entity (
as seen below)
6. When you’re ready to delete press the ‘
delete’ button on your keyboard or right-click on the graph and select ‘
Remove’ from the options wheel
s 37(2)(b), s 47(1)(b), s 47E(d)
1982
Act
Information
of
Freedom
the
under
OFFICIAL
Palantir User Guide – Importing Call Charge Record (CCR) information (20/162702)
Page
12 of
21
Released
OFFICIAL
Final Graph Results
(Cth)
Once you have merged and deleted the event data on the graph, you will only have entities remaining and can continue your analysis
1. Use
F5 (or click on the
‘Auto’ layout button) to rearrange the objects on your graph
1982
2. Using the
Histogram helper ensure the remaining objects are the entity types ‘
Telecommunication Service’ and ‘
Phone Handset’
You can now move onto the next step to resolve duplicate objects (see
Step 5: Using the Manual Object Resolution Wizard)
s 37(2)(b), s 47(1)(b), s 47E(d)
Act
Information
of
Freedom
the
under
OFFICIAL
Palantir User Guide – Importing Call Charge Record (CCR) information (20/162702)
Page
13 of
21
Released
OFFICIAL
Step 5: Using the Manual Object Resolution Wizard
(Cth)
s 37(2)(b), s 47E(d)
1982
1. Open the ‘
Investigation’ toolbar to the top-left of Palantir
Act
2. Navigate to the ‘
Object Resolution’ option and select the ‘
Manual Object Resolution’ option to load the wizard
s 37(2)(b), s 47(1)(b), s 47E(d)
Information
of
Freedom
the
under
OFFICIAL
Palantir User Guide – Importing Call Charge Record (CCR) information (20/162702)
Page
14 of
21
Released
OFFICIAL
Select your objects
(Cth)
1. You can now select which objects you would like to resolve by
checking/unchecking the boxes next to each. By default, all objects on your graph will be
selected, which is why in previous steps other objects were removed.
a. You can use the buttons to the bottom of the window to
select all/deselect all
1982
s 37(2)(b), s 47(1)(b), s 47E(d)
Act
Information
of
Freedom
the
under
OFFICIAL
Palantir User Guide – Importing Call Charge Record (CCR) information (20/162702)
Page
15 of
21
Released
OFFICIAL
Choose your matching criteria (properties)
(Cth)
1. Next you will need to select matching criteria types (properties) by searching for a property in the ‘
Add New Linking Term’ search box. BY default,
property types that already exist in the in the object
e.g. phone numbers, IMEIs etc. will automatically generate
2. For CRR data, it’s recommended to select an
exact match for IMEI and
Phone Number property types. Additionally, it’s recommended to include a
1982
second Phone Number property but filter to ‘
Last 8 digit match’ to ensure matches are resolved that may be differentiated by an area code
e.g. +61
3. Click ‘
Next’ to continue
Act
s 37(2)(b), s 47(1)(b), s 47E(d)
Information
of
Freedom
the
under
OFFICIAL
Palantir User Guide – Importing Call Charge Record (CCR) information (20/162702)
Page
16 of
21
Released
OFFICIAL
Find and select your successful matches and resolve
(Cth)
1. You can now
check/uncheck property matches generated from the previous step
a. Use ‘
select unique’ to select all objects that have only
one criteria match. Use ‘
select all’ to quickly navigate through this process
2. Click ‘
resolve’ once you’re happy with your selection
1982
3. Click ‘
Next’ to proceed to the following criteria match (property search term applied). ‘
Next’ will be greyed out if you have not yet resolved the matches
s 37(2)(b), s 47(1)(b), s 47E(d)
Act
Information
of
Freedom
the
under
OFFICIAL
Palantir User Guide – Importing Call Charge Record (CCR) information (20/162702)
Page
17 of
21
Released
OFFICIAL
Check and finalise the process
(Cth)
1. You now have the option to
review all resolutions you processed during the previous step and
undo these changes where necessary. Use the check
boxes to undo these changes
2. Click ‘
finish’ to apply all changes and finish the Manual Object Resolution process
1982
s 37(2)(b), s 47(1)(b), s 47E(d)
Act
Information
of
Freedom
the
under
OFFICIAL
Palantir User Guide – Importing Call Charge Record (CCR) information (20/162702)
Page
18 of
21
Released
OFFICIAL
Step 6: Basic Analysis
(Cth)
Timeline Helper
1. You can use the ‘
Timeline’ helper to analyse time-based properties via the graph application. With CCR data you can identify the dates and times of
1982
each call and SMS communication (
noting you can unmerge the phone calls to see each individual event as previously these were link merged in Step 3)
s 37(2)(b), s 47(1)(b), s 47E(d)
Act
Information
of
Freedom
the
under
OFFICIAL
Palantir User Guide – Importing Call Charge Record (CCR) information (20/162702)
Page
19 of
21
Released
OFFICIAL
s 37(2)(b), s 47E(d)
(Cth)
1982
s 37(2)(b), s 47(1)(b), s 47E(d)
Act
Information
of
Freedom
the
under
OFFICIAL
Palantir User Guide – Importing Call Charge Record (CCR) information (20/162702)
Page
20 of
21
Released
OFFICIAL
(Cth)
1982
Act
Information
End of Document
of
Freedom
the
under
OFFICIAL
Palantir User Guide – Importing Call Charge Record (CCR) information (20/162702)
Page
21 of
21
Released
(Cth)
1982
Act
Information
of
Freedom
the
under
Released
OFFICIAL
Frequently Asked Questions (FAQs)
(Cth)
What is the IPND?
• The Integrated Public Number Database (IPND) is an industry-wide database containing all listed and unlisted public telephone numbers.
1982
• It was established in 1998 and is managed by Telstra under the Carrier License Conditions (Telstra Corporation Limited) Declaration 1997 (the
license conditions)
Act
s 22(1)(a)(ii), s 37(2)(b)
• It holds the following information:
o
The public phone number
o
The name of the customer
o
The service address of the customer
Where can I find IPND information?
Information
s 37(2)(b), s 47E(d)
of
Other Considerations:
• Palantir allows users to simply drag and drop the CAD document into the Palantir graph application and it will automatically create objects and their
Freedom
associations based on the CAD data during the import processs 47(1)(b)
the
under
OFFICIAL
Palantir User Guide – Importing Integrated Public Number Database (IPND) Information (20/162747)
Page
2 of
15
Released
OFFICIAL
Step 1: Saving the IPND in to CM9 (TRIM)
(Cth)
s 37(2)(b), s 47E(d)
1982
Act
s 37(2)(b), s 47(1)(b), s 47E(d)
Information
of
Freedom
the
under
OFFICIAL
Palantir User Guide – Importing Integrated Public Number Database (IPND) Information (20/162747)
Page
3 of
15
Released
OFFICIAL
Step 2: Importing IPND to Palantir
(Cth)
1. To start the CCR upload simply drag and drop your CCR file from TRIM or your H:drive into the graph application in Palantir
2.
OR, you can open the ‘
Data Import’ wizard from the
Investigation toolbar.
1982
Please note: Both options listed above produce the same outcome. However the drag and drop option (1) is the faster method
s 37(2)(b), s 47(1)(b), s 47E(d)
Act
Information
of
Freedom
the
under
3. The CAD will be selected (ticked) by default and you simply need to click ‘
Next’ to proceed to the final step of the import process
OFFICIAL
Palantir User Guide – Importing Integrated Public Number Database (IPND) Information (20/162747)
Page
4 of
15
Released
OFFICIAL
4. You can continue to add multiple files by clicking ‘
Add File’ to the left of the data import wizard, or drag and drop files into the grey space of the
(Cth)
importer wizard. In this instance we will upload the one CAD file
s 37(2)(b), s 47(1)(b), s 47E(d)
1982
Act
Information
of
Freedom
Please note: The CAD file (if imported correctly) will appear as seen above. Once you click on ‘Next’ you will skip the manual mapping process usually seen
in step 2 of the data import wizard. This is due to CAD being automated in the back-end of Palantir so all the heavy lifting is done for you!
the
under
OFFICIAL
Palantir User Guide – Importing Integrated Public Number Database (IPND) Information (20/162747)
Page
5 of
15
Released
OFFICIAL
5. The final import process is
Step 3 (Review Your Import). Here you simply need to click ‘
Import’ to load the CAD into the graph
(Cth)
6. You can view the
import statistics of the file, identifies the source count and the file size (in kilobytes)
7. You can adjust the
permissions of the import data. By default, leave this as default (‘everyone’) unless it’s vital to lock down the information
8. You can select an
object resolution setting. By default, leave this as ‘None (Recommended)’ as this will be completed in
Step 4: Using the Manual
Object Resolution Wizard
1982
s 37(2)(b), s 47(1)(b), s 47E(d)
Act
Information
of
Freedom
the
under
OFFICIAL
Palantir User Guide – Importing Integrated Public Number Database (IPND) Information (20/162747)
Page
6 of
15
Released
OFFICIAL
Step 4: Resolving Duplicate Objects
(Cth)
When an IPND document is imported into Palantir, new entities (and the corresponding links) are automatically created
e.g. person, location and
telecommunication service. During this process, entities that have the same properties can be created multiple times and users must manually resolve
duplicate objects before publishing to Palantir.
1982
As seen below, this IPND has created two of the same person entities during the import process
(continue with the steps below to resolve these objects)
Act
s 37(2)(b), s 47(1)(b), s 47E(d)
Information
of
Freedom
the
under
OFFICIAL
Palantir User Guide – Importing Integrated Public Number Database (IPND) Information (20/162747)
Page
7 of
15
Released
OFFICIAL
4.1 Resolving duplicate objects via the Graph application
(Cth)
1. Using the Histogram helper (Ctrl + Shift + H), you can locate duplicate entity property types and resolve these entities on the Graph application
2. In this instance, we have identified duplication in the ‘Person Name: Exact Match’. Left-click on a property type in the Histogram helper to identify and
select those specific entities
1982
Please note: Resolving objects on the Graph will only resolve those immediate objects and miss any duplicate objects already published in the Palantir base
realm. You must use the Manual Object Resolution wizard to resolve duplicate objects in the base realm (
see step 4.2)
Act
s 37(2)(b), s 47(1)(b), s 47E(d)
Information
of
Freedom
the
under
OFFICIAL
Palantir User Guide – Importing Integrated Public Number Database (IPND) Information (20/162747)
Page
8 of
15
Released
OFFICIAL
3. After selecting the entities via the Histogram helper, right-click anywhere on empty space in the Graph application to bring up the ‘
Options Wheel’
(Cth)
4. From the Options Wheel, click on the ‘resolve’ option to resolve both entities into one entity. This is the final step in resolving from the Graph.
s 37(2)(b), s 47(1)(b), s 47E(d)
1982
Act
Information
of
Freedom
the
under
OFFICIAL
Palantir User Guide – Importing Integrated Public Number Database (IPND) Information (20/162747)
Page
9 of
15
Released
OFFICIAL
4.2 Using the Manual Object Resolution wizard
(Cth)
s 37(2)(b), s 47E(d)
1982
1. Open the ‘
Investigation’ toolbar to the top-left of Palantir
Act
2. Navigate to the ‘
Object Resolution’ option and select the ‘
Manual Object Resolution’ option to load the wizard
s 37(2)(b), s 47(1)(b), s 47E(d)
Information
of
Freedom
the
under
OFFICIAL
Palantir User Guide – Importing Integrated Public Number Database (IPND) Information (20/162747)
Page
10 of
15
Released
OFFICIAL
a) Select your objects for resolution
(Cth)
1. You can now select which objects you would like to resolve by
checking/unchecking the boxes next to each. By default, all objects on your graph will be
selected, which is why in previous steps other objects were removed.
a. You can use the buttons to the bottom of the window to
select all/deselect all
1982
s 37(2)(b), s 47(1)(b), s 47E(d)
Act
Information
of
Freedom
the
under
OFFICIAL
Palantir User Guide – Importing Integrated Public Number Database (IPND) Information (20/162747)
Page
11 of
15
Released
OFFICIAL
b) Choose your matching criteria (properties)
(Cth)
1. Next you will need to select matching criteria types (properties) by searching for a property in the ‘
Add New Linking Term’ search box. BY default,
property types that already exist in the in the object
e.g. phone numbers, IMEIs etc. will automatically generate
2. For CRR data, it’s recommended to select an
exact match for IMEI and
Phone Number property types. Additionally, it’s recommended to include a
1982
second Phone Number property but filter to ‘
Last 8 digit match’ to ensure matches are resolved that may be differentiated by an area code
e.g. +61
3. Click ‘
Next’ to continue
Act
s 37(2)(b), s 47(1)(b), s 47E(d)
Information
of
Freedom
the
under
OFFICIAL
Palantir User Guide – Importing Integrated Public Number Database (IPND) Information (20/162747)
Page
12 of
15
Released
OFFICIAL
c) Find and select your successful matches and resolve
(Cth)
1. You can now
check/uncheck property matches generated from the previous step
a. Use ‘
select unique’ to select all objects that have only
one criteria match. Use ‘
select all’ to quickly navigate through this process
2. Click ‘
resolve’ once you’re happy with your selection
1982
3. Click ‘
Next’ to proceed to the following criteria match (property search term applied). ‘
Next’ will be greyed out if you have not yet resolved the matches
s 37(2)(b), s 47(1)(b), s 47E(d)
Act
Information
of
Freedom
the
under
OFFICIAL
Palantir User Guide – Importing Integrated Public Number Database (IPND) Information (20/162747)
Page
13 of
15
Released
OFFICIAL
d) Check and finalise the process
(Cth)
1. You now have the option to
review all resolutions you processed during the previous step and
undo these changes where necessary. Use the check
boxes to undo these changes
2. Click ‘
finish’ to apply all changes and finish the Manual Object Resolution process
1982
s 37(2)(b), s 47(1)(b), s 47E(d)
Act
Information
of
Freedom
the
under
OFFICIAL
Palantir User Guide – Importing Integrated Public Number Database (IPND) Information (20/162747)
Page
14 of
15
Released
OFFICIAL
(Cth)
1982
Act
End of Document
Information
of
Freedom
the
under
OFFICIAL
Palantir User Guide – Importing Integrated Public Number Database (IPND) Information (20/162747)
Page
15 of
15
Released
(Cth)
1982
Act
Information
of
Freedom
the
under
Released
OFFICIAL
Frequently Asked Questions (FAQs)
(Cth)
What are Helpers?
• Helpers are Palantir plug-ins that enhance a given Application
1982
• Helpers can be enabled/disabled using the ‘Helpers’ toolbar and once enabled, accessed at the left, right or bottom of a Palantir Application
• There are
Shared Helpers and
Application-specific Helpers (
see the individual Helper overviews below for specific details)
Act
o
Shared Helpers can be used across multiple Applications
o
Application-specific Helpers are locked to one specific Application
When should I use Helpers?
• Helpers should be used wherever possible, as they augment a given Application to assist with further analysis of objects/networks
• Please refer to the individual Helper overviews below for specific examples
What Helper should I use?
Information
• Each Helper has a unique function and varies depending on what Application you’re working in, as well as the properties attached to an object/link
of
• If you’re ensure on how a specific Helper may work, either contact Intelligence Training and/or contact a local member of the Palantir Local
Champions group
• You can test the functions of a specific Helper within Palantir Staging, which can be access via
Internet Explorer > Favourites > Internal Web Sites >
Palantir Workspace Staging
Other Considerations:
Freedom
• Helpers are best demonstrated when completing a work-related task. Please enrol in upcoming Online Palantir Training (20/77892) workshops to
see specific Helpers in action
the
under
OFFICIAL
Palantir User Guide – Introduction to Helpers (20/189291)
Page
2 of
18
Released
OFFICIAL
Histogram Helper
(Cth)
The
Histogram Helper is a shared helper that you can use to view information about objects you have selected in an Application. It can assist you identify
trends across a large sample size of objects. This is accessible from the
Browser, Graph and
Map Applications
1982
1. Enable the helper through the
‘Helpers’ toolbar by left-clicking on “Histogram”. Alternatively, you can use the keyboard shortcut
‘Ctrl + Shift + H’ 2. Select all objects on your graph using ‘
Ctrl + A’ and these will load on the histogram as can be seen in the above image
s 37(2)(b), s 47(1)(b), s 47E(d)
Act
Information
of
Freedom
the
under
OFFICIAL
Palantir User Guide – Introduction to Helpers (20/189291)
Page
3 of
18
Released
OFFICIAL
3. You can select different object types by
left-clicking on the Histogram and these will highlight on the graph (as seen below by the orange frames)
(Cth)
4. The Histogram can be used to
‘Drill Down’ on objects to show related properties within that object group. Right-click on the objects type and select
‘Drill Down to Current Selection’
o
You will now notice that the object properties have updated and only show properties among those objects (in this case for ‘Person’ entities)
s 37(2)(b), s 47(1)(b), s 47E(d)
1982
Act
Information
of
Freedom
the
under
OFFICIAL
Palantir User Guide – Introduction to Helpers (20/189291)
Page
4 of
18
Released
OFFICIAL
History Helper
(Cth)
s 37(2)(b), s 47E(d)
1982
1. Enable the helper through the
‘Helpers’ toolbar by left-clicking on “History”. Alternatively, you can use the keyboard shortcut
‘Ctrl + Shift + Y’ 2. Using the slides below the graph, you can left-click to select particular points in time during your investigation, which includes layouts and autosaves etc
s 37(2)(b), s 47(1)(b), s 47E(d)
Act
Information
of
Freedom
the
under
OFFICIAL
Palantir User Guide – Introduction to Helpers (20/189291)
Page
5 of
18
Released
OFFICIAL
Timeline Helper
(Cth)
s 37(2)(b), s 47E(d)
1982
1. Enable the helper through the
‘Helpers’ toolbar by left-clicking on “Timeline”. Alternatively, you can use the keyboard shortcut
‘Ctrl + Shift + T’
Act
s 37(2)(b), s 47(1)(b), s 47E(d)
Information
of
Freedom
the
under
OFFICIAL
Palantir User Guide – Introduction to Helpers (20/189291)
Page
6 of
18
Released
OFFICIAL
2. You can
filter the events and properties on your graph using the checklist to the right side of the helper by left-clicking to check/uncheck the filters
(Cth)
3. You can view each individual event/property type to the centre of the helper. Left click on each event/property to view on the graph and use the mouse
wheel to refine or expand the timeline (can view by years down to exact times in a day)
s 37(2)(b), s 47(1)(b), s 47E(d)
1982
Act
Information
of
Freedom
the
under
OFFICIAL
Palantir User Guide – Introduction to Helpers (20/189291)
Page
7 of
18
Released
OFFICIAL
Flows Helper
(Cth)
s 37(2)(b), s 47E(d)
1982
1. Enable the helper through the
‘Helpers’ toolbar by left-clicking on “Flows”. Alternatively, you can use the keyboard shortcut
‘Ctrl + Shift + L’
s 37(2)(b), s 47(1)(b), s 47E(d)
Act
Information
of
Freedom
the
under
OFFICIAL
Palantir User Guide – Introduction to Helpers (20/189291)
Page
8 of
18
Released
OFFICIAL
2. Under the
‘Flow Options’ setting you can select the type of event flow you want to visualise on the graph (in this case we have selected ‘Phone calls’)
(Cth)
a. Click on the ‘Show Flows/Hide Flows’ button to the right of the options at any time to enable/disable the visualisation
3. Under the
‘Animation’ setting you can adjust various visualisation effects, such as the flow visualisation, speed and colour
s 37(2)(b), s 47(1)(b), s 47E(d)
1982
Act
Information
of
Freedom
the
under
OFFICIAL
Palantir User Guide – Introduction to Helpers (20/189291)
Page
9 of
18
Released
OFFICIAL
Options Helper
(Cth)
s 37(2)(b), s 47E(d)
1982
1. Enable the helper through the
‘Helpers’ toolbar by left-clicking on “Options”. Alternatively, you can use the keyboard shortcut
‘Ctrl + Shift + A’
s 37(2)(b), s 47(1)(b), s 47E(d)
Act
Information
of
Freedom
the
under
OFFICIAL
Palantir User Guide – Introduction to Helpers (20/189291)
Page
10 of
18
Released
OFFICIAL
2. Use the
‘Imagery’ setting by clicking on the drop down arrow to change the map between the two primary views. The
Open Street Maps (selected
(Cth)
below) looks similar to ‘Google Maps’ and is less resource intensive compared to the
NearMap view (which looks similar to ‘Google Earth’)
3. Use the
‘Filters’ setting to select/deselect the object and property types that are loaded into the Map application (noting that to load an object you
must have geo-coordinates attached to the property of that object)
4. Use the
‘Labels’ setting to select/deselect the visual identifications of an object
e.g. you may choose to view only the object icon and not the object label
1982
as it may include too much text on screen and clutter your map
5. Use the
‘Point Style Options’ and ‘Options’ settings to modify additional map features, such as the icon shapes and colours, as well as enable/disable
Act
the map grid and scale bar
s 37(2)(b), s 47(1)(b), s 47E(d)
Information
of
Freedom
the
under
OFFICIAL
Palantir User Guide – Introduction to Helpers (20/189291)
Page
11 of
18
Released
OFFICIAL
Heatmap Helper
(Cth)
s 37(2)(b), s 47E(d)
1982
1. Enable the helper through the
‘Helpers’ toolbar by left-clicking on “Heatmap”. Alternatively, you can use the keyboard shortcut
‘Ctrl + Shift + P’
s 37(2)(b), s 47(1)(b), s 47E(d)
Act
Information
of
Freedom
the
under
OFFICIAL
Palantir User Guide – Introduction to Helpers (20/189291)
Page
12 of
18
Released
OFFICIAL
2. Firstly, click on the
‘Advanced Settings’ drop-down and ensure that
‘Density mode’ is enabled,
not ‘Bucket mode’
(Cth)
3. Secondly, ensure that the ‘Smoothing’ is set to “Good/Fast” and the ‘Spectrum’ is set to the default (see the image below)
s 37(2)(b), s 47(1)(b), s 47E(d)
1982
Act
Information
of
Freedom
the
under
OFFICIAL
Palantir User Guide – Introduction to Helpers (20/189291)
Page
13 of
18
Released
OFFICIAL
4. Once you have completed steps 2 and 3, use the
‘Legend’ setting to modify the
‘Density Radius’ (uses kilometres) to suit your current map zoom
(Cth)
5. Use the
‘Show Heatmap/Hide Heatmap’ to enable/disable the heatmap visualisation if you need to conduct further analysis with other helpers
s 37(2)(b), s 47(1)(b), s 47E(d)
1982
Act
Information
of
Freedom
the
under
OFFICIAL
Palantir User Guide – Introduction to Helpers (20/189291)
Page
14 of
18
Released
OFFICIAL
Layers Helper
(Cth)
s 37(2)(b), s 47E(d)
1982
1. Enable the helper through the
‘Helpers’ toolbar by left-clicking on “Layers”. Alternatively, you can use the keyboard shortcut
‘Ctrl + Shift + Y’
s 37(2)(b), s 47(1)(b), s 47E(d)
Act
Information
of
Freedom
the
under
OFFICIAL
Palantir User Guide – Introduction to Helpers (20/189291)
Page
15 of
18
Released
OFFICIAL
2. To open a shared map layer
left-click on the ‘Sources’ icon followed by selecting
the ‘Shared Map Layers’ (
this will open a new pop-up window)
(Cth)
3. Use the
first drop-down box to select an uploaded shared map layer. In this case we will use the
“Australian Airports – June 2020” layer to visualise all
known private/public landing strips in Australia
4.
Left-click ‘Load Layer’ to finalise the process
s 37(2)(b), s 47(1)(b), s 47E(d)
1982
Act
Information
of
Freedom
the
under
OFFICIAL
Palantir User Guide – Introduction to Helpers (20/189291)
Page
16 of
18
Released
OFFICIAL
5. The layer will now be visible on the map application. You will notice that certain datasets contained in the layers settings can be checked/unchecked in
(Cth)
the Layers Helper.
s 37(2)(b), s 47(1)(b), s 47E(d)
1982
Act
Information
of
Freedom
the
under
OFFICIAL
Palantir User Guide – Introduction to Helpers (20/189291)
Page
17 of
18
Released
OFFICIAL
(Cth)
1982
Act
End of Document
Information
of
Freedom
the
under
OFFICIAL
Palantir User Guide – Introduction to Helpers (20/189291)
Page
18 of
18
Released
(Cth)
1982
Act
Information
of
Freedom
the
under
Released
OFFICIAL
Before Getting Started
(Cth)
If you’re a first time user of Palantir, ensure you request access to the system via the ASK Portal. See below for instructions on doing so:
1. Open the following ASK link – Palantir access request form – or open ASK via the application located on your desktop. Navigate to
Request
1982
Something (located to the top-left of the ASK homepage) > User Access (located under ‘Categories’) > Operational Systems > Palantir Systems
2. Complete all compulsory sections of the ASK form
3. Ensure you enter the correct EL2 approver, otherwise this can cause delays
Act
4. Wait for the confirmation email from the Service Desk stating approval, then continue with this user guide
Information
of
Freedom
the
under
OFFICIAL
Palantir User Guide – An Introduction to Palantir Basics (20/120374)
Page
2 of
24
Released
OFFICIAL
Frequently Asked Questions (FAQ’s)
(Cth)
s 37(2)(b), s 47E(d)
1982
Act
Information
of
Freedom
the
under
OFFICIAL
Palantir User Guide – An Introduction to Palantir Basics (20/120374)
Page
3 of
24
Released

(Cth)
1982
Act
Information
of
Freedom
the
under
Released
OFFICIAL
5. This will now launch the Palantir Gotham website. Click on ‘
Workspace’ to download a small launch file (.exe). If you do not select a save location
(Cth)
manually, by default it will save to your ‘My Documents’ folder
s 47(1)(b)
1982
Act
Information
of
Freedom
the
under
OFFICIAL
Palantir User Guide – An Introduction to Palantir Basics (20/120374)
Page
5 of
24
Released

(Cth)
1982
Act
Information
of
Freedom
the
under
Released
OFFICIAL
Step 2: Basic Palantir Navigation
(Cth)
s 37(2)(b), s 47E(d)
1982
Act
Information
of
Freedom
the
under
OFFICIAL
Palantir User Guide – An Introduction to Palantir Basics (20/120374)
Page
7 of
24
Released
OFFICIAL
s 37(2)(b), s 47(1)(b), s 47E(d)
(Cth)
1982
Act
Information
of
Freedom
the
under
OFFICIAL
Palantir User Guide – An Introduction to Palantir Basics (20/120374)
Page
8 of
24
Released
OFFICIAL
Step 3: Basic Palantir Search
(Cth)
s 37(2)(b), s 47E(d)
a. When you click on ‘Search’ or hit ‘Enter’ on the keyboard, the results will open in the Browser application as seen below
1982
2. The search results will be categorised as object types, such as entities, events and documents. You can select each category type to filter your results
s 37(2)(b), s 47(1)(b), s 47E(d)
Act
Information
of
Freedom
the
under
OFFICIAL
Palantir User Guide – An Introduction to Palantir Basics (20/120374)
Page
9 of
24
Released
OFFICIAL
3. You can click on the ‘
Keyword search’ (advanced search in Palantir Production) below the homepage search bar to open a search template to apply
(Cth)
keyword filters and dates to your search terms (see
Palantir User Guide – Searching in Palantir 20/129872 for more information on keyword searches)
In this instance, I applied the ‘Person’ keyword to the Object Type field and the ‘Gender’ keyword to the Property Type
1982
s 37(2)(b), s 47(1)(b), s 47E(d)
Act
Information
of
Freedom
the
under
OFFICIAL
Palantir User Guide – An Introduction to Palantir Basics (20/120374)
Page
10 of
24
Released
OFFICIAL
4. Using the additional search bar will generate your results on the home page of Palantir rather than opening in the browser application
(Cth)
s 37(2)(b), s 47(1)(b), s 47E(d), s 47F(1)
1982
Act
Information
of
Freedom
the
Please note: Clicking on the ‘
Advanced help’ hyperlink in Palantir Staging (next to the homepage search bar) will bring up the
Advanced Search Operators
under
feature to assist you with refining the scope of your search (see
Palantir User Guide – Searching in Palantir 20/129872 for more information)
OFFICIAL
Palantir User Guide – An Introduction to Palantir Basics (20/120374)
Page
11 of
24
Released
OFFICIAL
Step 4: Basic Application Introduction
(Cth)
Applications are tools used to assist a user in analysing information within Palantir. Applications can be enabled/disabled via the ‘Application’ toolbar. Any
enabled Application will be visible under the Palantir toolbar to the top-left of the screen. To enable/disable an Application, simply click on the Application
toolbar and tick/untick the Application
1982
Browser Application
Act
s 37(2)(b), s 47E(d)
s 37(2)(b), s 47(1)(b), s 47E(d)
Information
of
Freedom
the
under
OFFICIAL
Palantir User Guide – An Introduction to Palantir Basics (20/120374)
Page
12 of
24
Released
OFFICIAL
Graph Application
(Cth)
1. Another useful application that allows a user to conduct basic analysis is the
Graph Application (this should be enabled by default – if not, follow
point 1
above to enable the Graph Application)
a. You can open an entity in the Graph application via the Browser (this will be demonstrated in
Step 6: Basic Helper Introduction)
1982
Please note:
These are only some of the available Applications available to you. For information on many other Applications available to you in Palantir,
please read this guide on applications and helpers – 19/223352
Act
s 37(2)(b), s 47(1)(b), s 47E(d)
Information
of
Freedom
the
under
OFFICIAL
Palantir User Guide – An Introduction to Palantir Basics (20/120374)
Page
13 of
24
Released
OFFICIAL
Search Assistant Application
(Cth)
s 37(2)(b), s 47(1)(b), s 47E(d)
1982
1. The Search Assistant application can be enabled from the
‘Application’ toolbar (first time users will need to do this)
2. First time users will need to update passwords. Click the ‘
Update your ACC passwords here’ hyperlink to the top-right of the Search Assistant
Act
s 22(1)(a)(ii), s 47(1)(b), s 47E(d)
Information
of
Freedom
the
under
OFFICIAL
Palantir User Guide – An Introduction to Palantir Basics (20/120374)
Page
14 of
24
Released
OFFICIAL
Step 5: Basic Helpers Introduction
(Cth)
Helpers can be enabled to enhance Palantir applications. The available helpers will change depending on what application you are using, some are specific
to a single application, while others can be used across multiple applications. Below we will cover some basic helpers that are used in the Graph and Map
applications to analyse relationships between objects, such as event links between entities e.g. phone call, meetings etc.
1982
Histogram Helper
Act
s 37(2)(b), s 47E(d)
1. The Histogram helper can be enabled via the Palantir toolbar under ‘Helpers’, then by clicking on ‘Histogram’. Once enabled you can expand/collapse
the helper on the right-hand side of the Graph application
2. The Histogram helper enables you to easily select groups of objects with a single click
s 37(2)(b), s 47(1)(b), s 47E(d)
Information
of
Freedom
the
under
OFFICIAL
Palantir User Guide – An Introduction to Palantir Basics (20/120374)
Page
15 of
24
Released
OFFICIAL
Flows Helper
(Cth)
s 37(2)(b), s 47E(d)
1982
1. You can change which flows are visible, the colours that represent each and the speed at which they move between objects
s 37(2)(b), s 47(1)(b), s 47E(d)
Act
Information
of
Freedom
the
under
OFFICIAL
Palantir User Guide – An Introduction to Palantir Basics (20/120374)
Page
16 of
24
Released
OFFICIAL
History Helper
(Cth)
The
History helper can be used to view and restore snapshots from different points in the investigation (working similarly to the undo/redo functions in
Microsoft programs). The History
helper is
only accessible from the Graph application.
1982
1. The history slide is located at the bottom of the graph by default.
2. You can select any slide in the history to restore or jump to any part of the investigation. You can also click on the information icon to see the
details about the slide (date, title, description etc.)
Act
s 37(2)(b), s 47(1)(b), s 47E(d)
Information
of
Freedom
the
under
PLEASE NOTE: The above are only some of the more common Helpers available to you. For a comprehensive list on the available Helpers in Palantir, please
read 19/223352
OFFICIAL
Palantir User Guide – An Introduction to Palantir Basics (20/120374)
Page
17 of
24
Released
OFFICIAL
Step 6: Naming your Investigation
(Cth)
It’s important to name you investigation if you plan to continue working on it in the future. Your investigation name should be relevant and useful to your
investigation, which will allow you and your colleagues to locate this easier in the future.
1982
1. Click on the ‘Investigation’ menu via the Palantir toolbar, then click ‘Name As’.
2. A pop-up window will now appear and allow you to name/rename the investigation. Click ‘Save’ once ready to continue
s 37(2)(b), s 47(1)(b), s 47E(d), s 47F(1)
Act
Information
of
Freedom
the
under
OFFICIAL
Palantir User Guide – An Introduction to Palantir Basics (20/120374)
Page
18 of
24
Released
OFFICIAL
Step 7: Publishing your Investigation
(Cth)
Your investigation will need to be published to the Palantir base realm once you have named/renamed the investigation in the above step. Publishing to the
base realm will ensure that all information uploaded as part of your investigation becomes visible and accessible by others.
1982
1. Click on the ‘
Investigation’ menu via the Palantir toolbar, then click ‘
Publish’
2. A pop-up window will now appear and allows you to select/deselect what changes you wish to publish. Click ‘
Accept’ to complete the process.
s 37(2)(b), s 47(1)(b), s 47E(d), s 47F(1)
Act
Information
of
Freedom
the
under
OFFICIAL
Palantir User Guide – An Introduction to Palantir Basics (20/120374)
Page
19 of
24
Released
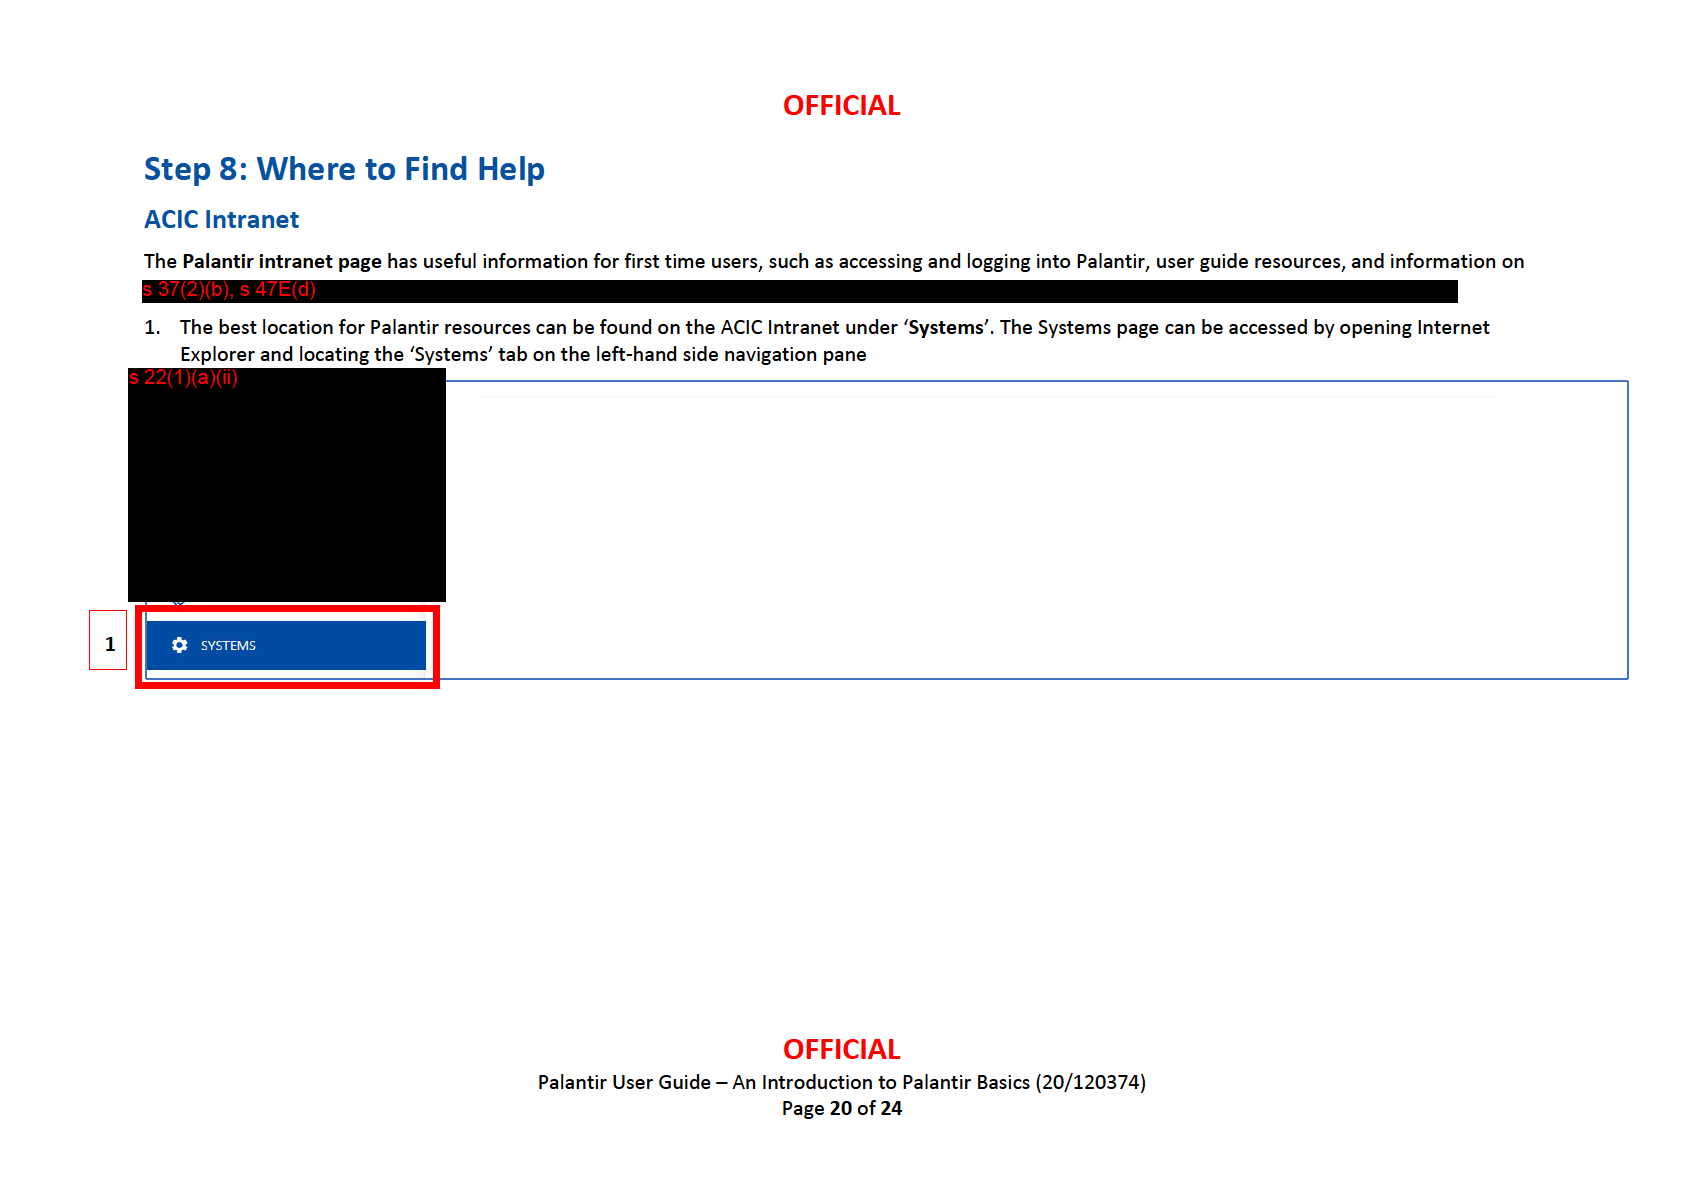
(Cth)
1982
Act
Information
of
Freedom
the
under
Released
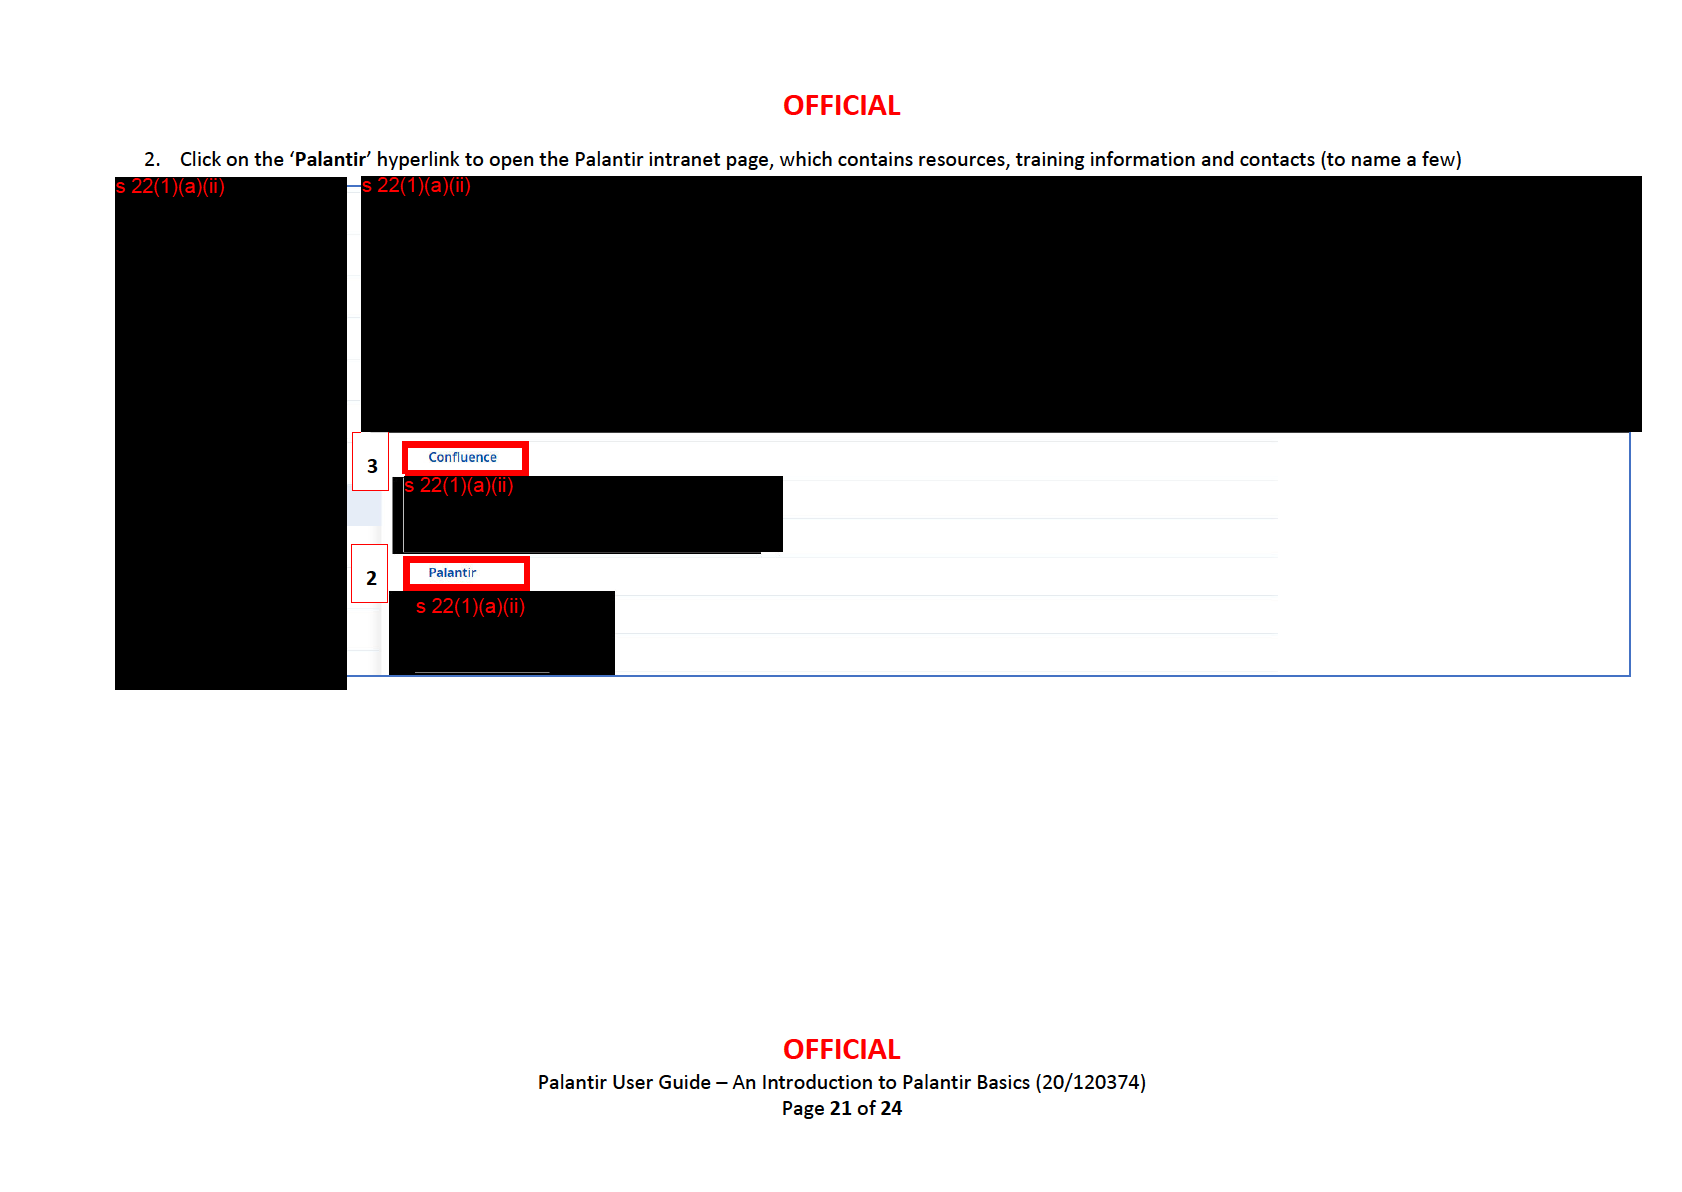
(Cth)
1982
Act
Information
of
Freedom
the
under
Released
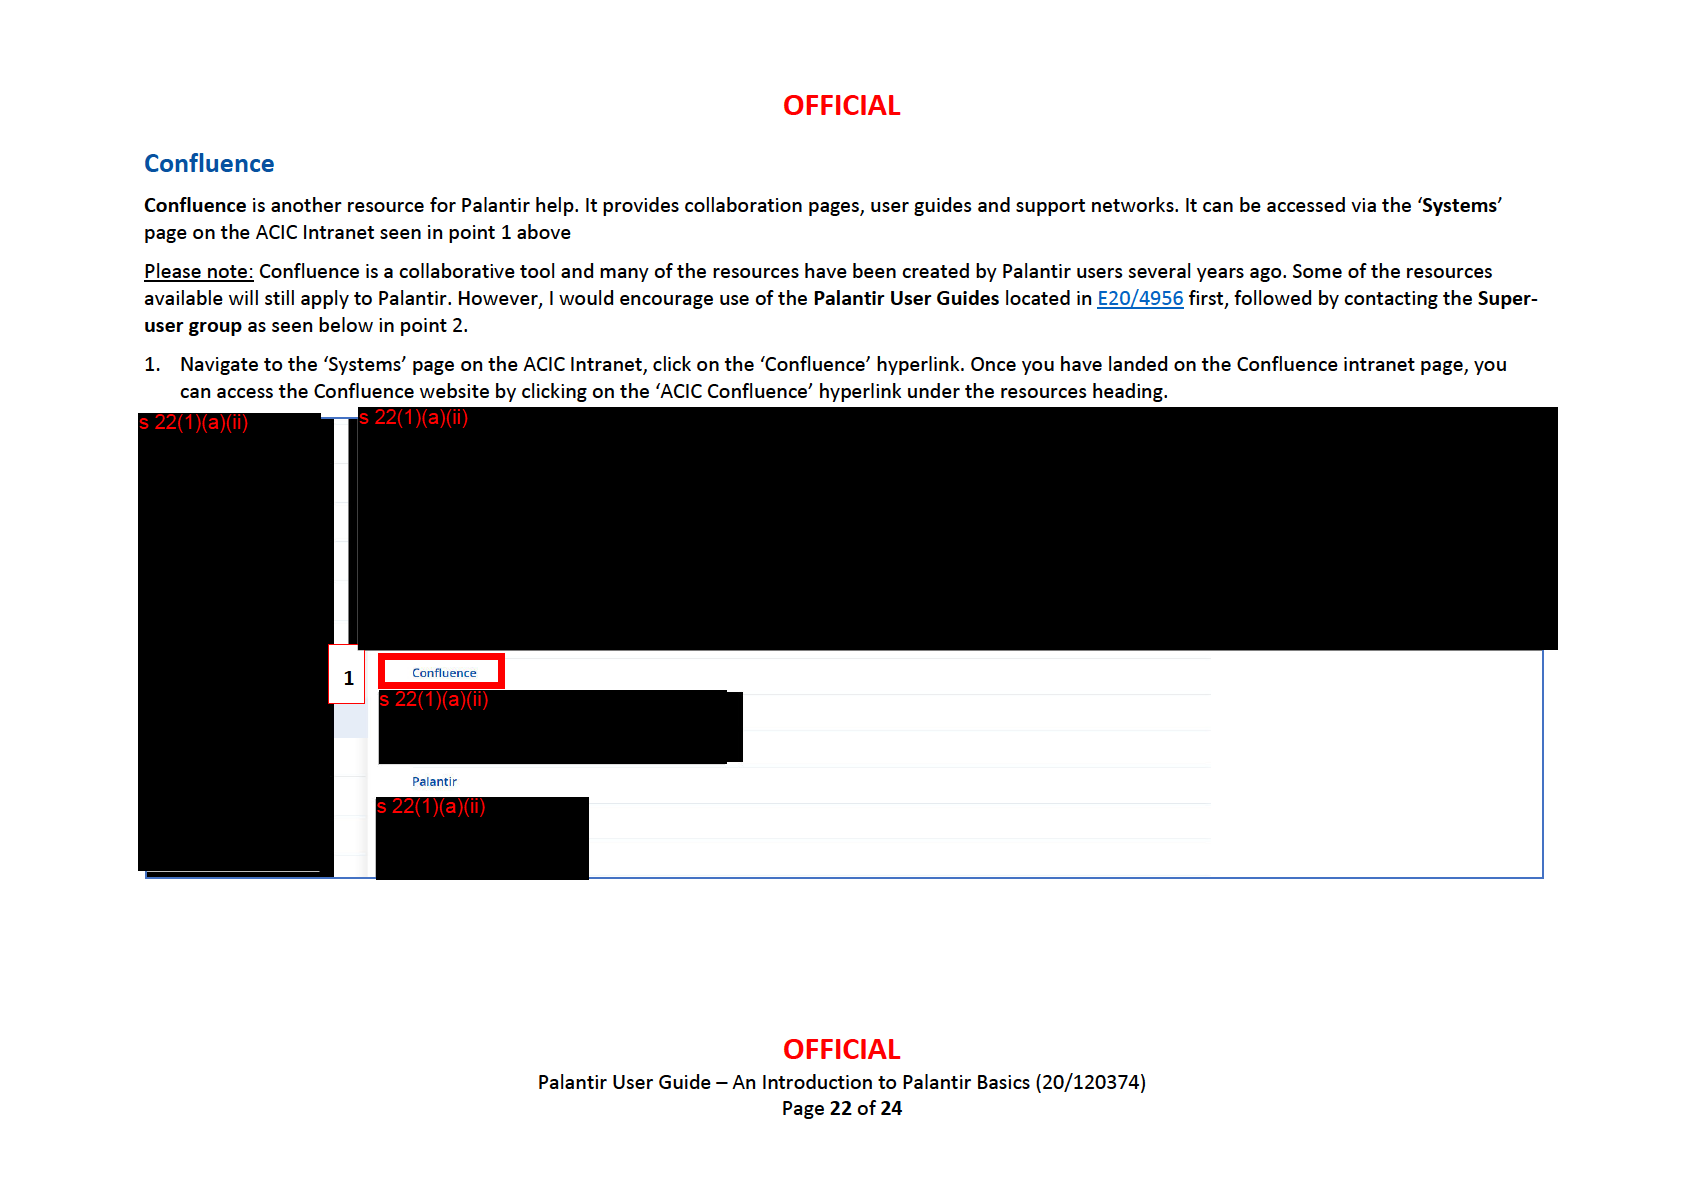
(Cth)
1982
Act
Information
of
Freedom
the
under
Released
OFFICIAL
2. The Super-users Confluence page lists experienced Palantir users in all state offices that can be contacted to assist you. This page can be located
(Cth)
through
Confluence > ACC Palantir User Help > Palantir Home > Palantir Super-user
s 37(2)(b), s 47(1)(b), s 47E(d), s 47F(1)
1982
Act
Information
of
Freedom
the
under
OFFICIAL
Palantir User Guide – An Introduction to Palantir Basics (20/120374)
Page
23 of
24
Released
OFFICIAL
(Cth)
1982
Act
Information
End of Document
of
Freedom
the
under
OFFICIAL
Palantir User Guide – An Introduction to Palantir Basics (20/120374)
Page
24 of
24
Released
(Cth)
1982
Act
Information
of
Freedom
the
under
Released
OFFICIAL
Frequently Asked Questions (FAQ’s)
(Cth)
What search features are available in Palantir?
• Basic searches can be completed through the homepage, quick search bar and the browser application
1982
• Advanced search operations are available in Palantir, you can use Boolean, wildcard and fuzzy search operators to refine your results (see
Step 3:
Advanced Searches in Palantir)
Act
• The search assistant application can be used to search several different data repositories s 37(2)(b), s 47E(d)
)
• The search around tool can be used on the graph application to search the Palantir base realm for related objects and property types (
see Step 5:
Search Around Tool)
What is the Palantir base realm?
s 37(2)(b), s 47E(d)
Information
What is the Search Assistant?
of
• This Palantir application is unique to the ACIC and allows users to search several different data repositories for information related to an
investigation and import this to their graph
• If a document is imported from the Search Assistant to a graph and then published to Palantir, this information will now be discoverable via
searching the Palantir base realm
Other Considerations
Freedom
• There are differences to the
homepage and
browser application when using Palantir Staging. Use the
old browser application (this can be enabled
via the ‘Application’ toolbar) if you wish to use the current Palantir Production browser.
the
• These changes only impact the interface and not the search capabilities.
• The Staging homepage and browser may be transferred to Production in the future so it’s worthwhile familiarising yourself with both Staging and
Production searches
under
OFFICIAL
Palantir User Guide – Searching in Palantir (20/129872)
Page
2 of
30
Released
OFFICIAL
Step 1: Palantir Base Realm Searches
(Cth)
The basic searching methods in Palantir are accessed from the homepage. Searching from the homepage will search all available information that has been
published to the Palantir data repository (base realm) or any unpublished data in your current investigation. s 37(2)(b), s 47E(d)
1982
Homepage Search
Act
1. Once you have logged in you will be on the homepage by default (if not, navigate to the homepage via the application toolbar). To complete a
homepage search, type your key words into the search bar located in the centre of the screen and click ‘Search’ or press ‘Enter’ to continue
s 37(2)(b), s 47(1)(b), s 47E(d)
Information
of
Freedom
the
under
OFFICIAL
Palantir User Guide – Searching in Palantir (20/129872)
Page
3 of
30
Released
OFFICIAL
(Cth)
2. Your search results will now open in the Browser application and be categorised into object type
e.g. person, document, event etc. 3. To open an object from your search result, simply click on the objects name
s 37(2)(b), s 47(1)(b), s 47E(d)
1982
Act
Information
of
Freedom
the
under
OFFICIAL
Palantir User Guide – Searching in Palantir (20/129872)
Page
4 of
30
Released
OFFICIAL
4. The object will open in a new browser tab and you can view the profile of that object, including the summary, properties, related objects etc. You can
(Cth)
also move this object to the Graph application for further analysis at this stage
Please note: the below image is from the old browser application. You can drag and drop objects from your searches into the old browser
s 37(2)(b), s 47(1)(b), s 47E(d)
1982
Act
Information
of
Freedom
the
under
OFFICIAL
Palantir User Guide – Searching in Palantir (20/129872)
Page
5 of
30
Released
OFFICIAL
Quick Search
(Cth)
1. The
quick search bar is located at the
top-right of the homepage. This searches the Palantir base realm and all results will be displayed in a drop-down
list. You can select objects directly from this list or open all the results in the browser application
1982
Please note: you can use the
Fuzzy and
Wildcard advanced search operators in the quick search bar (see
Step 3: Advanced Searches in Palantir for further
information on these operators)
s 37(2)(b), s 47(1)(a), s 47E(d), s 47F(1)
Act
Information
of
Freedom
the
under
OFFICIAL
Palantir User Guide – Searching in Palantir (20/129872)
Page
6 of
30
Released
OFFICIAL
Keyword Search (Advanced Search)
(Cth)
The keyword search is accessed on the homepage below the search bar in Palantir Staging. In Palantir Production, this keyword search function is enabled
by clicking on the ‘Advanced’ hyperlink next to the homepage search bar.
1982
1. Click the ‘
Keyword Search’ button below the homepage search bar
After clicking the Keyword Search, a new search will open in the browser application.
Act
s 37(2)(b), s 47(1)(b), s 47E(d)
Information
of
Freedom
the
under
OFFICIAL
Palantir User Guide – Searching in Palantir (20/129872)
Page
7 of
30
Released
OFFICIAL
2. The keyword search template will allow you to apply filters, such as
dates,
object types and
properties. You can use advanced search operators in this
(Cth)
search template (see
Step 3: Advanced Searches in Palantir)
3. In the below instance, I have applied filters for
object type (person) and
property type (gender = male). This has refined my search results to two
objects. By searching Bart Simpson in a general homepage or quick search the total search results returned equal
27
1982
Please note: this search template will look different in Palantir Production but it ultimately operates the same
s 37(2)(b), s 47(1)(b), s 47E(d)
Act
Information
of
Freedom
the
under
OFFICIAL
Palantir User Guide – Searching in Palantir (20/129872)
Page
8 of
30
Released
OFFICIAL
Step 2: Using the Palantir Search Assistant Application
(Cth)
s 37(2)(b), s 47E(d)
1982
Act
Searching the Fusions Data Holdings (FDH)
1. The Search Assistant application can be enabled from the ‘Application’ toolbar (first time users will need to do this)
s 37(2)(b), s 47(1)(b), s 47E(d)
Information
of
Freedom
the
under
OFFICIAL
Palantir User Guide – Searching in Palantir (20/129872)
Page
9 of
30
Released
OFFICIAL
s 37(2)(b), s
47E(d)
2. If using the Search Assistant for the first time you will need to update your ACIC passwords to access
(Cth)
a. This can be done by click on the ‘Update your ACC passwords here’ hyperlink to the top-right of the Search Assistant application.
b. After clicking the above link, you will need to double-click on the ‘username’ and ‘password’ fields in the new window and input your generic
login details (the same username/password combination used to sign in to Palantir)
s 37(2)(b), s 47(1)(b), s 47E(d)
1982
Act
Information
of
Freedom
the
under
OFFICIAL
Palantir User Guide – Searching in Palantir (20/129872)
Page
10 of
30
Released
OFFICIAL
s 37(2)
s 37(2)(b), s 47E(d)
(b), s
3. Once you click save and Palantir updates your username/password you will have access to 47E(d) As you can see, there are
to
(Cth)
the left-hand side of the screen that can narrow down searches to specific entities. For this example we will complete a general search using the ‘FDH –
General Search’ template
a. Enter the search criteria e.g. Bart Simpson
b. Enter a date range (if applicable)
1982
c. You can also select the various datasets available to you from the ‘Data source’ drop down (leave this as the default to search all datasets)
s 37(2)(b), s 47(1)(b), s 47E(d)
Act
Information
of
Freedom
the
under
OFFICIAL
Palantir User Guide – Searching in Palantir (20/129872)
Page
11 of
30
Released
OFFICIAL
4. Your results will display below the search menu in order of relevancy (represented by a score out of 10). This will also be colour-coded, ‘green’
(Cth)
indicating a higher score
a. You can right-click on a result to see a Preview of that information to the right-hand side of the screen
b. You can right-click to add that object to your Graph application to conduct some analysis
1982
s 37(2)(b), s 47(1)(b), s 47E(d)
Act
Information
of
Freedom
the
under
OFFICIAL
Palantir User Guide – Searching in Palantir (20/129872)
Page
12 of
30
Released
OFFICIAL
5. You can also use the filters in the Search Assistant to refine your results. Simply click on the column header you wish to apply the filter to e.g. Name,
(Cth)
using the drop-down arrow and make a selection. Results will still be displayed in order of relevancy after applying a filter.
s 37(2)(b), s 47(1)(b), s 47E(d)
1982
Act
Information
of
Freedom
the
under
OFFICIAL
Palantir User Guide – Searching in Palantir (20/129872)
Page
13 of
30
Released
OFFICIAL
Searching the National Police Reference Systems (NPRS)
(Cth)
The NPRS search can be used in the Search Assistant application to search for national person of interest records (essentially, a person with a criminal
record in Australia)
1982
1. Select the ‘NPRS Search’ template from the Search Assistant application
2. At minimum you will need to complete the ‘Surname’ and ‘Reason’ fields in your search criteria to produce any results.
3. You also have the ability to change your ‘Search type’ from ‘exact’ to ‘fuzzy’. Exact matches will limit results to exactly the values being searched, while
Act
fuzzy matches give results that are phonetically similar to the search terms (see
Step 3 Advanced Searches for more information on fuzzy searches)
s 37(2)(b), s 47(1)(b), s 47E(d)
Information
of
Freedom
the
under
OFFICIAL
Palantir User Guide – Searching in Palantir (20/129872)
Page
14 of
30
Released
OFFICIAL
s 37(2)(b), s
4. You can apply filters to your searches as seen in 47E(d)
example above. In this case, we have applied a filter to only include records from the
(Cth)
usin
s 37(2)(b), s 47E(d)
g the ‘Source’ filter
s 37(2)(b), s 47(1)(b), s 47E(d)
1982
Act
Information
of
Freedom
the
Searching TRIM
under
Using the Search Assistant you can also search for contents stored in Content Manager (CM9), also referred to as TRIM. You have a basic search criteria to
input key words, as well the ability to use advanced searching operators (see
Step 3: Advanced Searches in Palantir)
OFFICIAL
Palantir User Guide – Searching in Palantir (20/129872)
Page
15 of
30
Released
OFFICIAL
1. Click on the ‘TRIM Search’ template in the Search Assistant
(Cth)
2. Enter you key words into either the ‘Title’ or ‘Content’ search fields
• The ‘Title’ search criteria can be used if you’re familiar with the documents actual title, otherwise use ‘Content’ as the primary search field as it
will search for your key words within an actual document
3. Search results will display in order of relevancy to your search terms.
1982
• You can apply filters and preview your results, as well as importing to the graph
Act
s 37(2)(b), s 47(1)(b), s 47E(d)
Information
of
Freedom
the
under
OFFICIAL
Palantir User Guide – Searching in Palantir (20/129872)
Page
16 of
30
Released
OFFICIAL
Step 3: Advanced Searches in Palantir
(Cth)
You can use advanced search operators in Palantir (including within the Search Assistant). These search operators can be used to narrow and expand your
search results when dealing with large data sets and common words for example. Search operators can be used in a simple search and in the Search
Assistant application.
1982
For the purpose of this user guide we will cover four common search operators to assist your searches in Palantir. For more resources on advanced
Act
searching tips, save these document to improve your results instantly!
• ACIC Intranet: Palantir Cheat Sheet
• Confluence: Palantir Boolean Operators
• 19/409481: Search Syntax for Full Text Document Search
Boolean Operators
You can use the words AND, OR and NOT between keywords to both narrow and expand your results.
AND will narrow your search by
including
all key
Information
words used.
OR will expand your search so all returned results must contain at least one of you key words (helpful when searching for synonyms).
NOT
of
will narrow your search by eliminating all key words that follow.
For example – quick fox AND red fox
You can also set Parentheses when using Boolean operators to set the order of your search. Parentheses should generally be used around OR
statements so your search can attempt to resolve the OR operator first, before moving to the next key word.
For example – (quick OR red) AND fox
Freedom
Exact Phrases
the
You can use double quotes at the beginning and end of your search term(s) to search for that exact sequence in a document.
For example – “quick red fox”
The above example would only return results with “quick red fox” exactly
under
OFFICIAL
Palantir User Guide – Searching in Palantir (20/129872)
Page
17 of
30
Released
OFFICIAL
(Cth)
Wildcards
You can use
? to replace a single character, or
* to replace zero or more characters. The
question mark character is best used when there are variable
1982
spellings for a word
For example – colo?r will produce results with ‘colour’ and ‘color’.
Act
The
asterisk character is best used following the end of a root word (known as a ‘truncation’)
For example – gam* will produce results such as ‘game’ and ‘gaming’
Additionally, both of these wildcards can be used in the same key word search to expand your results
For example – qu?ck* will produce results with ‘quack’, ‘quacks’, ‘quick’, ‘quickly’ etc.
Fuzzy Operators
Information
You can use
~ (tilt character) before a simple search term to search for phonetically similar terms in addition to exact phrases. This can be especially
useful when dealing with lengthy words where there’s potential for misspelling, as well as names that have multiple spellings but sound alike
e.g.
of
Mohammed vs Muhammed
For example – ~quikc ~rd ~foks
This search would return results with ‘quick’, ‘red’, and ‘fox’
Please Note: You cannot use a * or ? symbol as the first character of a search
Freedom
the
under
OFFICIAL
Palantir User Guide – Searching in Palantir (20/129872)
Page
18 of
30
Released
OFFICIAL
Step 4: Search Around Tool
(Cth)
The Search Around tool is available to you in the Graph application and allows you to right-click on an object and search the Palantir base realm for linked
items such as entities, documents, events. You can also search for entities that have common properties with your current object.
1982
1. Using the Graph application, select your object and right-click to bring up the ‘Search Around’ tool
2. Select the ‘search around’ button and select from your various actions e.g. ‘Linked entities’
3. The Graph will now load hard-linked entities to your investigation for further analysis
Act
s 37(2)(b), s 47(1)(b), s 47E(d)
Information
of
Freedom
the
under
OFFICIAL
Palantir User Guide – Searching in Palantir (20/129872)
Page
19 of
30
Released
OFFICIAL
4. Select the ‘search around’ button and select from your various actions e.g. ‘Linked entities’
(Cth)
s 37(2)(b), s 47(1)(b), s 47E(d)
1982
Act
Information
of
Freedom
the
under
OFFICIAL
Palantir User Guide – Searching in Palantir (20/129872)
Page
20 of
30
Released
OFFICIAL
5. The Graph will now load hard-linked entities to your investigation for further analysis
(Cth)
s 37(2)(b), s 47(1)(b), s 47E(d)
1982
Act
Information
of
Freedom
the
under
OFFICIAL
Palantir User Guide – Searching in Palantir (20/129872)
Page
21 of
30
Released
OFFICIAL
Step 5: Customised Searches in Palantir
(Cth)
You can completed a customised search in Palantir using the Graph application. This uses the ‘Search Around’ tool as seen in step 5 above, but allows you to
modify your search terms, rather than use a pre-existing search around template e.g. linked entities, linked events etc.
1982
1. Select an object on your Graph and right-click to bring up the search around tool
2. Highlight the ‘search around’ button, followed by the ‘more…’ button and click to open a new window Act
s 37(2)(b), s 47(1)(b), s 47E(d)
Information
of
Freedom
the
under
OFFICIAL
Palantir User Guide – Searching in Palantir (20/129872)
Page
22 of
30
Released
OFFICIAL
3. You can now select from numerous search templates. We will select ‘Create a New Search’ in this instance
(Cth)
s 37(2)(b), s 47(1)(b), s 47E(d)
1982
Act
Information
of
Freedom
the
under
OFFICIAL
Palantir User Guide – Searching in Palantir (20/129872)
Page
23 of
30
Released
OFFICIAL
4. You can now select the objects you wish to create a search for. In this instance we only have one object on the graph so it has been selected
(Cth)
automatically
s 37(2)(b), s 47(1)(b), s 47E(d)
1982
Act
Information
of
Freedom
the
under
OFFICIAL
Palantir User Guide – Searching in Palantir (20/129872)
Page
24 of
30
Released
OFFICIAL
5. You can now select what link types and properties you wish to search for that may be connected to your object. In this instance we are searching for
(Cth)
siblings so have selected one relationship type “Parent of / Child of”
s 37(2)(b), s 47(1)(b), s 47E(d)
1982
Act
Information
of
Freedom
the
under
OFFICIAL
Palantir User Guide – Searching in Palantir (20/129872)
Page
25 of
30
Released
OFFICIAL
6. You can now select the target object types you wish to search for within your link type parameters. In this instance, we are searching for siblings of
(Cth)
Marge SIMPSON so we will only select the ‘Entity’ target type.
s 37(2)(b), s 47(1)(b), s 47E(d)
1982
Act
Information
of
Freedom
the
under
OFFICIAL
Palantir User Guide – Searching in Palantir (20/129872)
Page
26 of
30
Released
OFFICIAL
7. You will now see a preview of your search results. As can be seen below the customised search provided two linked entities within our search
(Cth)
parameters (‘Parent of / Child of’ and ‘Entity’).
a. To save this customised search as a template, click on the ‘Save Copy as New Search’ which will appear at the top of your list next time
b. Click ‘Finish’ to complete the search and load the new objects and links into your graph
s 37(2)(b), s 47(1)(b), s 47E(d)
1982
Act
Information
of
Freedom
the
under
OFFICIAL
Palantir User Guide – Searching in Palantir (20/129872)
Page
27 of
30
Released
OFFICIAL
Step 6: Object Explorer
(Cth)
The
Object Explorer is an application that allows a user to search for
all objects published to the Palantir base realm and apply filters to these objects to
drilldown on specific entity or property types. This is similar to using the Histogram helper but opens your search results to every single object.
1982
1. Activate the Object Explorer via the
‘Application’ toolbar
2. When you open the Object Explorer for the first time you will need to click ‘
Explore All Objects’. This can take 1-2 minutes to load the millions of
objects for the first time
Act
s 37(2)(b), s 47(1)(b), s 47E(d)
Information
of
Freedom
the
under
OFFICIAL
Palantir User Guide – Searching in Palantir (20/129872)
Page
28 of
30
Released
OFFICIAL
3. Using the histogram-like
‘type model’ to the right-hand side of screen, you can select objects and property types to search (you can also drag objects
(Cth)
from other applications into the Object Explorer)
4. As you build your search you can track your stages to the top most part of the screen. In this instance I built a search based on
vehicles >
property type
= Make > property type = model
5. You can apply various
visualisations or
filters to your searches as well. These can include charts, properties, timelines etc. In this instance I applied the
1982
property filter and selected the ‘
Model’ property type. This visualisation will generate in the centre of the screen
s 37(2)(b), s 47(1)(b), s 47E(d)
Act
Information
of
Freedom
the
under
OFFICIAL
Palantir User Guide – Searching in Palantir (20/129872)
Page
29 of
30
Released
OFFICIAL
(Cth)
1982
Act
Information
End of Document
of
Freedom
the
under
OFFICIAL
Palantir User Guide – Searching in Palantir (20/129872)
Page
30 of
30
Released
(Cth)
1982
Act
Information
of
Freedom
the
under
Released
OFFICIAL
Frequently Asked Questions (FAQs)
(Cth)
What is Palantir mapping?
• This is the process of importing a structured (Spreadsheet) document and the process of mapping all entities, and linking entities and events. The
1982
process of mapping also allows you to:
o
Save your mapping into your H:drive
Act
o
Save your mapping into Palantir
When to use Palantir mapping?
• To upload large structured documents (any .xlsx and .csv files) containing entities, associations and events (any .xlsx and .csv files)
• To quickly clean data/information and merge columns during the mapping process
• To save the Palantir Import Mapping settings for future uploads of similar structured documents
How do I access Palantir mapping?
Information
• Palantir mapping can easily be accessed by dragging and dropping a structured document into the graph application to open the import window
of
• The import wizard can be open while in any application in Palantir. Simply click on the ‘
Investigation’ toolbar, followed by ‘
Data Import’
When do I need to manually map objects?
It’s important to note that for Call Charge Records (CCRs), Call Associated Data (CAD) and Integrated Public Number Database (IPND) imports into Palantir,
pre-existing mappings have been built into the systems that allows you to bypass creating mappings manually. All other structured documents created for a
Freedom
specific purpose will need to be mapped initially and a PIM file can then be saved to your H:drive for future uploads.
the
under
OFFICIAL
Palantir User Guide – Uploading a Structured Document (20/144783)
Page
2 of
25
Released
OFFICIAL
Step 1: Uploading an Excel Document
(Cth)
Open the Data Importer
1. Open Palantir and click on ‘
Investigation’, followed by ‘
Data Import’ (you can also use the shortcut Ctrl+I)
1982
• Alternatively, you can upload the document by dragging and dropping the file straight into the graph application. This user guide will follow the
Act
Data Import method above, but both will accomplish the same thing.
s 37(2)(b), s 47(1)(b), s 47E(d)
Information
of
Freedom
the
under
OFFICIAL
Palantir User Guide – Uploading a Structured Document (20/144783)
Page
3 of
25
Released
OFFICIAL
Selecting a Data Source
(Cth)
1. Select ‘
Add File’ to select the document from your local directory (H:drive), OR you can drag and drop the file from the local directory or CM9 directly
into the empty space to the right of the ‘Add File’ button.
• You can import multiple files at the same time. Untick any file that you don’t want to import, as shown below 1982
2. Click ‘
Next’ when ready to continue, followed by selecting ‘
Create New Mappings’
Please Note: It is important to ensure the document being uploaded follows a clear naming procedure to assist in identifying the primary contents of that
Act
document. For example, include the date the document was received/created, the information source type and any entities of importance
i.e. CM9/TRIM
Reference # – Intelligence Report – Known Associates of Bart SIMPSON – 1 June 2020
s 37(2)(b), s 47(1)(b), s 47E(d)
Information
of
Freedom
the
under
OFFICIAL
Palantir User Guide – Uploading a Structured Document (20/144783)
Page
4 of
25
Released
OFFICIAL
Step 2: Mapping data to Create Entities
(Cth)
When creating new mappings, you will need to add an entity type and relate the correct column of data to that entity, along with any additional entity
properties
e.g. person, gender, date of birth
1982
Cleaning your Data
Its best practice to clean your data in Excel prior to uploading and mapping in Palantir. However, during the mapping process you do have the option to
Act
merge columns before completing the upload. This is useful when dealing with names that have been separated in individual columns
e.g. surname, given
name, middle name
1. Select the columns we would like to merge by holding ‘Ctrl’ and left-clicking on the column header. In this instance, selecting the ‘Family’ and ‘Given’
columns. Following this, right click on one of the columns you selected and click ‘
Combine Selected Columns’
s 37(2)(b), s 47(1)(b), s 47E(d)
Information
of
Freedom
the
under
OFFICIAL
Palantir User Guide – Uploading a Structured Document (20/144783)
Page
5 of
25
Released
OFFICIAL
2. This will open the ‘
Combine Columns’ window. Here you can name your new column and change the order of the columns values
e.g. surname, Given
(Cth)
name vs. given name, surname (this is referred to as the ‘
Combination pattern’). In this instance, name the column
Full Name and keep the default
combination pattern, but include a space following the given name (see below)
3. Click ‘Combine Columns’ when you’re ready to proceed
s 37(2)(b), s 47(1)(b), s 47E(d)
1982
Act
Information
of
Freedom
the
under
OFFICIAL
Palantir User Guide – Uploading a Structured Document (20/144783)
Page
6 of
25
Released
OFFICIAL
4. You can now view your new column in the preview window to the bottom of your screen. You may need to scroll across to see this depending on the
(Cth)
size of the spreadsheet (all new merged columns will always appear at the end of the preview)
s 37(2)(b), s 47(1)(b), s 47E(d)
1982
Act
Information
of
Freedom
the
under
OFFICIAL
Palantir User Guide – Uploading a Structured Document (20/144783)
Page
7 of
25
Released
OFFICIAL
Creating an Entity
(Cth)
1. To map data to Palantir, you first need to create and object. In this instance, create the entity type ‘
Person’. This can be done by clicking on the ‘
Add’
icon to the top left of the screen (represented by the green + sign), followed by highlighting
Entities > Person > Person
1982
Please note: You cannot text search to find an entity in the Data Import window, you must select the entity from the drop-down menu
s 37(2)(b), s 47(1)(b), s 47E(d)
Act
Information
of
Freedom
the
under
OFFICIAL
Palantir User Guide – Uploading a Structured Document (20/144783)
Page
8 of
25
Released
OFFICIAL
2. Once the entity is on the graph preview, select the column you wish to map to this entity by left-clicking and dragging that column header to the entity
(Cth)
from the left-hand side of the Data Import window. In this instance, drag and drop the ‘Full Name’ column header onto the new entity.
s 37(2)(b), s 47(1)(b), s 47E(d)
1982
Act
Information
of
Freedom
the
under
OFFICIAL
Palantir User Guide – Uploading a Structured Document (20/144783)
Page
9 of
25
Released
OFFICIAL
3. Following the above step, you will need to select a property field for that column. In this instance we know that this is the person’s full name we are
(Cth)
mapping to this entity. Simply start typing “Person” and you will be able to select the ‘
Person Name’ property
4. Once complete, you can view a sample of each entity mapped to that column via the preview window to the bottom right of the screen. Simply scroll
through each row using the arrows or select a specific row from the drop-down list.
s 37(2)(b), s 47(1)(b), s 47E(d)
1982
Act
Information
of
Freedom
the
under
OFFICIAL
Palantir User Guide – Uploading a Structured Document (20/144783)
Page
10 of
25
Released
OFFICIAL
5. Following steps 2 above, map the following people-related columns to the
Person entity, along with the corresponding properties
(Cth)
a)
Date of Birth column with the property type ‘
Date of Birth’
b)
Gender column with the property type ‘
Gender’
s 37(2)(b), s 47(1)(b), s 47E(d)
1982
Act
Information
of
Freedom
the
under
OFFICIAL
Palantir User Guide – Uploading a Structured Document (20/144783)
Page
11 of
25
Released
OFFICIAL
6. Repeat step 1 above to create a new entity type ‘
Location’ (as seen below)
(Cth)
s 37(2)(b), s 47(1)(b), s 47E(d)
1982
Act
Information
of
Freedom
the
under
OFFICIAL
Palantir User Guide – Uploading a Structured Document (20/144783)
Page
12 of
25
Released
OFFICIAL
7. Having not combined the address columns as seen in the
Cleaning your Data section above, we will need to map each column individually. In this
(Cth)
instance, start with mapping the column ‘
Street No’ to the new
Location entity by dragging and dropping into the black panel.
8. Add the property type “
Address: Address 1” by typing “Address” in the text field (as seen below)
s 37(2)(b), s 47(1)(b), s 47E(d)
1982
Act
Information
of
Freedom
the
under
Please note: The properties ‘
Address: Address 1’ through to ‘
Address: Address 3’ can be used to create building details, such as street number, street name
and street type
e.g. Address: Address 1 = street number, Address: Address 2 = street name, Address: Address 3 = street type
OFFICIAL
Palantir User Guide – Uploading a Structured Document (20/144783)
Page
13 of
25
Released
OFFICIAL
9. Following steps 7 and 8 above, map the following location-related columns to the
Location entity, along with the corresponding properties
(Cth)
a)
Street column with the property type ‘
Address: Address 2’
b)
Street Type column with the property type ‘
Address: Address 3’
c)
Suburb column with the property type ‘
Address: Suburb’
d)
State column with the property type ‘
Address: State’
1982
s 37(2)(b), s 47(1)(b), s 47E(d)
Act
Information
of
Freedom
the
under
OFFICIAL
Palantir User Guide – Uploading a Structured Document (20/144783)
Page
14 of
25
Released
OFFICIAL
Step 3: Linking Entities in the Mapping Process
(Cth)
Linking entities while in the mapping process is similar to the process of creating a link in the graph application.
1. Select your first entity by left-clicking on the bottom-right of the icon (
the triangle outline), then draw a line to the other entity you wish to create the
1982
link with by dragging and dropping. In this instance we’re creating a link from the
Person to the
Location.
s 37(2)(b), s 47(1)(b), s 47E(d)
Act
Information
of
Freedom
the
under
OFFICIAL
Palantir User Guide – Uploading a Structured Document (20/144783)
Page
15 of
25
Released
OFFICIAL
2. Drag the ‘
Association Type’ column to the black panel to map these details to that link type.
(Cth)
s 37(2)(b), s 47(1)(b), s 47E(d)
1982
Act
Information
of
Freedom
the
under
OFFICIAL
Palantir User Guide – Uploading a Structured Document (20/144783)
Page
16 of
25
Released
OFFICIAL
3. You can now select an association description to accompany the link. In this instance, there are various types of associations between the people and
(Cth)
locations within that one column
e.g. resides, user of, Relates to etc. Given this information, start typing “Link Text” in the ‘
Association’ text field and
select ‘
Link Text’
4. Click ‘
Next’ to continue to the final Data Import step
1982
s 37(2)(b), s 47(1)(b), s 47E(d)
Act
Information
of
Freedom
the
Please note: In the above scenario, selecting ‘Link Text’ as the association property will bring in the default text from the spreadsheet as additional link
under
information. This is useful when the one column of data contains multiple associations. However, if the column only contains a single link type, such as
‘Resides at’, you can change the link type to ‘Lives/Lived At’ for a more accurate depiction of the link.
OFFICIAL
Palantir User Guide – Uploading a Structured Document (20/144783)
Page
17 of
25
Released
OFFICIAL
Step 4: Completing the Data Import Process
(Cth)
Review and Import
1. This is final process of the Data Import. Here you can see an overview of your import as well as save your mapping file (PIM file).
1982
a. The first section displays the
number and types of objects being imported, as well as the
number of properties related to those objects
b. You can
edit the permissions of the imported data by clicking on the hyperlink and following the instructions on screen.
Act
c. You can
select a resolution setting as the final step. In this instance, leave it as the default ‘
None (recommended)’. It is always best practice to
complete object resolution following the import
s 37(2)(b), s 47(1)(b), s 47E(d)
Information
of
Freedom
the
under
OFFICIAL
Palantir User Guide – Uploading a Structured Document (20/144783)
Page
18 of
25
Released
OFFICIAL
CAVEAT: It is important to resolve items following a data import, especially larger data-sets with hundreds of entities. If the entities already exist within
(Cth)
Palantir prior to the import, Palantir automatically creates duplicates. You can resolve entities on the graph application using the right-click search around
tool.
Please note, generic user accounts can only resolve
five entities at a time. Therefore, if you’re importing larger data-sets you can always ask for assistance
1982
from a Palantir
Power-user in your team/section. Power-users have the ability to use the
‘Manual Object Resolution’ wizard to resolve large numbers of
entities simultaneously and with ease. If you’re interesting in becoming a Power-user due to higher frequencies of importing large data-sets, contact the
Intelligence Training team for more information as specific training is required due to the additional levels of functionality involved.
Act
Information
of
Freedom
the
under
OFFICIAL
Palantir User Guide – Uploading a Structured Document (20/144783)
Page
19 of
25
Released
OFFICIAL
Saving a Mapping File (PIM File) and Importing
(Cth)
You have the option while mapping a structured document to save this mapping process for future documents of the same structure, which can be useful if
you frequently upload similar documents. This allows you to open your pre-mapping file on the next import and use this to automatically map all objects
and links with a few simple clicks. The mapping file is referred to as a PIM (Palantir Import Mapping) file.
1982
1. Click the ‘
Save & Import’ button. You will then need to confirm again by clicking ‘Save’ in a pop-up window.
a. If you do not wish to save your mapping, you can click ‘Import’ to bypass saving the PIM file.
Act
s 37(2)(b), s 47(1)(b), s 47E(d)
Information
of
Freedom
the
under
OFFICIAL
Palantir User Guide – Uploading a Structured Document (20/144783)
Page
20 of
25
Released
OFFICIAL
2. You have the option to save the PIM file to your
computer (H:drive) or
Palantir. Saving to Palantir allows users to search for your PIM file when
(Cth)
importing a spreadsheet. However, if you do not want it public you can save the PIM file to your computer and share within your team via email. In this
instance, we will save the PIM file to our computer.
3. Chose a location on your computer, name the PIM file and click ‘Save’ to finish the process.
1982
s 37(2)(b), s 47(1)(b), s 47E(d)
Act
Information
of
Freedom
the
under
OFFICIAL
Palantir User Guide – Uploading a Structured Document (20/144783)
Page
21 of
25
Released
OFFICIAL
4. When next importing a spreadsheet with the same structure you can select to use existing mapping by clicking on ‘
Choose Preexisting Mappings’
(Cth)
s 37(2)(b), s 47(1)(b), s 47E(d)
1982
Act
Information
of
Freedom
the
under
OFFICIAL
Palantir User Guide – Uploading a Structured Document (20/144783)
Page
22 of
25
Released
OFFICIAL
5. Here you can select from publicly uploaded PIM files saved to Palantir or upload a PIM file from your computer. In this instance, select ‘
Choose a PIM
(Cth)
from your hard drive’ and select the file
6. Once you have selected the PIM file, click on ‘
Open’ and then ‘Next’ to proceed to the import process as seen at the beginning of
step 4.
s 37(2)(b), s 47(1)(b), s 47E(d), s 47F(1)
1982
Act
Information
of
Freedom
the
under
OFFICIAL
Palantir User Guide – Uploading a Structured Document (20/144783)
Page
23 of
25
Released
OFFICIAL
Loading Objects to the Graph
(Cth)
Once you have finished the import your objects will be loaded to the graph application (as seen below). Here you can resolve any duplicate objects, open
and edit any objects in the browser application, and use other applications/helpers to conduct analysis.
s 37(2)(b), s 47(1)(b), s 47E(d)
1982
Act
Information
of
Freedom
• By default, after importing a structure document the objects will load in a ‘
grid layout’. This can be messy or difficult to interpret. The above
arrangement of objects is the ‘
hierarchical layout’. Alternatively, pressing ‘
F5’ on your keyboard while all the objects are selected will rearrange all
objects to avoid link and entity crossovers.
the
under
OFFICIAL
Palantir User Guide – Uploading a Structured Document (20/144783)
Page
24 of
25
Released
OFFICIAL
(Cth)
1982
Act
Information
End of Docum
of
ent
Freedom
the
under
OFFICIAL
Palantir User Guide – Uploading a Structured Document (20/144783)
Page
25 of
25
Released
(Cth)
1982
Act
Information
of
Freedom
the
under
Released
OFFICIAL
Frequently Asked Questions (FAQs)
(Cth)
What is tagging?
s 37(2)(b), s 47E(d)
1982
Act
Why tag or create the object?
s 37(2)(b), s 47E(d)
Information
How can I tag the document?
of
Two methods are available to add and tag a document:
1)
Import the document by dragging and dropping from your file directory
2)
Use the import wizard to tag a document
Can I tag a PDF, HTML page or spreadsheet?
Freedom
• Yes, you can tag a .pdf, .html page and a spreadsheet
• Typically, a spreadsheet would not need to be tagged by the following method, as objects are created using various mappings which exist to ingest
the
excel data
What happens when I receive a document from an external agency?
• If you source a document from an external agency you must contact that agency and receive permission to upload that document to the ACIC
under
Palantir database.
OFFICIAL
Palantir User Guide – Uploading an Unstructured Document (20/102230)
Page
2 of
23
Released
OFFICIAL
Step 1: Naming a Document
(Cth)
It’s important to correctly name a document prior to importing into Palantir. Doing so provides identifiable information and the source file
1. Save your document to your
H:drive
1982
2. Ensure the document contains the
source file reference number in the title
e.g. TRIM reference (if dragging from CM9 (TRIM) into Palantir, rename the
document via the ‘Properties’ option)
3. Other information in the title should allow the reader to identify the primary contents of that document. For example, include the date the document
Act
was received/created, the information source type and any objects of importance (refer to your section/team guidelines and/or advice from colleagues)
For example:
20/12345 Information Report – Bart Simpson Travel Movements – July 2020
In the below image, the documents source file can be easily identified in the ‘History’ section of the browser application after the initial upload:
s 37(2)(b), s 47(1)(b), s 47E(d)
Information
of
Freedom
the
under
OFFICIAL
Palantir User Guide – Uploading an Unstructured Document (20/102230)
Page
3 of
23
Released
OFFICIAL
Step 2: Open the Data Import Window
(Cth)
1. Select the document you wish to upload to Palantir from CM9 (TRIM), save the document to your H:drive, such as the ‘
My Documents’ folder.
2. Open Palantir and click on ‘Investigation’, then ‘Data Import (Ctrl+I)’
1982
s 37(2)(b), s 47(1)(b), s 47E(d)
Act
Information
of
Freedom
the
Please note: You can drag and drop a document directly from your H:drive or CM9 into the graph application to start the import wizard. Both this method
and the above will result in opening the Data Import wizard.
under
OFFICIAL
Palantir User Guide – Uploading an Unstructured Document (20/102230)
Page
4 of
23
Released
OFFICIAL
Step 3: Select Data Source
(Cth)
1. Click on the ‘
Add File’ button and select the file from your H:drive, OR you can drag and drop the file from the local directory into the empty space to
the right of the ‘Add File’ button. The file will be ticked by default and ready for upload
a. You can import multiple files at the same time
1982
b. Untick any file that you don’t want to import using the checkbox next to each file, as seen below
s 37(2)(b), s 47(1)(b), s 47E(d)
Act
Information
of
Freedom
the
under
OFFICIAL
Palantir User Guide – Uploading an Unstructured Document (20/102230)
Page
5 of
23
Released
OFFICIAL
Mapping Exception
(Cth)
Please note
: Step 2 in the data import is not required when uploading a word document. This step only appears selectable if a spreadsheet is uploaded.
Otherwise you will be taken directly to step 3 (final step) of the data import
1982
• See
Palantir User Guide – Uploading a Structured Document (20/144783) to learn how to upload spreadsheets (.xlsx and .csv files) and create
mappings from these files
Act
Information
of
Freedom
the
under
OFFICIAL
Palantir User Guide – Uploading an Unstructured Document (20/102230)
Page
6 of
23
Released
OFFICIAL
Step 4: Review the Data Import
(Cth)
1. You will now see the number of files to be imported and the total size of your file(s)
2. You can
edit/set permissions of the data import. Please note, unless absolutely necessary you should leave this as set to ‘everyone’ (the default setting)
as it enhances the agency’s discovery capabilities
1982
3. Click the ‘
Import’ button to finalise the import process and load the document to your graph.
Act
s 37(2)(b), s 47(1)(b), s 47E(d)
Information
of
Freedom
the
under
OFFICIAL
Palantir User Guide – Uploading an Unstructured Document (20/102230)
Page
7 of
23
Released
OFFICIAL
Step 5: Adding the Document to the Graph
(Cth)
1. After the upload is completed, you will be asked if you want to
load the document as an object to the graph.
2. Click ‘
Yes’ and the object will automatically load into the graph, as seen below
1982
s 37(2)(b), s 47(1)(b), s 47E(d)
Act
Information
of
Freedom
the
under
OFFICIAL
Palantir User Guide – Uploading an Unstructured Document (20/102230)
Page
8 of
23
Released
OFFICIAL
Step 6: Viewing the Document in the Browser
(Cth)
1. To view the document in the new Browser, double-click on the object or drag-and-drop the object directly over the browser application
a. If using Palantir Staging, you may want to open the object in the ‘
Old Browser’ application as this is the current version on Palantir Production
and will be more familiar to you
1982
s 37(2)(b), s 47(1)(b), s 47E(d)
Act
Information
of
Freedom
the
under
OFFICIAL
Palantir User Guide – Uploading an Unstructured Document (20/102230)
Page
9 of
23
Released
OFFICIAL
2. To view the document in the Old Browser, simply drag and drop the document from the Graph onto the Old Browser tab in the Palantir application bar
(Cth)
s 37(2)(b), s 47(1)(b), s 47E(d)
1982
Act
Information
of
Freedom
the
under
OFFICIAL
Palantir User Guide – Uploading an Unstructured Document (20/102230)
Page
10 of
23
Released
OFFICIAL
3. When viewing the document in the Old Browser, to see the pdf, text or html version of the document select the
‘Notes & Media’ tab (the
‘Media’ tab in
(Cth)
the new Browser). This also shows images inside the document which may be selected and used as a mugshot.
Please note: To see how the document would appear if printed, including all text, logo’s and pictures, it is best to open the source file as imports do not
always transfer seamlessly to Palantir
1982
s 37(2)(b), s 47(1)(b), s 47E(d)
Act
Information
of
Freedom
the
under
OFFICIAL
Palantir User Guide – Uploading an Unstructured Document (20/102230)
Page
11 of
23
Released
OFFICIAL
Step 7: Tagging the Document in the Browser
(Cth)
1. To begin tagging the document, select the ‘Document’ tab in the New/Old Browser application
s 37(2)(b), s 47(1)(b), s 47E(d)
1982
Act
Information
of
Freedom
the
under
OFFICIAL
Palantir User Guide – Uploading an Unstructured Document (20/102230)
Page
12 of
23
Released
OFFICIAL
2. Highlight the word or series of words you wish to tag, then press ‘
T’ on your keyboard or right-click and select ‘
Tag’. The Tag wizard will load and search
(Cth)
for a match on the selected object
a. You can choose an existing entity if the details match your target to prevent duplicates from being created (recommended), or if that person
does not exist, simply create a new entity
s 37(2)(b), s 47(1)(b), s 47E(d)
1982
Act
Information
of
Freedom
the
under
OFFICIAL
Palantir User Guide – Uploading an Unstructured Document (20/102230)
Page
13 of
23
Released
OFFICIAL
Step 8: Creating Properties of an Object
(Cth)
1. After creating an Object, add the type of object and its properties. For a person, the
object type is ‘person’ and the default
property is the ‘
person
name’. The value of the property is their name, e.g. Fred FLINSTONE
2.
1982
Select the ‘
Tag’ button to complete the process. Once completed, the person’s name will be hyperlinked in the text, as seen in the below images
s 37(2)(b), s 47(1)(b), s 47E(d)
Act
Information
of
Freedom
the
under
OFFICIAL
Palantir User Guide – Uploading an Unstructured Document (20/102230)
Page
14 of
23
Released
OFFICIAL
3. It is important to include other properties of the person, such as their date of birth
(Cth)
a. To add the date of birth from the document to the hyperlinked person,
highlight the date of birth and drag and drop it over the person’s name
b. Type in the words ‘
date of birth’ or ‘DOB’ to find the exact property type.
c. Click ‘
Tag’ to finish and save
d. Repeat these steps to add additional properties such as the person’s ‘
gender’
1982
s 37(2)(b), s 47(1)(b), s 47E(d)
Act
Information
of
Freedom
the
under
OFFICIAL
Palantir User Guide – Uploading an Unstructured Document (20/102230)
Page
15 of
23
Released
OFFICIAL
4. To create an organisation entity, highlight the text in the document and ‘
Tag’ the new object as a ‘
commercial organization’ (Cth)
a. After highlighting the text in the document start typing ‘commercial organization’ to find the correct object
b. Once the organization is created, the location can be added as a property by the same drag and drop process seen in point 3 above
c. Simply follow the steps as seen in points 1, 2 and 3 above to create various types of objects and the corresponding properties
1982
s 37(2)(b), s 47(1)(b), s 47E(d)
Act
Information
of
Freedom
the
under
OFFICIAL
Palantir User Guide – Uploading an Unstructured Document (20/102230)
Page
16 of
23
Released
OFFICIAL
5. Adding properties to the actual document can assist with locating the document in the database and finding the source file. To do this, open the
(Cth)
document in the Browser and locate the ‘
Properties’ tab and navigate to the “
Search for properties” bar and start typing or select from the drop down.
a. Adding the date that the document was uploaded to Palantir will allow users to search results by date uploaded
b. Adding a property field titled “
Source” and including the CM9 (TRIM) number or serial number from where the document was received will
allow analysts to reference their findings easily
1982
s 37(2)(b), s 47(1)(b), s 47E(d)
Act
Information
of
Freedom
the
under
OFFICIAL
Palantir User Guide – Uploading an Unstructured Document (20/102230)
Page
17 of
23
Released
OFFICIAL
Step 9: Linking Objects
(Cth)
You can link objects via the drag and drop process within the document after you have tagged and created some entities.
1. To link
Fred FLINSTONE to the
Slate Rock and Gravel Company, drag one onto the other by holding the left-click button.
1982
2. Once you have dropped one object on the other the options to ‘
Link or Resolve’ appear, click ‘
Add Link’ to proceed to the link linking option
s 37(2)(b), s 47(1)(b), s 47E(d)
Act
Information
of
Freedom
the
under
OFFICIAL
Palantir User Guide – Uploading an Unstructured Document (20/102230)
Page
18 of
23
Released
OFFICIAL
3. After clicking ‘
Add Link’ you will need to enter a
link type and the description
(Cth)
a. In this instance, we know it’s the location Fred FLINTSTONE leases a vault, so the link type can be ‘
Associated with’ b. Label the description in the optional field as ‘
Leases a vault’ to provide more context surrounding the association type
4. Click on ‘
Save’ to add the link. This will now also link the two objects/entities on the Graph application
s 37(2)(b), s 47(1)(b), s 47E(d)
1982
Act
Information
of
Freedom
the
under
OFFICIAL
Palantir User Guide – Uploading an Unstructured Document (20/102230)
Page
19 of
23
Released
OFFICIAL
5. As you progress with tagging, the objects can be seen appearing on the Graph application, as seen below
(Cth)
s 37(2)(b), s 47(1)(b), s 47E(d)
1982
Act
Information
of
Freedom
the
under
OFFICIAL
Palantir User Guide – Uploading an Unstructured Document (20/102230)
Page
20 of
23
Released
OFFICIAL
As you identify associations, continue to tag and link these objects to provide further insight into the criminal nature of these objects
(Cth)
6. In this instance, I have created a tag for a ‘
telecommunication service’ and linked this to
Fred FLINSTONE (drag and drop method)
7. I have labelled the link as ‘
Subscriber of’ as
Fred FLINSTONE is the primary subscriber registered to this phone service
s 37(2)(b), s 47(1)(b), s 47E(d)
1982
Act
Information
of
Freedom
the
under
OFFICIAL
Palantir User Guide – Uploading an Unstructured Document (20/102230)
Page
21 of
23
Released
OFFICIAL
Once you have finished tagging and linking objects in the document, the Graph application can be used to assist in analysing the data, see below
(Cth)
Please note: To remove tags, right click on the object and select ‘Remove just this tag’
s 37(2)(b), s 47(1)(b), s 47E(d)
1982
Act
Information
of
Freedom
the
under
OFFICIAL
Palantir User Guide – Uploading an Unstructured Document (20/102230)
Page
22 of
23
Released
OFFICIAL
Training Exercise
(Cth)
Objective: You have been tasked to upload an Information Report to Palantir using the SOP above as a guide.
1. Open Palantir Staging to commence the exercise
1982
2. Open CM9 and use the sample document 15/41731
3. Upload the document, create the objects and the associated properties of those objects
4. Tag and link the objects
Act
5. Produce a graph of your results
Information
of
End of Document
Freedom
the
under
OFFICIAL
Palantir User Guide – Uploading an Unstructured Document (20/102230)
Page
23 of
23
Released
(Cth)
1982
Act
Information
of
Freedom
the
under
Released
OFFICIAL
Frequently Asked Questions (FAQs)
(Cth)
What is the Collaboration application?
• This is the process of sharing objects in Palantir with another user or group of users
1982
• You can share any object(s) on your graph, such as a person or telecommunication service and the associated network
• Messages sent through collaboration will prompt the receiving user/team with a notification
Act
Why would I use the Collaboration application?
• To create an ongoing personal or team discussion space to easily share objects and investigations with colleagues without the use of separate
emails
• To send the objects or complete charts you have created directly to another user or team, enabling them to add further details or pursue another
direction of analysis
How does this application work?
Information
• The Collaboration application can be enabled from the Palantir toolbar and is used to send personal and team messages
of
• You can select individual or multiple recipients and customise your message
• You can create a team and invite others, or request to join an existing team
• You can attach objects to your message, or share a chart currently on your graph or search for shared charts in the database
• You
must publish your objects or chart in order to share these. If these exist only within your personal investigation you must first publish them to
share with other users.
Freedom
the
under
OFFICIAL
Palantir User Guide – Using the Collaboration Application (20/156309)
Page
2 of
18
Released
OFFICIAL
Step 1: Enabling the Collaboration Application
(Cth)
If this is your first time using Palantir (or the Collaboration application) you will firstly need to enable the application from the Palantir Workspace toolbar
1. Locate the ‘
Applications’ toolbar located at the top of Palantir Workspace
1982
2. Click on ‘
Collaboration’ to enable the application
3. Once you enable the Collaboration application for the first time, this will remain enabled and can be accessed from the applications bar
s 37(2)(b), s 47(1)(b), s 47E(d)
Act
Information
of
Freedom
the
under
OFFICIAL
Palantir User Guide – Using the Collaboration Application (20/156309)
Page
3 of
18
Released
OFFICIAL
Step 2: Updating Your Collaboration Profile
(Cth)
Once you have enabled the Collaboration application, you can view and update your unique profile
1. Once in the Collaboration application, click on your
account icon or
name to the top-left of the screen
1982
2. Once here you can update some of your account information, such as profile photos, colours etc.
s 47(1)(b), s 47F(1)
Act
Information
of
Freedom
the
under
OFFICIAL
Palantir User Guide – Using the Collaboration Application (20/156309)
Page
4 of
18
Released
OFFICIAL
Step 3: Sending a Message in the Collaboration Application
(Cth)
From the Collaboration application you can send direct messages to individual users and/or teams to share your objects or charts.
Sending a Personal Message
1982
1. Click on the ‘
Personal Message’ tab to the left-hand side of the Collaboration application.
2. Type your personal message in the first free text field. You can have up to 1000 characters (word count is located below the free text field)
Act
3. Select a recipient(s) by typing their name or user ID in the second free text field. Their name will automatically generate
4. Click ‘
Share’ to send your message
s 37(2)(b), s 47(1)(b), s 47E(d), s 47F(1)
Information
of
Freedom
the
under
OFFICIAL
Palantir User Guide – Using the Collaboration Application (20/156309)
Page
5 of
18
Released
OFFICIAL
Sending a Team Message
(Cth)
1. Click on the ‘
Teams’ tab to the left-hand side of the Collaboration application
a. Any teams you manage or are a member of can be accessed directly below the ‘Teams’ tab
2. Type your team message in the first free text field. You can have up to 1000 characters (word count is located below the free text field)
1982
3. Select the team(s) by typing the team name in the second free text field. Individuals can also be included in team messages. Team names (
blue in
colour) and individual names (
grey in colour) will automatically generate
Act
4. Click ‘
Share’ to send your message
s 37(2)(b), s 47(1)(b), s 47E(d), s 47F(1)
Information
of
Freedom
the
under
OFFICIAL
Palantir User Guide – Using the Collaboration Application (20/156309)
Page
6 of
18
Released
OFFICIAL
Step 4: Message Attachments
(Cth)
You can share some or all of your objects on a graph, or share an entire chart from your graph through the Collaboration application. Alternatively, there’s
the option to share a chart directly from the Graph application (covered in
Step 5: Sharing a Graph from Your Investigation)
1982
Attaching an Object to your Message
1. Click on the ‘
Objects’ button in the first free text field while writing a personal or team message
Act
2. A new field will appear directly below that free text field, allowing you to drag and drop objects to attach them to the message
s 37(2)(b), s 47(1)(b), s 47E(d), s 47F(1)
Information
of
Freedom
the
under
OFFICIAL
Palantir User Guide – Using the Collaboration Application (20/156309)
Page
7 of
18
Released
OFFICIAL
(Cth)
3. Navigate to your chart and select the object you wish to attach to your message by left-clicking (and holding)
4. Drag that object up to the Collaboration application icon on the application toolbar
s 37(2)(b), s 47(1)(b), s 47E(d)
1982
Act
Information
of
Freedom
the
under
OFFICIAL
Palantir User Guide – Using the Collaboration Application (20/156309)
Page
8 of
18
Released
OFFICIAL
5. Following the above process your screen will then change to the Collaboration application, drag that object to the designated attachment bar as seen
(Cth)
below
6. After dropping that object on the attachment bar it will now be attached to the message and can be shared. Continue this process if you need to attach
further objects (note that you can select multiple objects simultaneously by using the ‘
Ctrl + left-click’ method) 1982
s 37(2)(b), s 47(1)(b), s 47E(d), s 47F(1)
Act
Information
of
Freedom
the
under
OFFICIAL
Palantir User Guide – Using the Collaboration Application (20/156309)
Page
9 of
18
Released
OFFICIAL
Attaching a Graph to your Message
(Cth)
1. Click on the ‘
Graph’ button in the first free text field while writing a personal or team message
2. You can select to either find and existing graph shared previously in Palantir, or to publish and share what is currently on your graph
s 37(2)(b), s 47(1)(b), s 47E(d), s 47F(1)
1982
Act
Information
of
Freedom
the
under
OFFICIAL
Palantir User Guide – Using the Collaboration Application (20/156309)
Page
10 of
18
Released
OFFICIAL
3. If you choose to share an existing graph within Palantir (‘
Find Existing Graph to Share’), you can search by the title of that graph (
if known), or search by
(Cth)
a publisher by clicking on the ‘
More options’. Results will generate to the left hand side in date order (newest to oldest)
a. In this example I located the complete Bart SIMPSON graph from one of my previous investigations that I shared with a training group
4. Once you are happy with your selection, click the ‘
Select’ button to attach this graph to your message
1982
s 37(2)(b), s 47(1)(b), s 47E(d), s 47F(1)
Act
Information
of
Freedom
the
under
OFFICIAL
Palantir User Guide – Using the Collaboration Application (20/156309)
Page
11 of
18
Released
OFFICIAL
5. If you choose to publish and share your current graph (‘
Publish and Share Current Graph’), you simply include any individuals/teams in the first field
(Cth)
followed by including a message (optional)
s 37(2)(b), s 47(1)(b), s 47E(d), s 47F(1)
1982
Act
Information
of
Freedom
the
under
OFFICIAL
Palantir User Guide – Using the Collaboration Application (20/156309)
Page
12 of
18
Released
OFFICIAL
6. Select the ‘
Use Templates’ header to update the security attached to this graph prior to sharing
(Cth)
7. Use the drop-down arrow to expand the various security selections for the graph (by default this will be ‘
Current Investigation Security’)
8. Click ‘
Next’ to proceed once happy with the graph settings and security
s 37(2)(b), s 47(1)(b), s 47E(d), s 47F(1)
1982
Act
Information
of
Freedom
the
under
OFFICIAL
Palantir User Guide – Using the Collaboration Application (20/156309)
Page
13 of
18
Released
OFFICIAL
(Cth)
9. Enter a
graph name for your new graph along with the
graph description (
optional)
10. Click the ‘
Share Graph’ button once you’re ready to send the message and attachment to the recipients
s 37(2)(b), s 47(1)(b), s 47E(d), s 47F(1)
1982
Act
Information
of
Freedom
the
under
OFFICIAL
Palantir User Guide – Using the Collaboration Application (20/156309)
Page
14 of
18
Released
OFFICIAL
Step 5: Sharing a Graph from Your Investigation
(Cth)
1. Navigate to the
Graph application using the application toolbar
2. Once you have a chart loaded to the graph application, click on the ‘
Share Graph’ button (
indicated by the ‘up arrow’)
1982
s 37(2)(b), s 47(1)(b), s 47E(d)
Act
Information
of
Freedom
the
under
Please note: Follow the process in
Step 4: Message Attachments – Attaching a Graph to your Message for the proceeding steps involved
OFFICIAL
Palantir User Guide – Using the Collaboration Application (20/156309)
Page
15 of
18
Released
OFFICIAL
Step 6: Opening a Attachments from a Message
(Cth)
1. To open an object or graph from a personal or team message, click on the message hyperlink or image attachment
s 37(2)(b), s 47(1)(b), s 47E(d), s 47F(1)
1982
Act
Information
of
Freedom
the
under
OFFICIAL
Palantir User Guide – Using the Collaboration Application (20/156309)
Page
16 of
18
Released
OFFICIAL
2. You can select to ‘
Add to Graph’
or ‘
Open In New Investigation’
(Cth)
s 37(2)(b), s 47(1)(b), s 47E(d), s 47F(1)
1982
Act
Information
of
Freedom
the
under
OFFICIAL
Palantir User Guide – Using the Collaboration Application (20/156309)
Page
17 of
18
Released
OFFICIAL
(Cth)
1982
Act
End of Document
Information
of
Freedom
the
under
OFFICIAL
Palantir User Guide – Using the Collaboration Application (20/156309)
Page
18 of
18
Released
Document 21
PROTECTED
s 37(2)
Contains LII
(b), s
Set up 47E(d)
export
s 37(2)(b), s
47E(d)
1. Select your warrant in
2. Highlight the rows you want to export
3. Select Investigator’s Report
s 37(2)(b), s 47(1)(b), s 47E(d)
(Cth)
a. At the View tab at the top select “Field Order”. Ensure every option aside from
“notes” is on the right hand side
1982
s 37(2)(b), s 47(1)(b), s 47E(d)
Act
Information
of
b. At the View tab at the top select “CAD/IRI Field Order”. Ensure only the following are
on the right hand side.
Freedom
s 37(2)(b), s 47(1)(b), s 47E(d)
the
under
Released
PROTECTED
Contains LII
TRIM 20/12540
PROTECTED
Contains LII
4. Select export (blue circle) and save the report to you documents. My preference is to name
the file with the warrant number, then the date and time the data was exported.
s 37(2)(b), s 47(1)(b), s 47E(d)
(Cth)
1982
Act
Information
of
Freedom
the
under
Released
PROTECTED
Contains LII
TRIM 20/12540
 OFFICIAL
Document 22
Palantir Search Syntax for Full Text Document Search
(Cth)
The default search is a PHRASE - so if you type in a series of words they are searched for as a
phrase.
Eg, if you search for John Smith, you wil find all documents where the phrase John Smith in that
1982
exact order (with no words in between) appears.
Act
Boolean Operators
These operators are used to find the existence of terms within a document in relation to other
terms.
AND The documents retrieved must contain both the words/phrases you have typed. The terms
can appear anywhere in the document unless modified by additional operators.
OR The document must contain at least one of the entered words or phrases. Both terms may be
Information
present.
of
NOT The retrieved documents must contain the first term and must not contain the second, no
matter where else it appears in the document.
XOR The documents must contain either the first search term or the second but not both terms.
EXCEPT The retrieved documents must contain the first search term but only if the second term
is not in the same paragraph as the first. Both terms can appear in the document but they cannot
Freedom
appear within the same paragraph.
BUTNOT The BUTNOT operator is an even more precise form of EXCEPT. The document must
the
contain the first term and must not contain the second term immediately fol owing the first. For
example, the query "WORLD BUTNOT WORLD BANK" wil find documents that contain the word
"WORLD" and which may or may not contain "BANK" but wil not find "WORLD BANK" where it
appears as a phrase.
under
Positional Operators
These operators specify the location of each of your search terms in relation to each other within
a document.
PHRASE To find words which occur next to each other as a phrase just type the words as you
Released
would normal y. In this search syntax there is no need to enclose phrases in quotes.
FAR FOLLOW ... The retrieved documents must contain both terms and the second term must
fol ow the appearance of the first. The second term can be anywhere in the document as long as
it occurs after the first.
OFFICIAL
Australian Criminal Intelligence Commission
Page
1 of
5
OFFICIAL
CLOSE FOLLOW .. The retrieved documents must contain both search terms occurring in pairs.
That is, the second term must immediately fol ow the first if a document is to be retrieved,
without a repeated occurrence of the first term. If the first term occurs multiple times before the
second term then it is the inner-most pair which is selected.
IN The retrieved documents must contain the first term in a paragraph beginning with the
second.
LABEL Retrieved documents must contain a paragraph beginning with the specified search term.
IN PARAS \\ Both search terms must occur within the specified number of paragraphs of each (Cth)
other. Placing a number between the lines indicates the number of paragraphs separating each
term.
•
No number between the \\ means the paragraphs must be consecutive (eg. Kevin \\ Jeffery).
1982
•
Single number (e.g. \5\). Search terms must occur within 5 paragraphs of each other.
•
Number separated by comma (e.g. \5,10\). The second search term must appear within 5 to 10
Act
paragraphs of the first.
•
Negative numbers (e.g. -5, +10) indicate the paragraphs may begin before the appearance of the
term. That is, the second term may appear up to 5 paragraphs before and up to 10 after the first.
NEAR BY // Both search terms must appear within the same paragraph. The order of appearance
within the paragraph is not relevant. Placing a number between the lines indicates the number of
words separating phrases.
Single number (e.g. /5/) (this can also be written as W/5). The two search terms must appear
Information
within five words of each other. Order of appearance is not relevant.
of
Number separated by comma (e.g. /5,10/). The search terms must appear in no fewer than 5
words and no more than 10 words of each other.
Negative numbers (e.g. /-5, +10/). The search terms may appear from 5 words before to 10
words after each other.
Precedence of operators and use of brackets
Freedom
With queries which use more than one search term certain words and operators take precedence
over others. Some operators wil always be read before others, regardless of where they occur in
the
your query. The order of precedence is as fol ows:
1. Phrases
2. //, LABEL, IN, EXCEPT, TO, BEFORE, AFTER
3. \\
under
4. ... , .. , AND, OR NOT
Where a query expression, or part thereof, contains several operators of the same precedence,
they wil be processed from left to right.
Use of brackets
Brackets allow you to control and define the order of precedence in complex queries as
Released
their use overrides the default searching order. They are not necessary in searches of two terms.
However, when using queries with three or more terms parentheses can be invaluable in ensuring
it does exactly what you want it to.
Examples: car allowance // manager OR salesperson
Using ISYS Query's default sequence, this wil be interpreted as fol ows:
OFFICIAL
Australian Criminal Intelligence Commission
Page
2 of
5
OFFICIAL
((car allowance) // manager) OR salesperson
...which means that documents need only to contain the word "salesperson" to be included with
the more detailed search of "car allowance in the same paragraph as manager".
To change the query to "find the phrase car allowance in the same paragraph as manager or
salesperson", use the fol owing search:
car allowance // (manager OR salesperson)
Range Searching
When searching for numerical values within an index these operators allow you to specify a range
(Cth)
values within which to search.
TO Specifies an alphabetic, numeric or date range to be searched.
For example: A123 TO A456 ...wil find "A123, A124, A125" ... and so on to "A456".
1982
Note: for the
TO operator to be used for dates the Intelligent Date Handling options must be
Act
selected for the index.
GE Search for a numeric range greater than or equal to the specified value.
For example: GE 1000 ...wil find "1000, 1001, 1002, 1003 ... 59001"
LE Search for a numeric range less than or equal to the specified value.
For example: LE 1000 ...wil find "1000, 999, 998, 997 ... -59001"
For increased accuracy when searching for numeric values select the Intelligent Nu
Information mber Handling
option when creating your index.
of
Date Searching
Dates may be used as a search term if Intelligent Date Handling has been selected.
With Intelligent Date Handling set dates within your index wil be found regardless of the way in
which they are expressed in the documents.
Freedom
For example "February 10 2001", "2/10/01" and "Saturday, February 10, 2001" are all read as the
same thing by ISYS.
the
Relative or implied dates such as "March this year" or "two weeks from next Thursday" are not
supported.
Date searching operators are:
AFTER Search for documents containing dates falling after a specific date.
under
BEFORE Search for documents containing dates falling before a specific date.
TO Search for a range between and including the specified dates.
Special Symbols
Certain symbols can be used in place of letters or characters in query words to help refine or
Released
expand a query. It wil replace the symbols with letters according to its built-in logic and run the
query on any resultant words. Using these symbols can save you having to think up and type al
the permutations of a word that you need to include in a query.
Note that using these word expansion systems can still only retrieve words that are listed in your
index.
OFFICIAL
Australian Criminal Intelligence Commission
Page
3 of
5
OFFICIAL
'
*' This is a wildcard symbol and can be used to search for any number of significant characters.
•
used at the end of a word - wil find al words that start with the letters appearing before the
symbol.
For example 'manage*' wil find 'management', 'manages', 'managed', 'manager', etc.
•
used at the middle of a word - wil find all words that begin and end with the specified letters.
e.g. 'd*ing' wil find 'dying', 'divorcing', 'dividing', 'droning', etc.
•
used at the beginning of a word - wil find all words that end with the specified letters. Note that
this option may significantly increase the search time required.
•
used alone - this wil select the first word in al documents; a way of providing a list of all the
(Cth)
documents in the index.
? This is a single-character wildcard symbol and can be used to search for any single character.
1982
For example, searching for "h?t" would match "hat" or "hit" but not "heat". Both forms of
wildcard may be used together in any combination desired, e.g."un*gra?ing". Act
~ Tense expansion. Asks ISYS to find all tense forms of the word specified.
Trailing expansion - Expands the tenses at the end of a word.
For example, 'posting~' wil find 'posted', 'posts', 'post' and 'poster', but not 'posture',
'postpone', etc.
Leading expansion - Expands the tenses at the beginning of a word.
For example, '~post' would also find 'outpost', 'prepost' and 'repost'.
By default ISYS automatically applies limited tense expansion to search terms.
Information
+ Toggle synonym expansion and thesaurus on or off. This symbol reverses the automatic
synonym expansion setting in the search page. By default synonym expansion is set to on.
of
Using this symbol in a query wil turn it off for the word to which it is applied.
If neither synonym expansion or the thesaurus are turned on in Options the + symbol wil turn
them both on for a given search term. If both are turned off in Options the + symbol wil turn
them both on. If only one option is active in Options the + symbol wil switch it off (and leave the
other option as it is) for a given search term.
Freedom
Punctuation and special words
Punctuation - punctuation in a qu
the ery is treated in one of three ways:
Significant - This means the punctuated search word or phrase will match only with words or
phrases containing matching punctuation characters.
Insignificant - it ignores the occurrence of specified punctuation in the text, meaning that a
search wil bring up match
under ing words and phrases whether punctuated or not.
Separators - Some punctuation marks wil not be recognized and wil be treated the same way as
spaces between words.
For example, 'over-charge' wil be indexed as two words - 'over' and 'charge'.
By default the period, or full stop, is a punctuation character and thus not indexed.
Reserved Words
Released
Reserved words are those used as operators. For example: AND, OR, NOT, LABEL and EXCEPT. If
you need to include a reserved word in a query precede the word with an insignificant character
such as an underscore (_). This is a signal to include the word as ordinary text in the search and
not as an operator.
OFFICIAL
Australian Criminal Intelligence Commission
Page
4 of
5
OFFICIAL
The // and \\ operators can be included in a search, if necessary, by enclosing them in quotes
(i.e."//" and "\\").
Common Words Common words are words such as I, THE, IT, IS and other words that frequently appear in many
documents but do not frequently have a significant meaning. They are excluded from searches in
order to save indexing space.
If your search includes a common word it wil remove it from the search and reconstruct the
search around the gap. For example, 'beside the road' becomes 'beside /2,2/ road' automatically.
Where the common word includes a Boolean or positional operator the word is ignored. For
(Cth)
example, 'manager and the' becomes simply 'manager'.
1982
Act
Information
of
Freedom
the
under
Released
OFFICIAL
Australian Criminal Intelligence Commission
Page
5 of
5

(Cth)
1982
Act
Information
of
Freedom
the
under
Released
s 37(2)(b), s 47(1)(b), s 47E(d)
(Cth)
1982
Act
Information
of
Freedom
the
under
Released
s 37(2)(b), s 47(1)(b), s 47E(d)
(Cth)
1982
Act
Information
of
Freedom
the
under
Released
Document 24
Palantir Boolean Operators
Palantir gives a user ability to conduct advance searches and apply Boolean Operators.
Wildcard Searches
ACC Search Assistant supports single and multiple character wildcard searches within single terms (not within phrase queries).
To perform a
single character wildcard search use the "
? " symbol.
The single character wildcard search looks for terms that match that with the single character replaced.
For example, to search for "text" or "test" you can use the search:
te?t
(Cth)
To perform a
multiple character wildcard search use the " * " symbol.
Multiple character wildcard searches looks for 0 or more characters.
For example, to search for test, tests or tester, you can use the search:
1982
test*
You can
also use the wildcard searches in the middle of a term:
Act
te*t
Note: You cannot use a * or ? symbol as the first character of a search.
Boolean Operators
ACC Search Assistant supports "AND", "+", "OR", "NOT" and "-" as Boolean operators (
Note: Boolean operators must be ALL CAPS).
AND
The AND operator matches documents where both terms exist anywhere in the text of a single document. The symbol & can be used in place of the word
AND.
Information
To search for documents that contain "grace bros" and "Myer" use the query:
"grace bros" AND "Myer"
of
+
The " + " or required operator requires that the term after the " + " symbol exist somewhere in a field of a single document.
To search for documents that must contain "grace" and may contain "myer" use the query:
+grace myer
OR
The OR operator is the default conjunction operator. This means that if there is no Boolean operator between two terms, the OR operator is used. The OR
Freedom
operator links two terms and finds a matching document if either of the terms exist in a document. A single space can be used in place of the word OR.
To search for documents that contain either "grace bros" or just "grace" use the query:
the
"grace bros" grace
or
"grace bros" OR grace
NOT
under
The NOT operator excludes documents that contain the term after NOT. The symbol
! can be used in place of the word NOT.
To search for documents that contain "grace bros" but not "Myer" use the query:
"grace bros" NOT "Myer"
Note: The NOT operator cannot be used with just one term. For example, the following search will return no results: NOT "Myer"
-
The " - " or prohibit operator excludes documents that contain the term after the " - " symbol.
Released
To search for documents that contain "grace bros" but not "Myer" use the query:
"grace bros" -"Myer"
Proximity Searches
This finds words within a specific distance from your terms. To do a proximity search use the tilde, "~", symbol at the end of a phrase.
For example to search for a "grace" and "bros" within 10 words of each other in a document use the search:
"grace bros"~10
Fuzzy Searches
This allows you to find words that sound similar. To do a fuzzy search use the tilde, "~", symbol at the end of a single word term.
For example to search for a term similar in spelling to "roam" use the fuzzy search:
roam~
This search will find terms like foam and roams.
Range Searches
Range Queries allow you to match documents whose field(s) values are between the lower and upper bound specified by the Range Query. Range
(Cth)
Queries can be inclusive or exclusive of the upper and lower bounds.
For example:
mod_date:[20110101 TO 20120101]
1982
This will find documents whose mod_date fields have values between 20110101 and 20120101, inclusive. Note that Range Queries are
reserved for
not
date fields. You could also use range queries with non-date fields:
title:{Aida TO Carmen}
Act
This will find all documents whose titles are between Aida and Carmen, but not including Aida and Carmen.
Inclusive range queries are denoted by square brackets [ ].
Exclusive range queries are denoted by curly brackets { }.
Fields
ACC Search Assistant supports fielded data. When performing a search you can either specify a field, or use the default field.
You can search any field by typing the field name followed by a colon "
:" and then the term you are looking for.
Information
As an example, let's assume the index contains two fields, title and text and text is the default field. If you want to find the document entitled "The Right
Way" which contains the text "don't go this way", you can enter:
of
title:"The Right Way" AND text:go
or
title:"Do it right" AND right
Since text is the default field, the field indicator is not required.
Note: The field is only valid for the term that it directly precedes, so the query:
Freedom
title:Do it right
will only find "Do" in the title field. It will find "it" and "right" in the default field (in this case the text field).
the
Field Grouping
ACC Search Assistant supports using parentheses to group multiple clauses to a single field.
To search for a title that contains both the word "return" and the phrase "pink panther" use the query:
under
title:(+return +"pink panther")
Boosting a Term
ACC Search Assistant provides the relevance level of matching documents based on the terms found. To boost a term use the caret, " ", symbol with a
^
boost factor (a number) at the end of the term you are searching. The higher the boost factor, the more relevant the term will be.
Boosting allows you to control the relevance of a document by boosting its term. For example, if you are searching for
grace bros and you want the term "grace" to be more relevant boost it using the ^ symbol along with the boost factor next to the term. You would type:
Released
grace^4 bros

(Cth)
1982
Act
Information
of
Freedom
the
under
Released


Document 26
Split your application into multiple screens
s 22(1)(a)(ii)
but what I
can show you is how to split out part of Palantir into another window so that you can look
at different things at once
Lets have a look at what you can do:
1. You have an investigation open and you want to have your link graph open in one window and your map open in another...
(Cth)
2. Click on the Graph button up in the applications bar to open your link graph.
3. Simply click and drag the Map button (from up in the applications bar) onto a blank part of your screen.
s 47(1)(b)
1982
4. A new Palantir window will open with the Map application in it.
Act
5. You can then have the windows next to each other so that you can drag and drop objects between them (see below).
s 37(2)(b), s 47(1)(b), s 47E(d)
Information
of
Freedom
the
under
Released
(Cth)
1982
Act
Information
of
Freedom
the
under
Released
(Cth)
1982
Act
Information
of
Freedom
the
under
Released
s 37(2)(b), s 47(1)(b), s 47E(d)
(Cth)
1982
Act
Information
of
Freedom
the
under
Released
Document 29
Palantir Cheat Sheet
Version current at 11/08/2017 until 02/12/2020 - 3:29pm
Searching
In Palantir you can search the Palantir base realm, which contains everyone’s published
investigations, and you can also search the ACC’s Fusion Data Holdings through the ACC (Cth)
Search Assistant application inside Palantir.
This information relates to the Palantir base realm search.
1982
•
Wildcards allow you to search when the information is ambiguous:
o
Substitute for 0 or more characters
Act
o
Substitute for 0 or 1 characters
o
Activates search for "sounds like"
•
Use
'AND' to find text that matches all search terms
•
Use
'OR' to find text that must match at least one of the search terms
•
Use
'NOT' to find text that must not match the following search term
Further information is available on the Palantir Quick Reference page.
Information
Use Helpers
of
There are lots of helper tools in Palantir. Some have been specifically built for ACC work-
flows.
•
From the main menu select
Helpers
•
Choose from the menu and the helper will appear in one of the margins of your
Freedom
investigation.
Use Multi-tag
the
•
Speed up tagging by multi tagging text for objects
•
When holding down Ctrl select text to be tagged
•
Follow the same steps as you would to tag an individual text item
under
•
Keep clicking next until all the tags have been completed
•
Once complete click finish
Tips
•
"Tag not type" - use tagging to link objects, entities, etc as it avoids duplication
Released
•
Import documents from Trim
•
Use Ctrl-Z to undo the last action
•
Drag items to the map
•
Drag items onto other items to link them (for example people onto organisations)
•
Use Ctrl-Shift to multi-link objects
•
Everything is saved as you go
•
Update regularly especially if you are working on team project, it will allow you to
access the latest information
Set Permissions on your Investigation
For example if you want to see NCTL objects your investigation needs to have the NCTL
permissions set.
•
Set your permissions on your investigation from
Investigations,
View/Edit
Permissions
(Cth)
•
Control access to your investigation but publish specific objects/information regularly
to allow other analysts to access useful information
1982
Resources (not sure if these will still link properly)
Act
Palantir workspace login
Palantir Confluence Home Page
s 22(1)(a)(ii)
Palantir Guides
ACC Workflow Guides
Information
of
Freedom
the
under
Released

Document 30
Automated CAD Importer
s 37(2)
What this means:
(b), s
47E(d)
To get CAD into Palantir correctly simply export your list from
and import it into Palantir – the
Automated CAD Importer will do the rest. The importer will add the warrant number to all of the data
objects, create calls/sms's/data/location updates, create the correct directions/flows and add the
times and locations to the calls.
What do I do?:
(Cth)
1. Go to s 37(2)(b), s
and export your CSV file (as per instructions below)
47E(d)
2. Name your CSV file to include warrant number and the line name (
do NOT open the file in Excel - it will corrupt the dates and phone numbers)
3. s 22(1)(a)(ii)
(using drag and drop or the import button). More information is available.
If you get a message similar to the one below during import:
1982
s 37(2)(b), s 47E(d)
Act
Information
of
then it means that the columns listed in the message are missing in your file, keep reading below on how to include them. When you get such a warning
message, click OK, then cancel your import, add the missing columns and try again.
On the import screen, make sure that the import file icon shows a person's head – otherwise the CAD importer is not engaged and you will need to check
your CSV as per below.
Freedom
s 22(1)(a)(ii)
And that's it – the data is then in Palantir,
analysis.
the
DETAILED INSTRUCTIONS RE THE s 37(2)(b), s
CSV FILES
47E(d)
s 37(2)(b), s 47E(d)
1) Open the Monitor Channels windows from
under
Released
s 37(2)(b), s 47(1)(b), s 47E(d)
(Cth)
1982
Act
s 37(2)(b), s 47E(d)
Information
of
s 37(2)(b), s 47(1)(b), s 47E(d)
Freedom
the
under
Released
5) The Field Order Window appears. Bring all fields across to the Shown column except Summary and Notes.
s 37(2)(b), s 47(1)(b), s 47E(d)
(Cth)
1982
Act
Information
6) In the View Tab also select CAD/IRI FIELD ORDER and bring all fields from Hidden into the Shown Window.
of
s 37(2)(b), s 47(1)(b), s 47E(d)
Freedom
the
under
Released
7) In the View Tab select Preferences from the drop down menu.
Make sure your selections are the same as below, including the "Export Calling and Called Numbers" option.
(Cth)
1982
Act
Information
of
Freedom
the
under
Released
Document 31
Bulk Match Results Importer Helper
This page describes how to use the Bulk Match Results Importer helper for Palantir.
The Advanced Analytics team have built a Palantir Helper that will allow you to import bulk matching results into Palantir.
Please note that only the
Advance Analytics team have the ability to conduct a Bulk Match. Please send an email to Advance Analytics for any Bulk Matching requests.
The bulk matching results need to be in the standard Excel format as received from the Advanced Analytics team.
1. Start Palantir and go to the Graph Application. From there open the Bulk Match Importer helper from the Helpers menu.
2. Click on the Select a File button and select your bu k matching results file, then click the Import button.
You should see the results rows displayed on screen. You may need to scroll to the right to see all the details. You can page up and page down as
required. If you don't see any results then it is likely that there is an issue with the format of the results spreadsheet. If this is the case then please
(Cth)
email the ACIC Service Desk who will then arrange for assistance to troubleshoot the spreadsheet form.
3. Select the rows you would l ke to import, right click, and select Add to Graph.
You'll see a document representation of the target and match result linked.
1982
s 37(2)(b), s 47(1)(b), s 47E(d)
Act
Information
of
Freedom
the
under
Released

(Cth)
1982
Act
Information
of
Freedom
the
under
Released
Q
Can I see how this all works in a pretty diagram?
s 37(2)(b), s 47(1)(b), s 47E(d)
(Cth)
1982
Act
Information
of
Freedom
the
under
Released

(Cth)
1982
Act
Information
of
Freedom
the
under
Released
(Cth)
1982
Act
Information
of
Freedom
the
under
Released
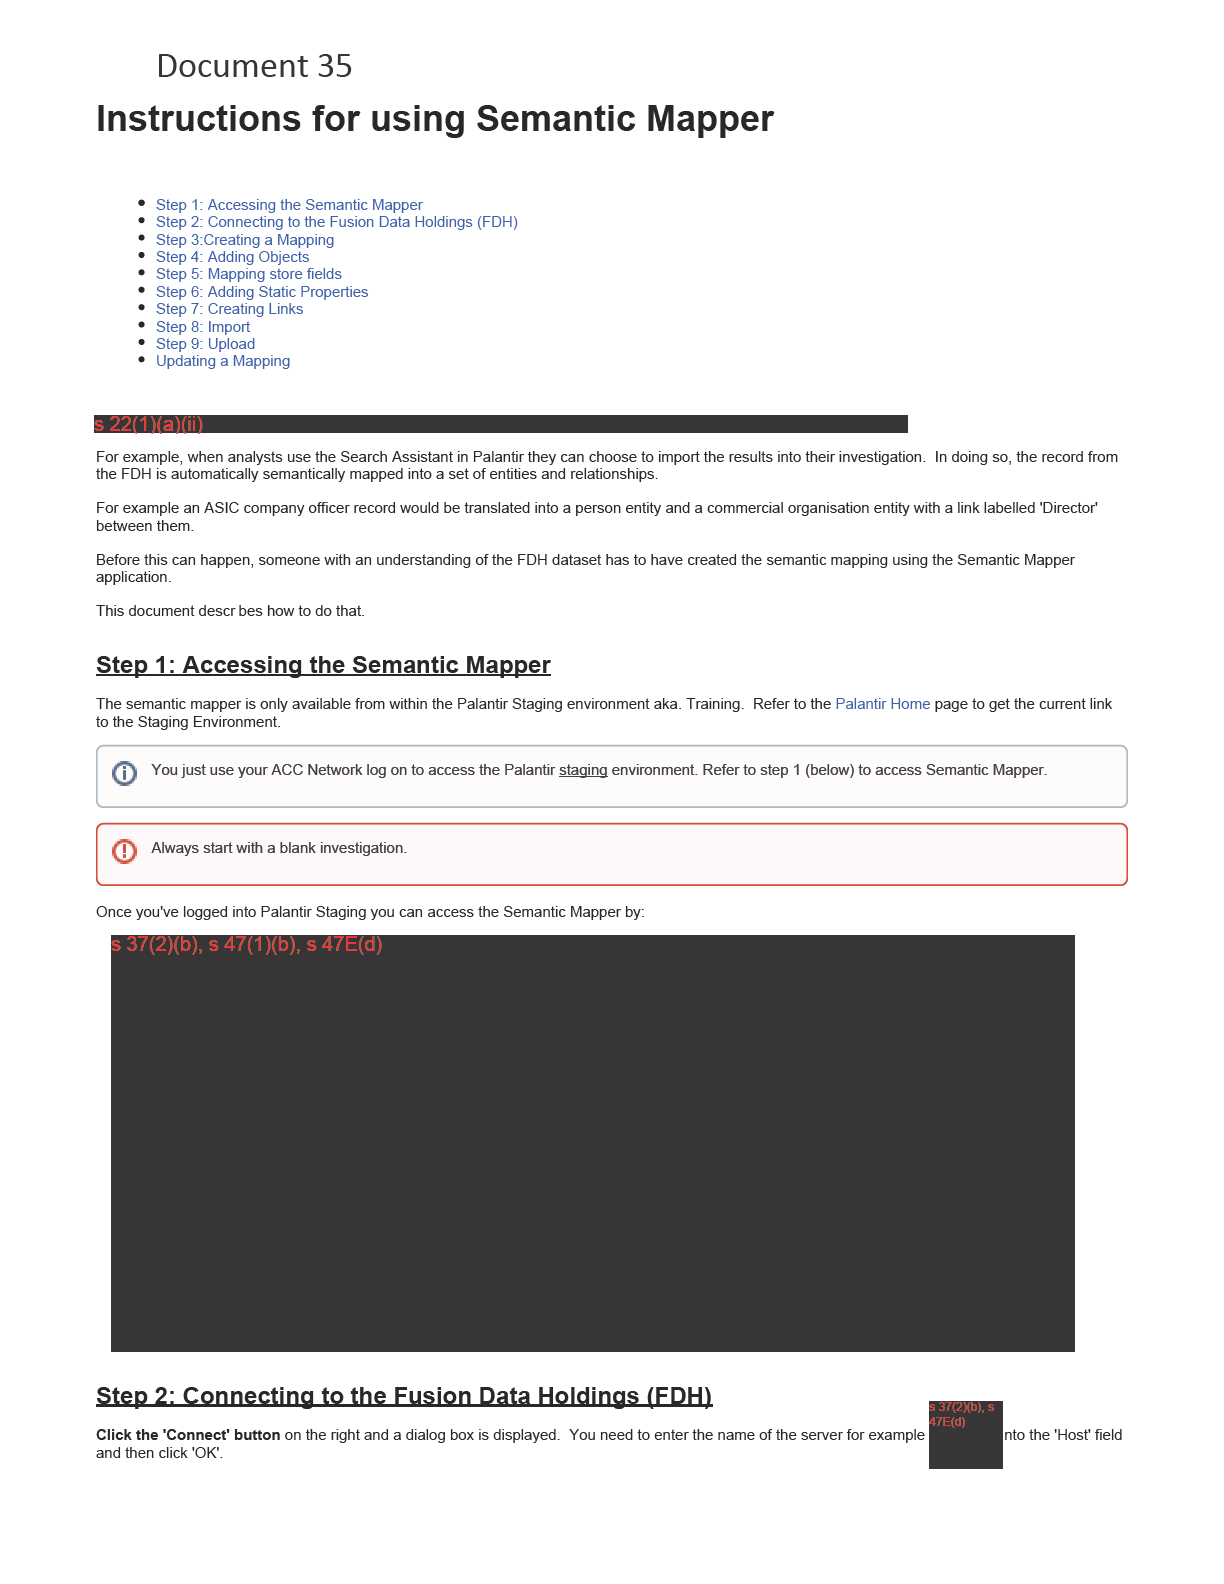
(Cth)
1982
Act
Information
of
Freedom
the
under
Released
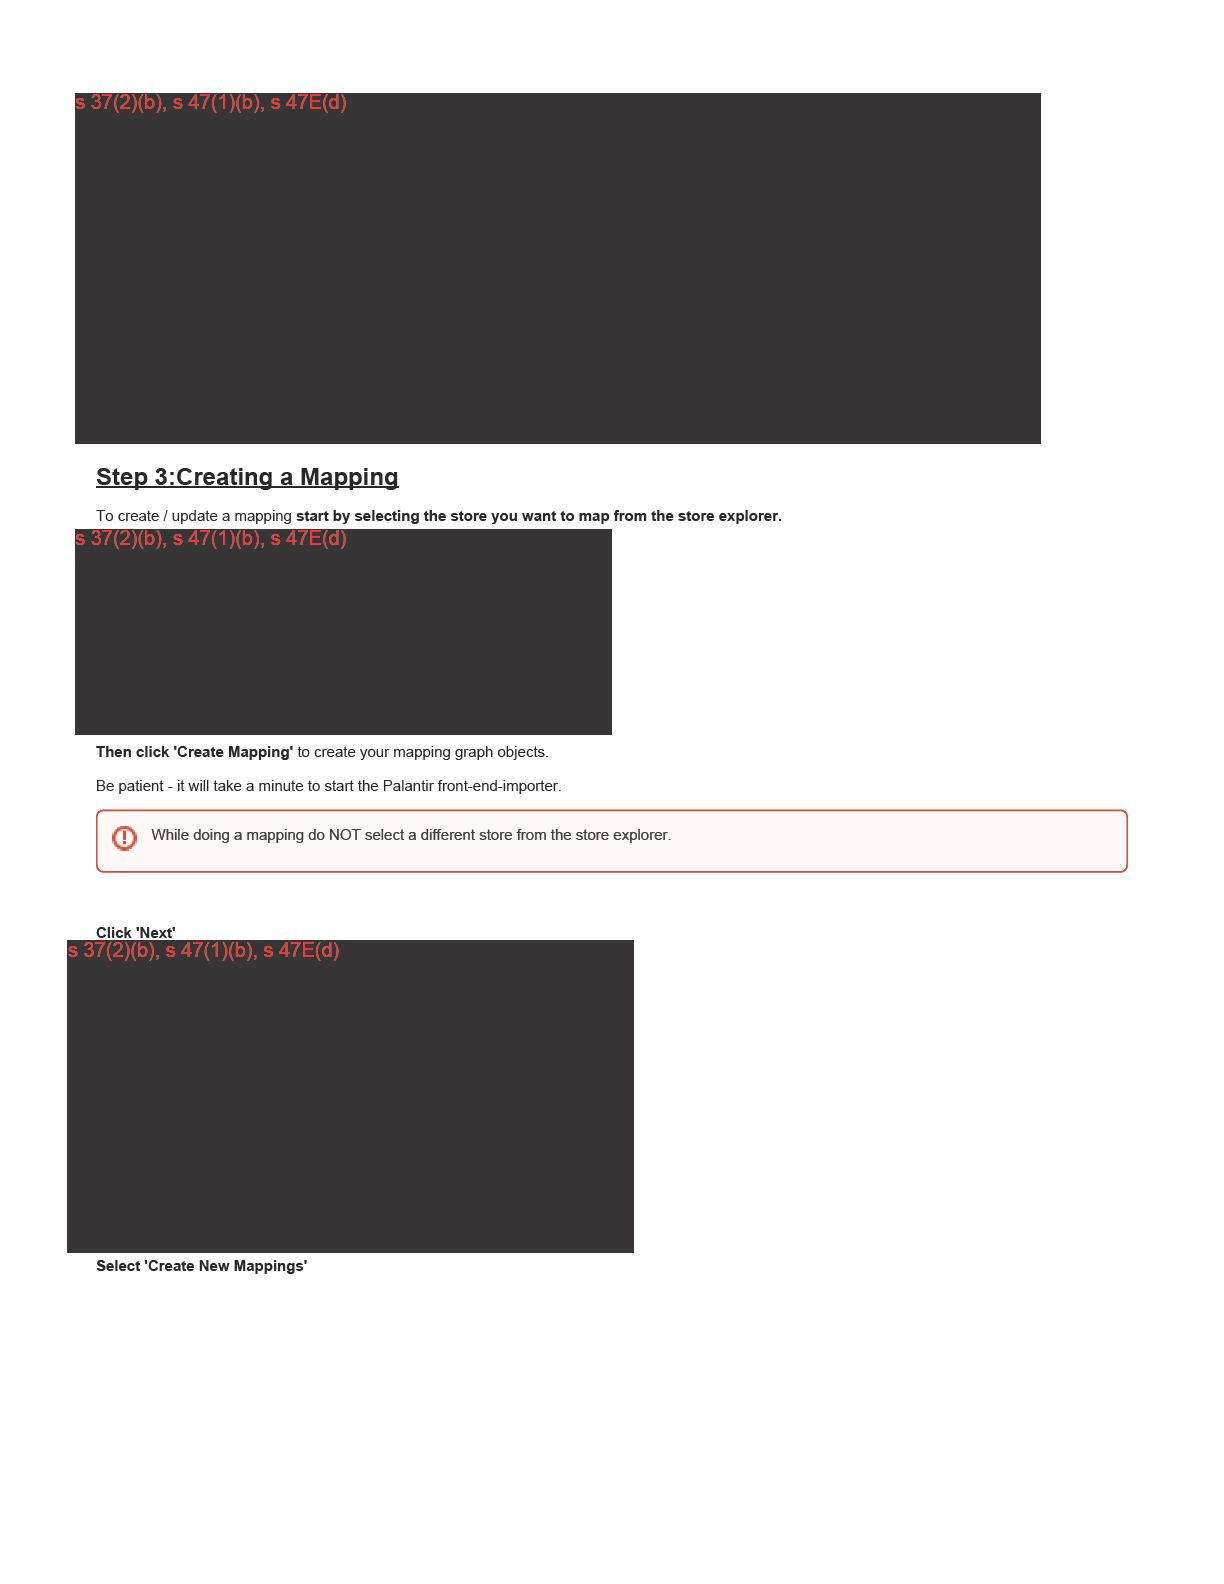
(Cth)
1982
Act
Information
of
Freedom
the
under
Released
s 37(2)(b), s 47(1)(b), s 47E(d)
(Cth)
1982
Step 4: Adding Objects
You now need to select or add the relevant Palantir objects. This can be done in a number of ways including:
Act
1. Selecting a value from the 'Select object' drop down box
2. Clicking the 'Add' button
3. In some cases the relevant Palantir object may already appear as in this example. However, if an object isn't relevant then select it and hit the
'delete' key on your keyboard to remove it.
s 37(2)(b), s 47(1)(b), s 47E(d)
Information
of
Freedom
Step 5: Mapping store fields
Once you have the right Palantir objects in the mapping workspace, you need to start mapping the FDH store fields to the Palantir object fields. Do so by
the
dragging a store field from the left panel onto the relevant object.
s 37(2)(b), s 47(1)(b), s 47E(d)
under
Released
Step 6: Adding Static Properties
If you need to add an object which doesn't have any actual data in the store to map but you know by virtue of the store's purpose or the existence of
another field, that an object exists then you can add what are termed 'static' properties. In this example, we know that an online betting account exists
because that its what the store is, about so we:
s 37(2)(b), s 47(1)(b), s 47E(d)
(Cth)
1982
Act
Information
of
Freedom
the
under
Released
Generally always add a context field so that people understand where the entitiy or relationship came from. For example 'ASIC July 2014 Company
Officers'. This saves them delving into the source information.
Step 7: Creating Links
The last major step is to create relationships or links between objects, if appropriate. To create a link hover over an object, click the triangle that appears
in the bottom left hand corner of the object and drag the cursor to the object you are linking to.
s 37(2)(b), s 47(1)(b), s 47E(d)
(Cth)
1982
Click Next when your mapping is complete.
Step 8: Import
Act
If you are satisfied with your mappings then click the 'Import' button, otherwise 'Cancel' or go 'Back'.
You will be prompted to add these entities to the graph. Select Ok to do so.
Step 9: Upload
The Mapper will have created some entities on the graph with some odd labels.
Now go back to the Semantic Mapper application and make sure the same dataset is still selected. Now click on the Upload Mapping button. Click Ok on
Information
the confirmation box.
The Mapper will now have uploaded your mapping for that dataset into production Palantir. From now on when an analyst imports a record from that
of
dataset into the graph, it will be mapped according to you mapping.
Deleting a mapping
Select a store from the store explorer and click 'Remove Mapping'
Freedom
Updating a Mapping
the
To update simply select the dataset and click on the 'Create Mapping' button. Palantir will load your original mapping and you can edit it as if you were
creating a new mapping. Follow the same process as for creating a new mapping.
Don't use the 'Retrieve Mapping' button.
under
Released
(Cth)
1982
Act
Information
of
Freedom
the
under
Released

s 37(2)(b), s 47(1)(b), s 47E(d)
(Cth)
1982
Act
Information
of
Freedom
the
under
Released

(Cth)
1982
Act
Information
of
Freedom
the
under
Released
s 37(2)(b), s 47(1)(b), s 47E(d)
(Cth)
1982
Act
From the menu on the left side of the screen (the Templates section), select the search type you wish to use.
The different search types are for searching for different entity types, such as a person, organization or address. In addition, you can search NPRS and
TRIM.
Information
s 37(2)(b), s 47(1)(b), s 47E(d)
of
Freedom
the
under
Released
s 37(2)(b), s 47E(d)
s 37(2)(b), s 47(1)(b), s 47E(d)
(Cth)
1982
Act
You will then be able to add your user name and password. This is the same username/password that you use to log in to the ACIC network every day.
s 37(2)(b), s 47(1)(b), s 47E(d)
Information
of
Freedom
the
under
Once you enter your password, press Enter on the keyboard, then click
:
OK
Released
s 37(2)(b), s 47(1)(b), s 47E(d)
(Cth)
1982
Act
You are now able to do a search!
There are several to choose from. The following example shows
FDH General Search.
FDH General Search
Information
Enter the details you wish to search for and click on the
button.
Search
of
s 37(2)(b), s 47(1)(b), s 47E(d)
Freedom
the
under
Released
The results of your search will appear like this:
s 37(2)(b), s 47(1)(b), s 47E(d)
(Cth)
1982
Act
Information
of
The status line below the search criteria panel shows the number of search results found in the FDH, almost 42 million in our case.
Clicking on the name of a column, for example Upload Date, will sort the column into either ascending or descending order, depending on the format of
the results in the column
You can select an item by clicking on it and can preview the item by right clicking on it. A menu box will appear, select
:
Preview
s 37(2)(b), s 47(1)(b), s 47E(d)
Freedom
the
under
Released
The preview of the selected item is displayed in the Preview panel:
s 37(2)(b), s 47(1)(b), s 47E(d)
(Cth)
1982
Act
Alternatively select Add to Graph to bring the selected results into Palantir.
Information
You can select several items by clicking on the items you want while holding down the Ctrl key. You can also select multiple contiguous items by selecting
of
the first one by clicking on it, then holding down the shift key, and clicking on the last iteem you want to select.
You can then add all the selected items to Graph at the same time, by right clicking them and selecting Add to Graph.
TRIM Search
TRIM Search searches the ACIC TRIM in real-time:
Freedom
the
under
Released

s 37(2)(b), s 47(1)(b), s 47E(d)
(Cth)
1982
Act
Information
You can run Title Search, Content Search, or both. You can specify the AND, OR and NOT Boolean operators in your search query, but you have to use
of
parentheses to reinforce operator precedence, because TRIM inserts its own parentheses in wrong places. For instance, the following search query:
A and B or C and D
will be interpreted by TRIM as:
((A and B) or C) and D
so in order to make operators work as intended, you need to add parentheses yourself:
(A and B) or (C and D)
Freedom
More information on Search Assistant can be found in the Search Assistant's User Manual in TRIM (
).
17/53296
the
under
Released
(Cth)
1982
Act
Information
of
Freedom
the
under
Released
s 37(2)(b), s 47(1)(b), s 47E(d)
(Cth)
1982
Act
3. Select "ACIC"
4. Use your normal ACIC login details
Information
of
Freedom
the
under
Released


Document 39
Logging in to ACIC Palantir
Welcome!
Let's get started!
You will need a username and password to login to Palantir. We have connected the login system with the main ACIC login database, so you can use your
main ACIC Windows login username and password to get in to ACIC Palantir.
How To Login to Palantir
(Cth)
1. Paste the following link into your browser and save as a favourite.
s 37(2)(b), s 47(1)(b), s 47E(d)
1982
Act
Information
of
s 37(2)(b), s 47E(d)
Freedom
the
under
Released