

 DOCUMENT1
DISCLOSURE LOG - FOi 24/25-1346 - DOCUMENTS
FOi 24/25-1346
1. The number of NDJS service providers that have been placed on
manual payment processing by the ND/A within the last two
financial years (or the most recent available timeframe), presented
as
a deidentified list by state.
2. The dollar amount reviewed under manual payment processing
for each provider during this period, presented in the same
deidentified list b state.
Response 1:
Financial Year
Number of Providers placed on MPR
2023/24
770
2024/25
1650**
**MPR team was stood up in early 2024, hence why there is a large variance in total
between FY23/24 and 24/25.
**Figures are approximate as at early May 2025.
**Whilst every effort has been made to ensure accuracy, this figure is approximate due to
potential limitations in data quality.
**Payment Integrity team are currently liaising with the NOIA Analytics, Data and Actuarial
(ADA) Division to assist in the management of data issues due to a breakdown of reporting.
Response 2:
Financial
Number of MPR
Number of MPR claims
Total dollar of MPR reviews
Year
applied
reviewed
2023/24
770
1024
$900,600
2024/25
1650**
�.956
$35,798,668.41
Page 1 of 18
 DOCUMENT 2
DISCLOSURE LOG - FOI 24/25-1346 - DOCUMENT S
Standard Operating Procedure
National Disability Insurance Scheme
Standard Operating Procedure
Payment Integrity Review Team:
•
Request for Information
•
Analysis of Evidence
•
Case Finalisation
Version 1.0
Released 24/10/2024
1
Page 2 of 18

DISCLOSURE LOG - FOI 24/25-1346 - DOCUMENT S
Standard
Standard Operating
Operating Procedure
Procedure
Table of Contents
Purpose: ................................................................................................................................ 3
To be used by ........................................................................................................................ 3
Prerequisite checklist ............................................................................................................. 3
Timeline for claim review process .......................................................................................... 3
Testing Tool ........................................................................................................................... 4
Case Tracker Tab .................................................................................................................. 4
Phase 1 – Claims allocation and Request for Information .............................................. 4
Creating a SharePoint Case Folder ....................................................................................... 5
Day 1 .............................................................................................................................. 6
Plan Manager Courtesy Email ............................................................................................ 6
Request For Information (RTP) Letter ................................................................................ 7
Phase 2 – Monitor Payment Integrity inbox for response ............................................... 9
Phase 3 – Begin quality analysis process within the Testing tool ................................. 10
Phase 4 – QA Tracker with relevant links to information .............................................. 11
Phase 5 – Send Invitation to Comment letter to the Legal Team and Provider for all
adverse decisions. ........................................................................................................ 11
Phase 6 – Review of evidence ..................................................................................... 13
Phase 7 – Send Outcome letter to the provider and move to completed ...................... 14
Version change control ........................................................................................................ 17
2
Page 3 of 18

DISCLOSURE LOG - FOI 24/25-1346 - DOCUMENT S
Standard
Standard Operating
Operating Procedure
Procedure
Daily Testing of Provider Plan Manager Claims
selected for Review
Purpose:
The purpose of this Standard Operating Procedure (SOP) is to provide Case Officers with
guidance on the correct process to follow when a claim has been submitted by a Participant,
Provider/ Plan Manager who is subject to a manual payment review.
Case Officers will be responsible for:
• Creating a testing tool to review claims that meet the criteria.
• Reviewing the claim/s
• Contacting a provider primary contact
• Resolving the claim enquiry
• Communicating the outcome to the provider primary contact
• Documenting claim review
To be used by
• Payments Integrity Case Officers (CO’s)
Prerequisite checklist
• The authorised team member (APS6 or above) has applied a Manual Payment Review
to the claim based on the approved criteria.
• The APS6 has added the requested claims to the Testing Tool tab of the Case Tracker
Timeline for claim review process
Phase 1
Claims allocation and Request for Information
Phase 2
Monitor Payment Integrity inbox for response
Phase 3
Begin quality analysis process within the Testing tool
Phase 4
QA Tracker with relevant links to information
Phase 5
Send Outcome letter to the provider and move to completed
3
Page 4 of 18


DISCLOSURE LOG - FOi 24/25-1346 - DOCUMENTS
Standard Operating Procedure
Testing Tool
The Testing Tool is where a Case
Officer will complete the review of any claims allocated to
them. They will answer questions relevant to the review and based upon the answers to these
questions will determine the outcome of the review.
Case Tracker Tab
The Case
Tracker tab will be used by Team Leaders to monitor the progression of their team's
cases and to record when correspondence and communication is made with the Participant,
Provider or Plan manager. The case number column has a formula that aligns the case
number allocated to the claimls in the testing tab and summarises that information into one
case.
Phase 1 - Claims allocation and Request for Information
1. The Team Leader (TL) is required to navigate to the
Case Trackers in our Payment
Integrity Folders in SharePoint.
Documents > Payments Integrity > Payment Lock Referral
D
Name v
0. Case Trackers I
1. RTP Cases
2. Webform Referrals
2. Select your TL Case Tracker and open (open in the desktop app).
3. In the
Claims Tab under the
Case Status section, filter all
'Not started -Assigned'.
Case Status
a
4. In the
Case column, filter for the relevant
RTP number.
4
Page 5 of 18


DISCLOSURE LOG - FOI 24/25-1346 - DOCUMENT S
Standard
Standard Operating
Operating Procedure
Procedure
Creating a SharePoint Case Folder
1. A SharePoint case folder is created using the
Project Name to store any correspondence
sent or received relevant to the claim review.
2. Navigate to the
RTP Cases folder in SharePoint.
3. Navigate to the
In Progress folder
4. Right click on the
02_RTP0000 – Draft Folder and select
copy to; navigate to the relevant
Project name folder and
copy here.
5. Refer to your case tracker to obtain the
Case Project Name.
6.
Right click on the folder, select
Rename and overwrite the folder name with RTP
number assigned.
5
Page 6 of 18


DISCLOSURE LOG - FOI 24/25-1346 - DOCUMENT S
Standard
Standard Operating
Operating Procedure
Procedure
7. Any correspondence received or sent will be saved in the
1. Emails folder.
8. All PDF versions of correspondence will be saved in the
2. Letters folder.
9. Navigate to the
3. Claims Review folder, select Rename and overwrite the name with the
assigned RTP case number
.
10. Open the
RTP – Testing Tool spreadsheet (open in desktop app).
11.
Copy and
Paste the claims information from your individual case tracker across to the
Testing Tool tab of the RTP – Testing Tool spreadsheet starting at the
Document Number
column. (paste as values).
12. This will transfer to the
RTP0000 – Claim Review tab within the Testing Tool.
13. Rename both the
RTP0000 – Claim Review and
RTP0000 – Outcome tab with the
assigned RTP number.
Day 1
Plan Manager Courtesy Email
1. After the initial checks have been completed in the Testing Tool, we then proceed to
sending out the first letter.
2. Navigate to the
Templates folder, then to the
Request for Information Templates folder
and download a copy of the
PMA – Notification of payments on hold.msg template.
6
Page 7 of 18


DISCLOSURE LOG - FOi 24/25-1346 - DOCUMENTS
Standard Operating Procedure
3. To locate the
Plan Manager, navigate to Testing Tool tab, in column G you will find the
plan manager information
G
Received from BP Name
a
4. If the plan manager name if different to the Review Entity Name in column D, you will need
to send the PMA notification email.
5. You will need to send a copy of the relevant claims to the plan manager via email. To do
this navigate to the
Testing tool tab,
copy all relevant claims from the Posting Date and
PRN fields and
paste into the email template.
L
Date Submitted Payment Reference Number
Posting
PRN
Date a a
6. Complete the missing sections in the
email template using the contact information located
in SAP CRM/PACE.
7. Select the
paymentsintegrityreview mailbox in the FROM section on the email if not
already selected.
r--;-i I I
From ....,
7E(d) - certain operations of agencies
�I I
To
---------
8. Address the email to the contact listed above,
proofread before hitting
SEND.
9. Save a copy of the email in the
1. Emails folder and drag the email from your
SENT box
to the
Provider folder in the
group mailbox.
Request For Information (RTP} Letter
1. Navigate to the 2.
Letters folder of the RTP folder previously created and right click on
the
RTPOXXX Request for Information template and
rename, saving using the assigned
RTP number under naming convention
RTP -
Request for Information.
� RTP0708 - Request for lnformation.docx
� RTP0708 - Request for lnformation.pdf
2. To locate the email address of the
Review Entity, navigate to SAP CRM/PACE and
search using the provider number found in column C of the Testing tool tab.
7
Page 8 of 18


DISCLOSURE LOG - FOI 24/25-1346 - DOCUMENT S
Standard
Standard Operating
Operating Procedure
Procedure
3. Open the letter and
copy their
email address from SAP CRM/PACE into the template.
Complete the rest of the blanks in the letter by referencing the
Testing Tool tab. The
return date for the
RTP is a minimum of
14 days from the date of the letter (inclusive of
weekends).
4. Once complete, save the letter to PDF and save to the RTP folder created under the
2.
Letters Folder (same naming convention as word version).
5. Navigate to your
Testing Tool and open the RTP – Claim Review tab. Highlight all claims
starting from row 1.
6. To change to PDF click File, Print. Ensure you select and change the
scaling to ‘Fit All
Columns on One Page’.
7. Click Print then Create PDF/XPS Document
8. Save to the RTP folder previously created under
2. Letters.
9. Navigate to the
Templates folder, then to the
Request for Information Templates folder,
right click and download the
SP – Request for Information email template and paste the
primary contact and/or Account Manager email address into the
Good
morning/afternoon field.
10. Ensure
PaymentsIntegrityReview is selected in the
From field.
8
Page 9 of 18


DISCLOSURE LOG - FOi 24/25-1346 - DOCUMENTS
Standard Operating Procedure
r--;-i I I
From "
s47E(d) - ce ain opera
�I I
To
11.
Attach the approved
PDF RTP-Request for Information letter and the
PDF Claims
Review to the email. Proofread the email before hitting send.
12.
Save a copy of the email in the
RTP folder under
1. Emails by holding and dragging
across from
Sent, repeat this process dragging from the
Sent Folder to
Provider Folder
in
group mailbox.
13. Go to your Case Tracker and update the
Case Status column select
In Progress -
Waiting for provider. Update the
Support Provider -
RFI column to reflect the date the
Request for Information Letter was sent as well as the
PMA Review Notice column to
reflect notice letter being sent (if applicable). This will automate the
Case Due Date
column to reflect a minimum of
14 days from today's date.
14. If you receive an email with documentation from the provider - refer to
Evidence
Received section.
Phase 2 - Monitor Payment Integrity inbox for response
1. Your Team Leader will monitor the Payment Integrity Review inbox for all
correspondence from the
PMA and
Support Provider and/or Participants and
Nominees.
2. If you receive an email, please action accordingly. Once you have actioned you will
need to
move both the received and sent emails into the
Provider Folder located in
the
group mailbox.
If at any stage throughout the process you receive
documentation from the provider such as
an
invoice or a
receipt, your Team Leader will move these to the relevant provider folder
within the
group mailbox. Note: If the Participant, Provider or Plan Manager has responded
to the notification or request for information, ensure you provide a response in a timely
manner. Seek Team Leader assistance if you are unsure on how to respond.
9
Page 10 of 18

DISCLOSURE LOG - FOI 24/25-1346 - DOCUMENT S
Standard
Standard Operating
Operating Procedure
Procedure
Phase 3 – Begin quality analysis process within the Testing tool
s47E(d) - certain operations of agencies
10
Page 11 of 18


DISCLOSURE LOG - FOI 24/25-1346 - DOCUMENT S
Standard
Standard Operating
Operating Procedure
Procedure
Phase 4 – QA Tracker with relevant links to information
1. Navigate to
2. Letters folder within the
RTP folder previously created and right click
on the relevant
Outcome Notice document, open in app.
2. Complete the blank fields in the letter.
3. Navigate to
6. QA and Cancellation Tracker, right click and open in app.
4. On the
QA Log tab, enter the relevant data for Date, Case Number, Case Officer
Name, Support Provider ID, Support Provider Name, and Project Name.
5. Copy the
Testing Tool link and paste under column G under
Testing Tool, copy the
Outcome Notice letter link and paste under column H under
Finalisation Letter.
6. Navigate to your
Individual case tracker, filter for the relevant
RTP number, update
the
Case Status to
‘In Progress - Ready for QA claims review’.
Phase 5 – Send Invitation to Comment letter to the Legal Team and
Provider for all adverse decisions.
1. Once QA is complete and Justifications have been updated, for all adverse decisions
you will need to draft an Invitation to comment letter.
2. Please use the template located in the Templates folder.
3. Reach out to your Team Leader or EL for related Tip Off information to include in your
draft letter – please do not summarise this yourself, paste in exact and Legal will work
with you to reword this information.
4. Please highlight the tip off in yellow in your draft letter and add a comment asking for
assistance in re-wording.
11
Page 12 of 18


DISCLOSURE LOG - FOi 24/25-1346 - DOCUMENTS
Standard Operating Procedure
5. Navigate to the outcome tab of your testing tool and update the outcome and reasons
accordingly.
s47E(d) - certain opera ·ons of agencie
I
I
Testing tool
RTP2556 - Claim Review
RTP2556 - Outcome
Data Validation
2
3
4
5
6
6. Once you have completed the Outcome Tab you will need to change to PDF.
7. Highlight from A 1 through to F1 and then down to the bottom of the listed claims
8. To change to PDF click File, Print. Ensure you select and change the
scaling to 'Fit
All Columns on One Page' and Change document to Landscape Orientation.
Settings
� PrintActiveSheets
"'
i;t:±1 Only print the active sheets
I
Pages:
[IJ Collated
l
.
1,2,3 1,2,3 1,2,3
I � Port,ait Orientation
I. □ A4 21 cm x 29.7 cm
fFfl Normal Ma1gins
l:ld:I
Top: 1.91 cm Bottom: 1.91 c .. ,
f"I NoScaling
-rod
Print sheets at their actual size
Page Setup
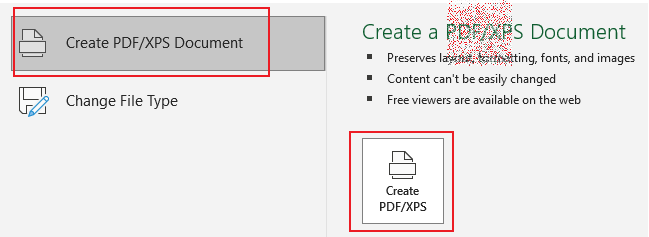
9. Click Print then Create PDF/XPS Document
B
Create a PDF/XPS Document
Create PDF /XPS Document
• Pr�e� layout,. fomutting, fontc;, and images
• Content can't be easily changed
� Change File
Type
• Free v1ewert are available on the web
Create.
PDF/XPS
10. Save to the relevant RTP folder.
11 . Once complete you will need to send both the draft letter and the Attachment A to the
Team Leader for review.
12. Once your Team Leader is satisfied with your letter they will forward to the EL for QA.
12
Page 13 of 18

DISCLOSURE LOG - FOI 24/25-1346 - DOCUMENT S
Standard
Standard Operating
Operating Procedure
Procedure
13. Once the EL has signed off you will need to send this through to the Legal Team along
with an Attachment A – this contains the preliminary decisions and justifications for
review.
14. The Legal team will review both the letter and Attachment A to ensure decisions are
correct and articulated well. Comments will be placed on the letter and sent back once
complete.
15. Once you receive feedback from the Legal team, please ensure you action all
comments and make the necessary changes.
16. Once complete you will need to send this back to Legal for their second review.
17. This process will go back and forth until Legal are satisfied with the letter and decisions
and will then give you the approval for the letter to be sent to the provider.
18. Once you have sent the letter to the provider please update the status in the QA tracker
to state “PF Letter sent to Provider”
Phase 6 – Review of evidence
Release/Substantiated/Compliant
s47E(d) - certain operations of agencies
13
Page 14 of 18

DISCLOSURE LOG - FOI 24/25-1346 - DOCUMENT S
Standard
Standard Operating
Operating Procedure
Procedure
s47E(d) - certain operations of agencies
Phase 7 – Send Outcome letter to the provider and move to completed
1. Once QA process has been completed and
payment has been actioned, the TL will
notify you that it is ok to proceed. Navigate to the previously created
RTP folder and to
2. Letters.
2. Open and amend the
Outcome Notice letter then save as PDF.
3. Navigate to
3. Claims Review, open to the
Testing tool, right click
and open in app.
4. On the
RTP – Outcome tab, amend any outcomes needed as a result of the QA
process, then highlight
all claims including the
banner data in row 1 to print to PDF.
5. To change to PDF click File, Print. Ensure you select and change the
scaling to ‘Fit
All Columns on One Page’ and Change document to Landscape Orientation.
14
Page 15 of 18


DISCLOSURE LOG - FOI 24/25-1346 - DOCUMENT S
Standard
Standard Operating
Operating Procedure
Procedure
6. Click Print then Create PDF/XPS Document
7. Save to the RTP folder previously created under
2. Letters.
8. Navigate to the
Templates folder, then to the
Finalisation of Review Templates
folder, download the
Finalisation of Review email.
9. Fill in the required fields within the email. Attach both the
Outcome letter PDF and the
Claims Outcome PDF to the letter and press send.
10. Drag the sent email into the
1. Emails folder within the previously created
RTP folder.
11. Update your individual Case Tracker with the
Date closed,
Support Provider –
Outcome Notice, and
PMA – Outcome Notice (if applicable).
12. Change the Case Status to the relevant Closed drop down and update the Cancellation
Reason.
15
Page 16 of 18


DISCLOSURE LOG - FOi 24/25-1346 - DOCUMENTS
Standard Operating Procedure
:s47E(d) - certain operations of agencies
13. Once the case is updated to
closed these figures will then appear in the stats section
of the
Case Summary tab.
14. Drag the RTP folder into the
Completed Folder in SharePoint.
{j
Name v
Completed
In Progress
Note: When adding comments in either the testing tab or case tracker tab, please ensure
the most current comment is at the top of the cell. Press ALT and ENTER to enter down a
line.
16
Page 17 of 18


DISCLOSURE LOG - FOi 24/25-1346 - DOCUMENTS
Standard Operating Procedure
Version change control
Version Amended by Brief Description of Change:
Status
Date
No
1
EJW188
Developed Work Instruction
Approved
�4/10/2024
2
EJW188
Updated to reflect changes to
Approved
6/11/2024
process
3
EJW188
Updated to reflect changes to
14/4/25
process
17
Page 18 of 18